Nadgradnja vaše glavne enote Honda Accord 2008-2012 (s slikami)
Nadgradnja stereo naprave Honda Accord 2008-2012
Mislim, da nikomur ne bi bila vožnja s starejšo Hondo Accord vznemirjenje. Najverjetneje ga vozite, ker je zelo ugoden, zanesljiv in na splošno lep avto. Vendar tudi ne verjamem, da bi kdorkoli trdil, da je osma generacija Honde Accord avtomobil pod paro. Je eleganten (relativno) in se res dobro pelje. Je zanesljiv – moj ima 125k in edino, kar sem zamenjal, je krmilna črpalka, ker se mi je zdelo, da povzroča preveč hrupa. Je varen avto in ima visoke ocene trkov. In za svoj čas je bil stereo spodoben, čeprav ga ne bi imel za visokotehnološko.
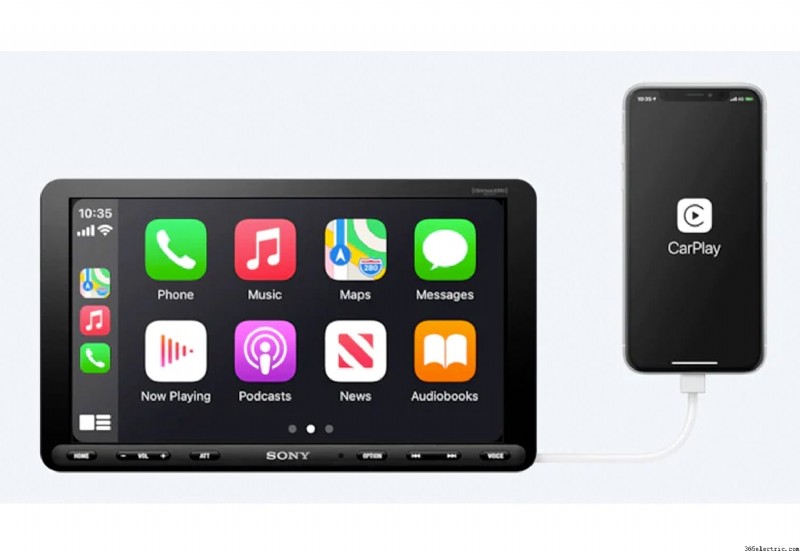
Accordovi stereo sistemi so takšni kot preostali del avtomobila – če jih ne udarjate ves dan, bodo zdržali. Toda tudi nove različice Accorda bi lahko uporabile nadgradnjo z eno najnovejših glavnih enot na trgu. Od leta 2012 se je v glavnih enotah veliko spremenilo, samo Apple CarPlay in Android Auto spreminjata igro v smislu integracije naših mobilnih naprav v tehnologijo našega vozila, ko smo na poti. Z namestitvijo novega poprodajnega stereo sistema bo vaše potovanje v službo ali vožnja bolj prijetno in vas bo popeljalo na korak z najnovejšo tehnologijo in funkcijami.
V tem članku vas bom vodil skozi postopek odstranjevanja vaše stare glavne enote Accord, priprave vaše nove poprodajne glavne enote, namestitve vaše nove poprodajne glavne enote in namestitve nove rezervne kamere.
O namestitvi
- Skupni čas namestitve:4-5 ur
- Skupni stroški za to namestitev:740 $
- Težavnost:enostavno (Weekend DIYer)
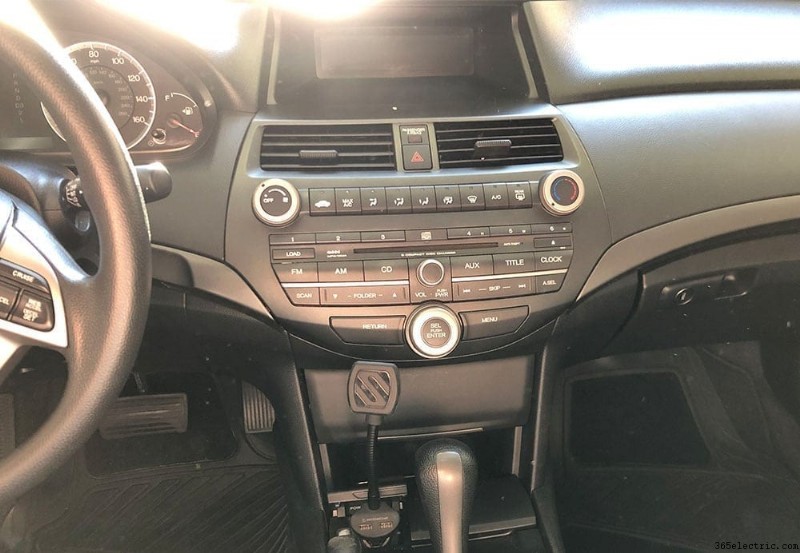
- Vozilo:2009 Honda Accord LX-S Coupe (brez navigacije)
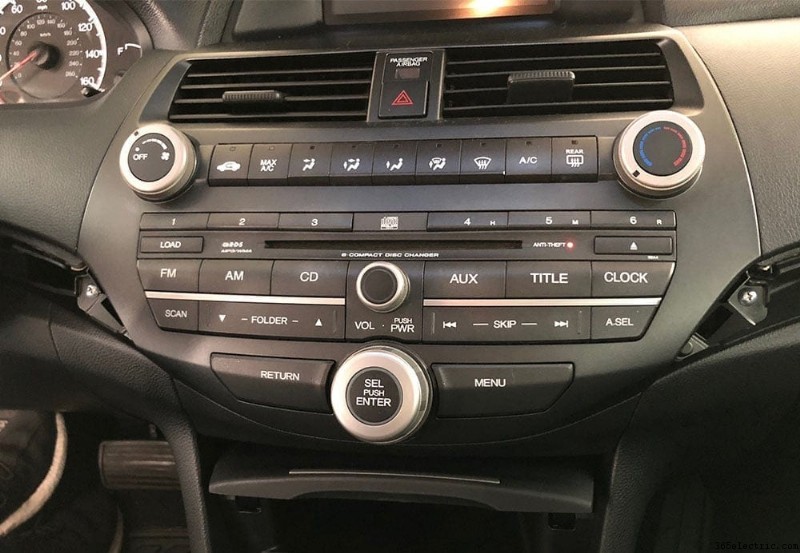
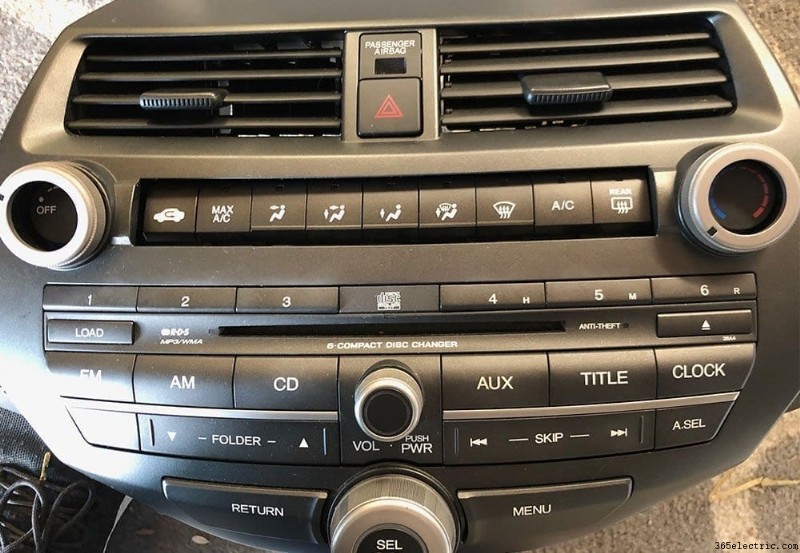
Pred kratkim sem za vsakodnevnega voznika vzel ženinega Accorda letnik 2009. Imel je cca 110k km. Dnevno prevozim približno 60–65 milj, izplačalo se je. Imelo je smisel. To je kupe 09 LX-S s predvajalnikom CD-jev na več ploščah. Nima navigacije GPS, nima bluetootha – samo pomožni vhod, ki je na sredinski konzoli, da lahko nanj priklopim svoj iPhone. ČASI SO SE SPREMENILI.
Čeprav s stereo sistemom OEM ni bilo res nič narobe, sem potreboval le nekaj tednov vožnje, da sem se prepričal, da potrebuje nadgradnjo. Kar zadeva zvočnike, je sistem s 6 zvočniki (vključno z visokotonci) še vedno zvenel odlično, zato jih (še) nisem nadgradil z enim od naših priporočenih zvočnikov 6,5 in zdelo se mi je, da bi bili poprodajni nizkotonci pretirani za splošni namen, za katerega uporabljam avto . Zato sem se odločil nadgraditi glavno enoto in dodati rezervno kamero, da jo popeljem v 2020.
Orodja in deli
Naj naštejem orodja, ki bi jih priporočal za to delo, skupaj z vsemi dejanskimi deli, ki sem jih uporabil pri nadgradnji stereo sistema moje Honde.
Orodja:
- Ploščati in križni izvijači – 10 $
- Snemalniki za vratne plošče – 10 $
- Konektorji za žično spajkanje (priporočeno) – 20 USD ALI tradicionalni žični spojki – 13 USD
- Toplotna pištola (samo če dobite konektorje za spajkanje) – 16 $
- Odstranjevalci žice – 13 $
Deli:
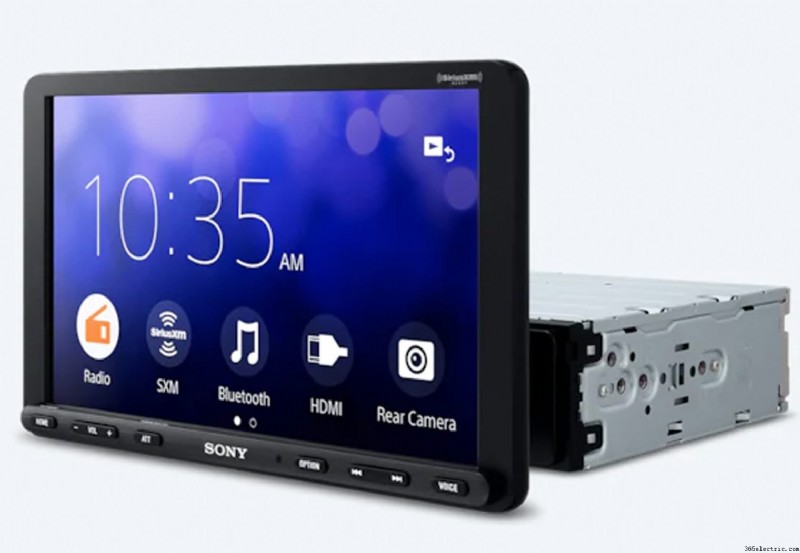
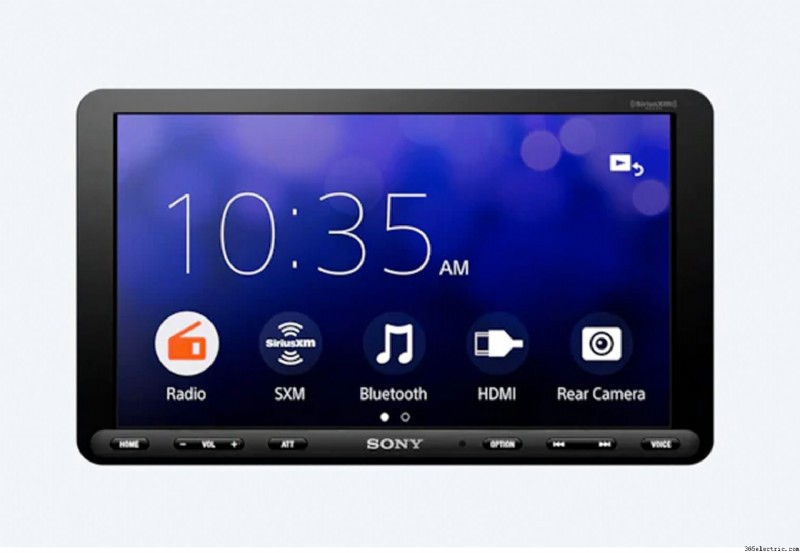
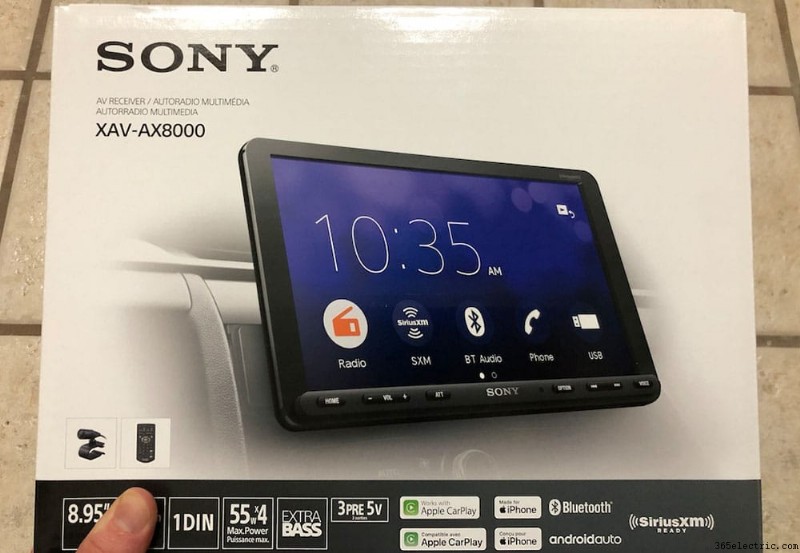
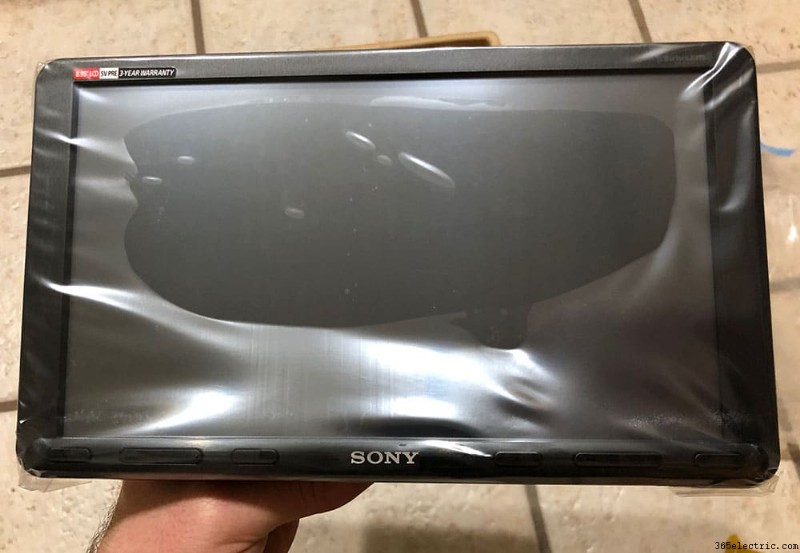
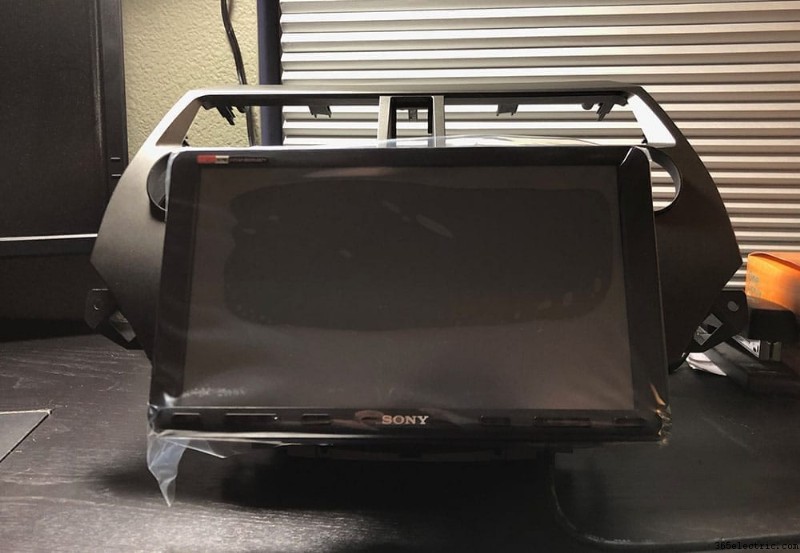
- Glavna enota:Sony XAV-AX8000 – 600 USD. Oglejte si naše celotno pisanje in pregled te glavne enote in njenih funkcij.
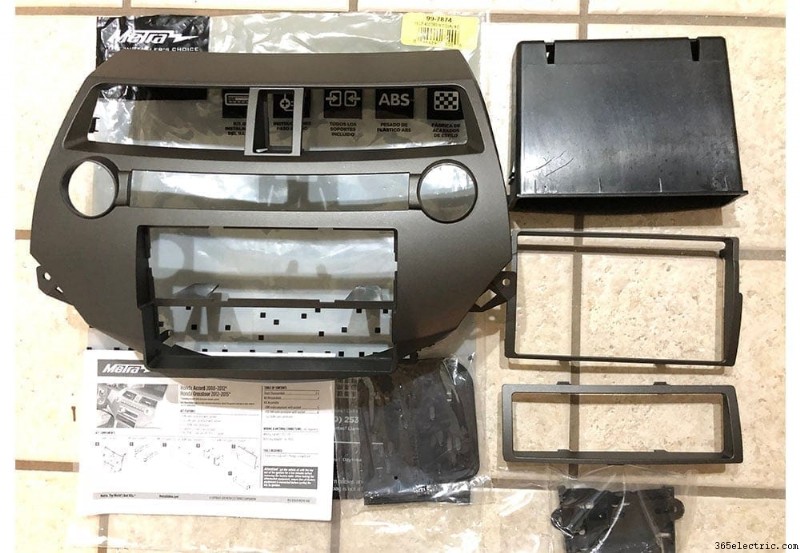
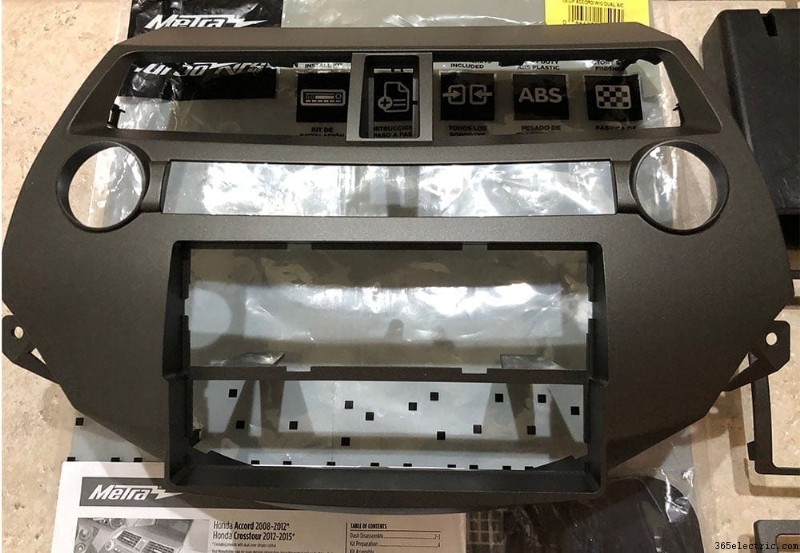
- Komplet armaturne plošče z dvojnim DIN/enim DIN brez dvojne klimatske naprave:Metra 99-7874 – 40 $
- Nadzor volana in napajalni antenski adapter:Crux SWRHN-62L – 52 $
- Vzvratna kamera:AUTO-VOX Cam 6 – 20 $
- Sponke za armaturno ploščo in sredinsko konzolo (za vsak slučaj):Rexka sredinska konzola in pritrdilne sponke za armaturno ploščo (30) – 12 $
1. korak – Priprava vašega novega poprodajnega radia
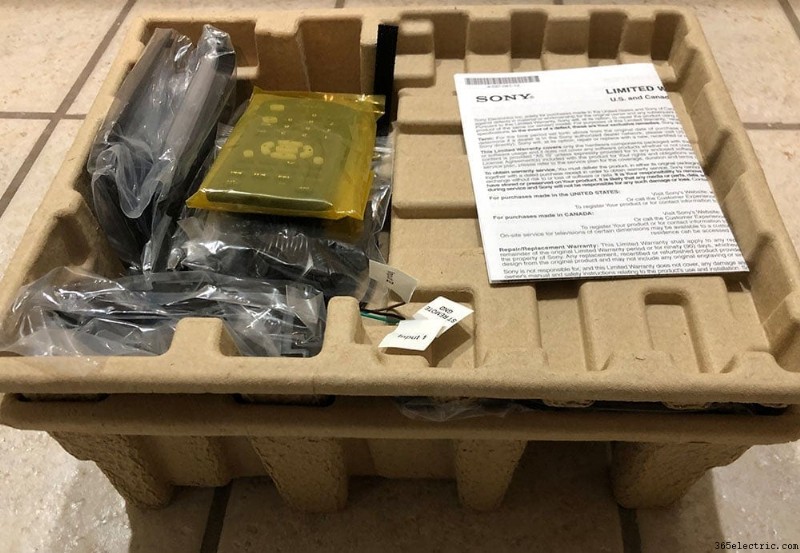
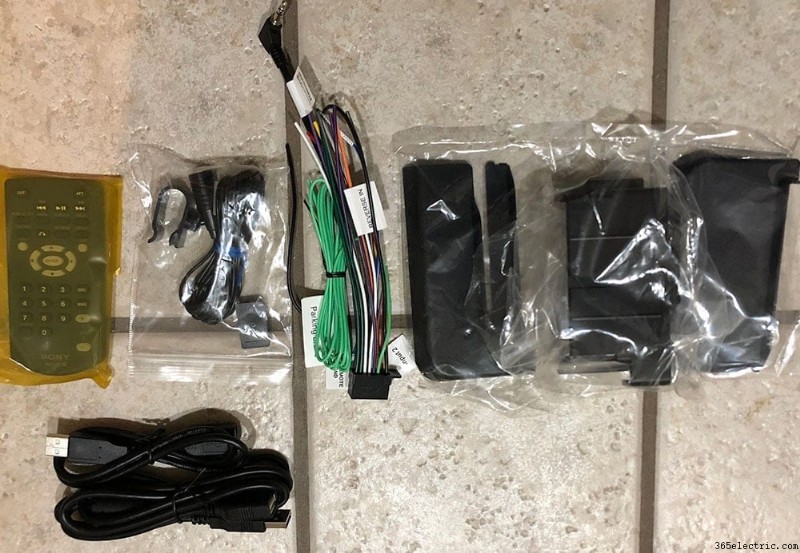
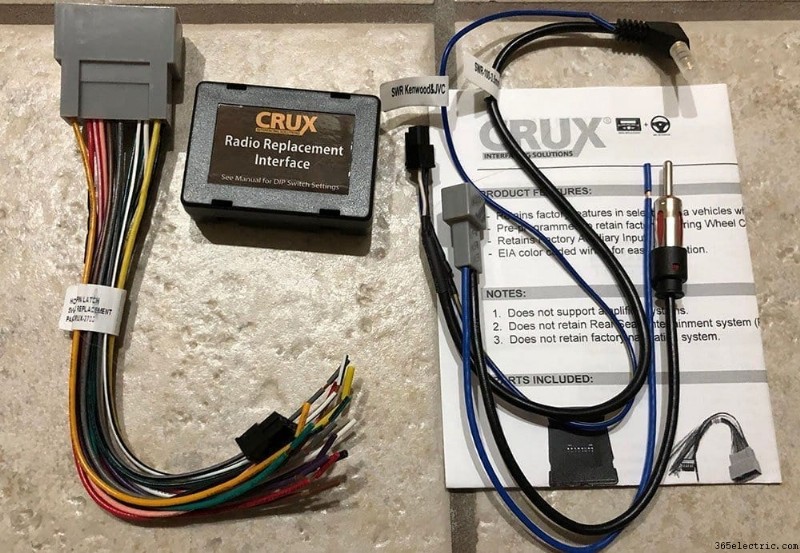
Poglobimo se naravnost v to. Prvi korak, preden se sploh začnete dotikati svojega radia OEM, je, da razpakirate svoj novi radio po prodaji. Preglejte ga za napake in se prepričajte, da so vključeni vsi deli, ki jih potrebujete. Ključni del tega koraka, ki ga boste uporabili, je kabelski snop proizvajalca, ki ga boste povezali s pasom CRUX SWRHN-62L, specifičnim za vaše vozilo.
Nekateri monterji pripravljajo svoje nove poprodajne radijske sprejemnike, potem ko so umaknili enoto OEM. To je običajno namenjeno pregledu kabelskega snopa in zagotavljanju, da bodo deli, ki ste jih kupili, ustrezali vozilu. Vendar sem v tem primeru poznal dele, ki sem jih ujemal z vozilom. Običajno rad pripravim vse nove komponente, preden začnem vleči dele OEM, tako da lahko takoj nadaljujem z namestitvijo, takoj ko bodo moji deli OEM povlečeni. To je tudi dober način za razdelitev časa namestitve. Noč, preden sem dejansko namestil glavno enoto in druge dele, sem opravil vse priprave v svoji hiši.
Povezovanje vaših kabelskih snopov
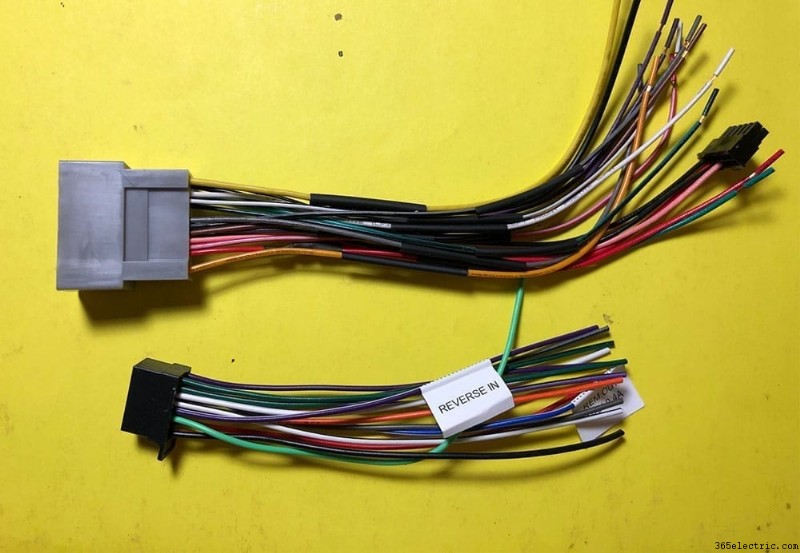
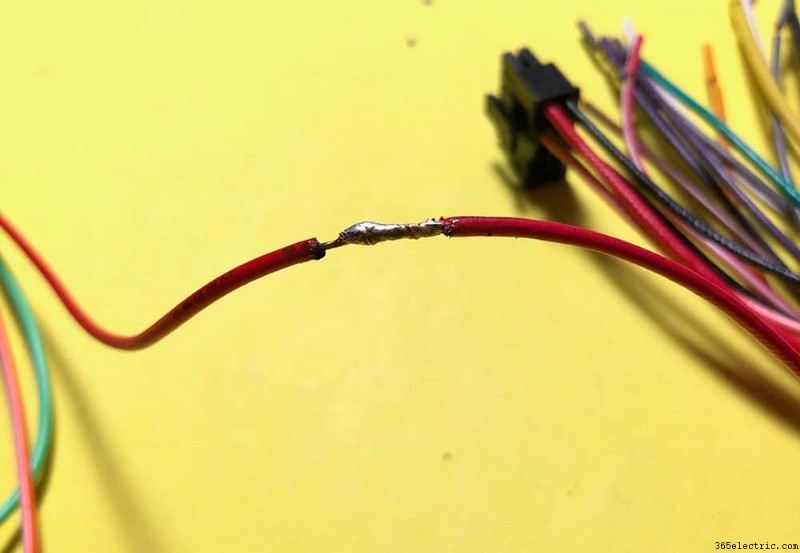
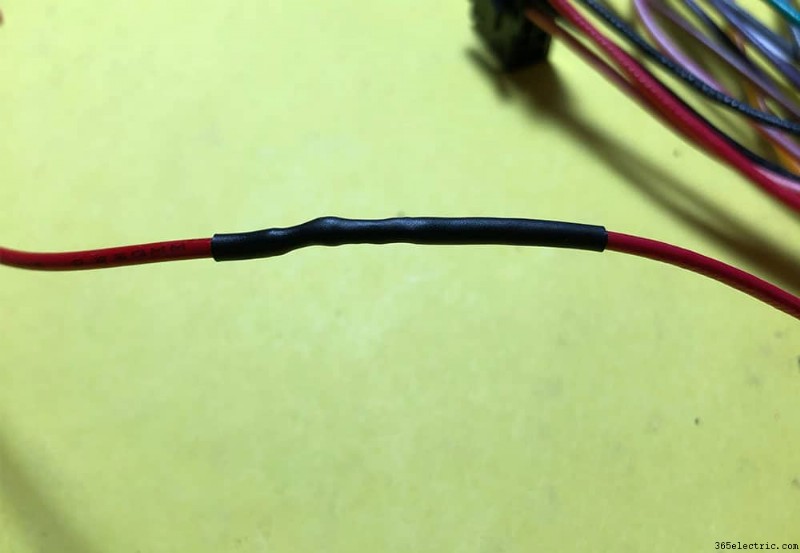
Ko končate s pregledom novih delov, izvlecite kabelski snop, ki ste ga dobili z glavno enoto, in kabelski snop, ki ste ga kupili za svojo Hondo. Obstaja veliko načinov za pritrditev obeh pasov skupaj. Moj najprimernejši pristop je bil vedno spajkanje vsakega skupaj, čemur sledi skrčljiva folija. In na slikah, ki jih bom pokazal, boste to videli. Vendar pa lahko uporabite tudi tradicionalne žične stiskalnice, ki zahtevajo samo orodje za stiskanje in odstranjevalec žice, ali pa uporabite tesnilne konektorje za spajkanje žice, ki so moja naslednja prednostna metoda. Oboje sem povezal v razdelku z orodji in deli.
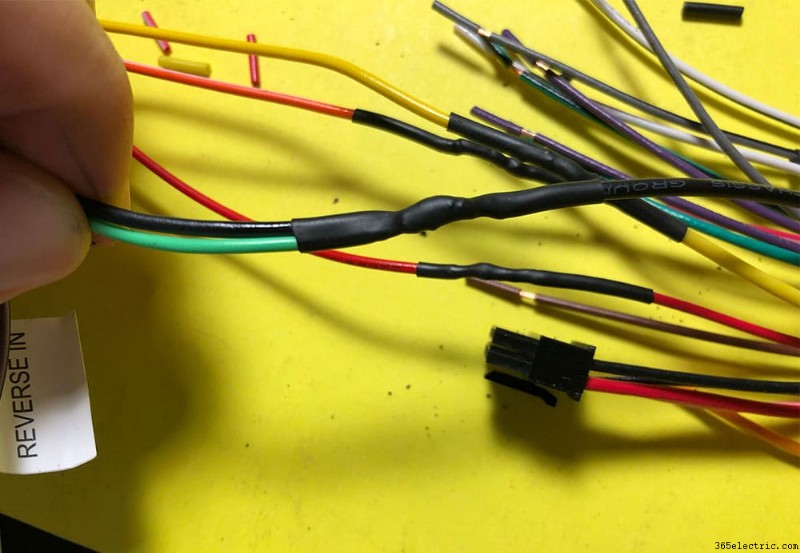
V tem koraku postopka boste vzeli vsako barvno kodirano žico na snopu glavne enote in jo povezali z ustrezno/ujemajočo se barvo na snopu CRUX. Tukaj je nekaj fotografij, da vam pokažem, kako sem to naredil (spet z metodo spajkanja).
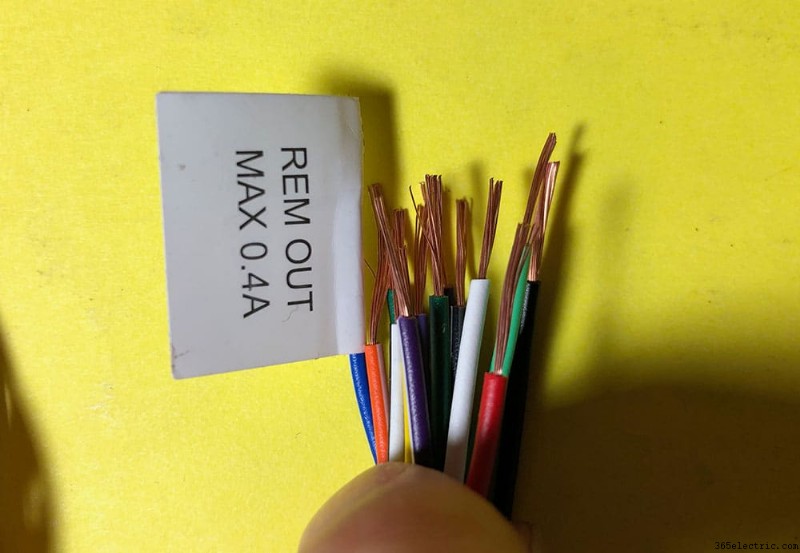
Pri povezovanju kabelskih snopov morate upoštevati nekaj stvari:
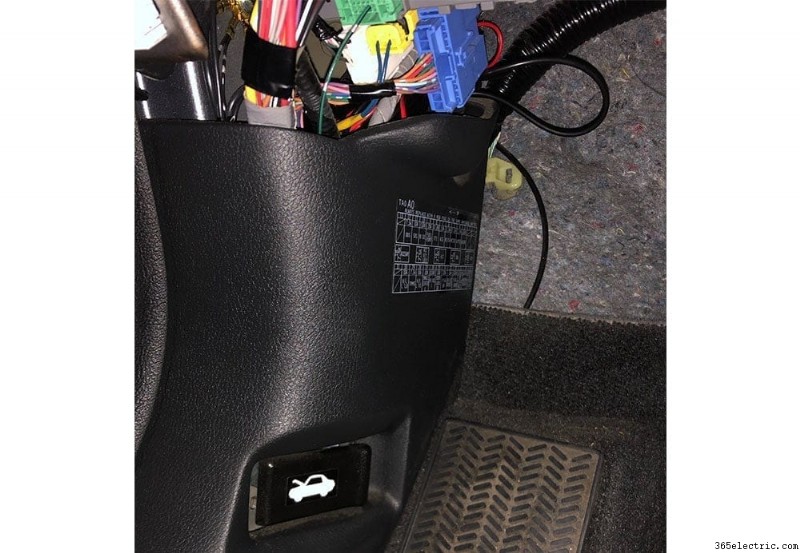
- Izbirno:Namesto da ozemljite svetlozeleno žico do zasilnega prekinitve, jo lahko ozemljite tudi neposredno na glavno ozemljitveno žico (črno). To vam bo omogočilo uporabo katere koli video funkcije, ki je morda omejena samo, ko je vozilo parkirano. Nekatere novejše enote bodo uporabljale GPS, tako da to ni vedno vse popravljeno. Glej sliko spodaj.
- Tam bo nekaj neuporabljenih žic – osvetlitev in zatemnilnik (oranžna in oranžna z belo) sta bila zame neuporabljena.
- Napajalne antene (velik moški vtič z modro žico, pritrjeno nanj) bo treba privezati na ustrezno modro žico na kabelskem snopu CRUX.
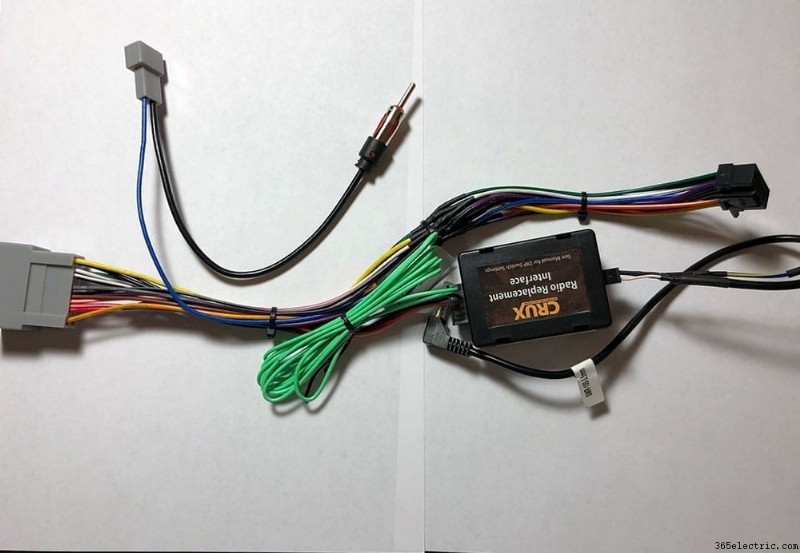
In voila! Ko povežete vse svoje žice, bi moral biti kabelski snop videti kot spodaj in pripravljeni ste na konfiguracijo enote CRUX.
Konfiguriranje vašega adapterja CRUX
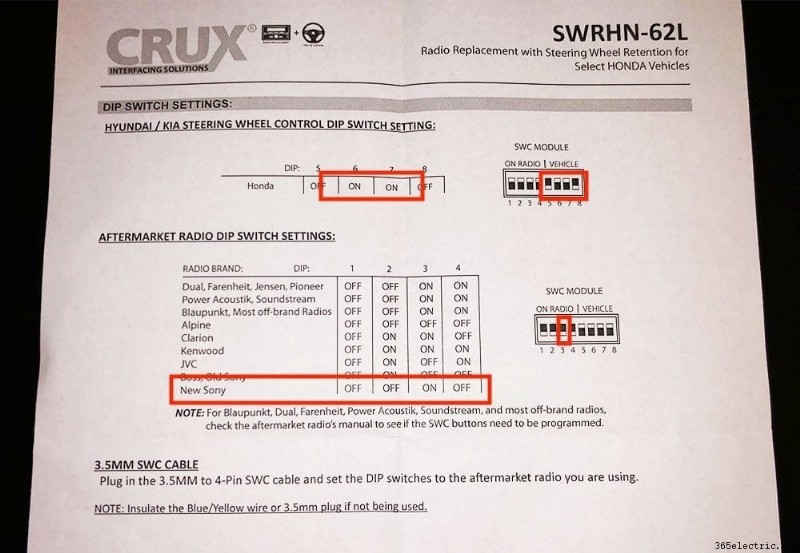
Enota CRUX je bila malo draga, a vredna. Obstajajo številne alternativne komponente, ki jih lahko uporabite za prilagoditev krmilnih elementov na volanu za poprodajno uporabo, ki so univerzalne. Kar pa je bilo lepo pri CRUX-u, je to, da preklopite nekaj stikal v skladu z lahko berljivimi navodili in je vse vnaprej konfigurirano. Pri univerzalnih enotah morate programirati glavno enoto, da se individualno ujema s signalom iz vašega volana. Mislil sem, da je to bolj preprosto in pošteno ni vredno glavobola programiranja vsakega gumba na mojem volanu za krmiljenje v glavni enoti.
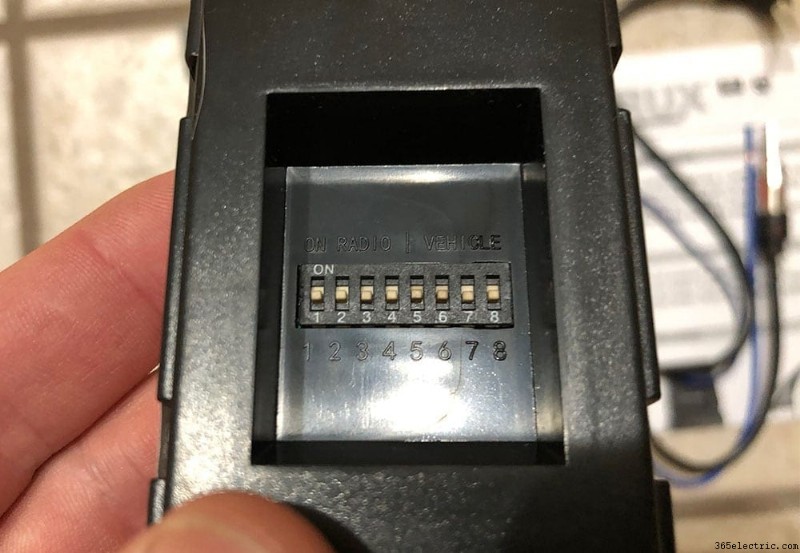
Za konfiguracijo enote CRUX (črna škatla) jo obrnite in si oglejte osem miniaturnih stikal na zadnji strani. Preden vse namestite v avto, se morate prepričati, da je vsak od teh v pravem položaju. Oglejte si navodila, ki ste jih dobili, da poiščete pravilno konfiguracijo. Če uporabljate novo glavno enoto Sony, bo konfiguracija:
- Izklopljeno
- Izklopljeno
- Vklopljeno
- Izklopljeno
- Izklopljeno
- Vklopljeno
- Vklopljeno
- Izklopljeno
Prva štiri stikala določajo vrsto radia, ki ga nameščate. Torej, če na primer nameščate Pioneer, bi bila stikala:1. Izklopljeno 2. Izklopljeno 3. Vklopljeno 4. Vklopljeno. Zadnja štiri stikala bodo tista, ki določajo vaše vozilo. Vsa vozila Honda imajo enaka zadnja štiri stikala. Tukaj je nekaj fotografij, kako ga konfigurirati, skupaj z navodili.
Predhodna namestitev vaše glavne enote
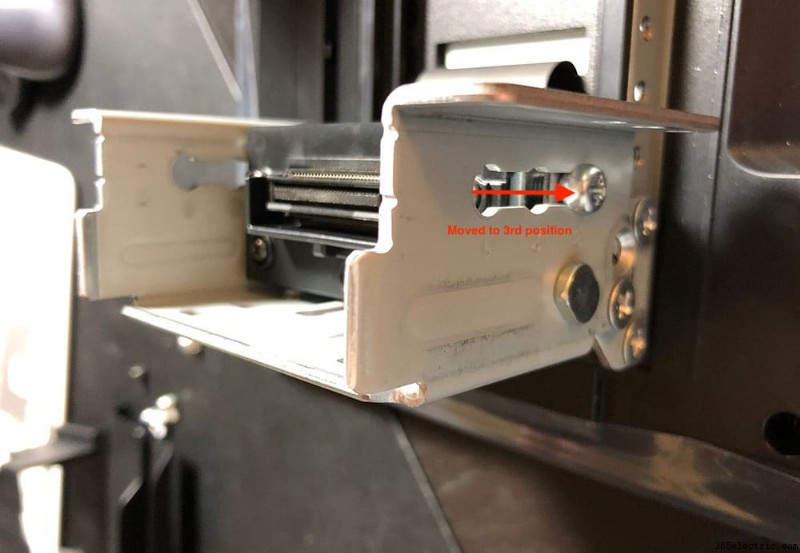
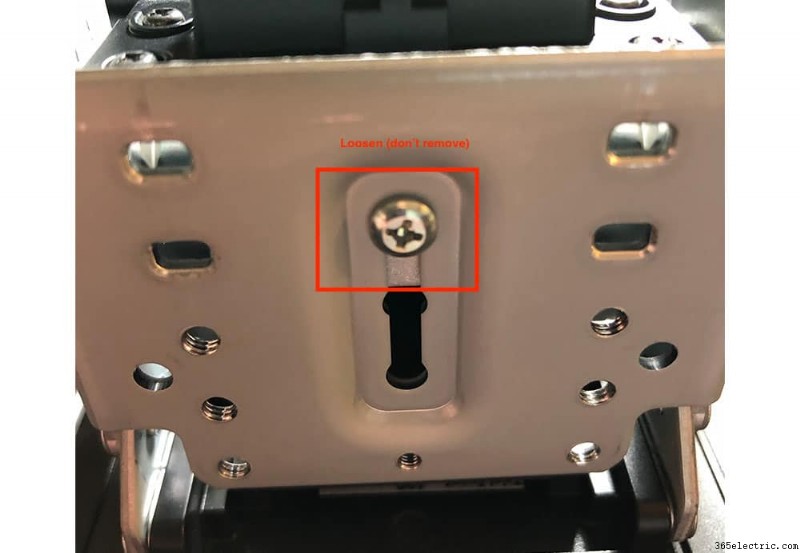
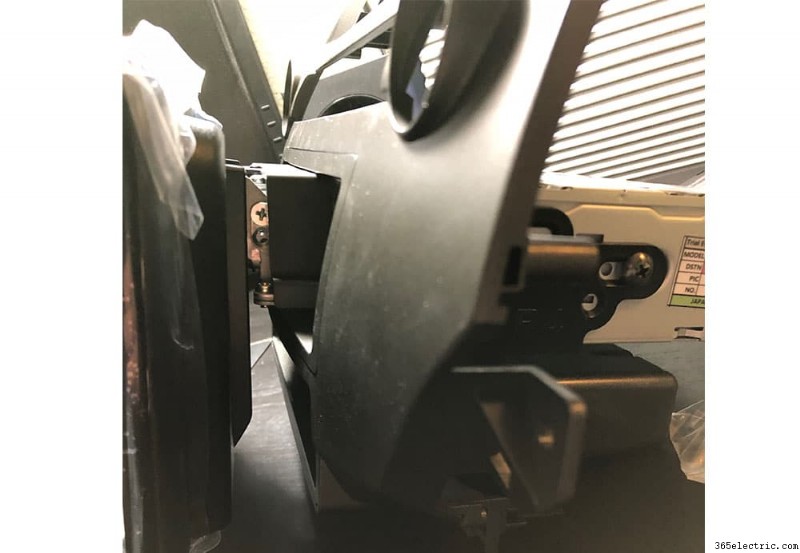
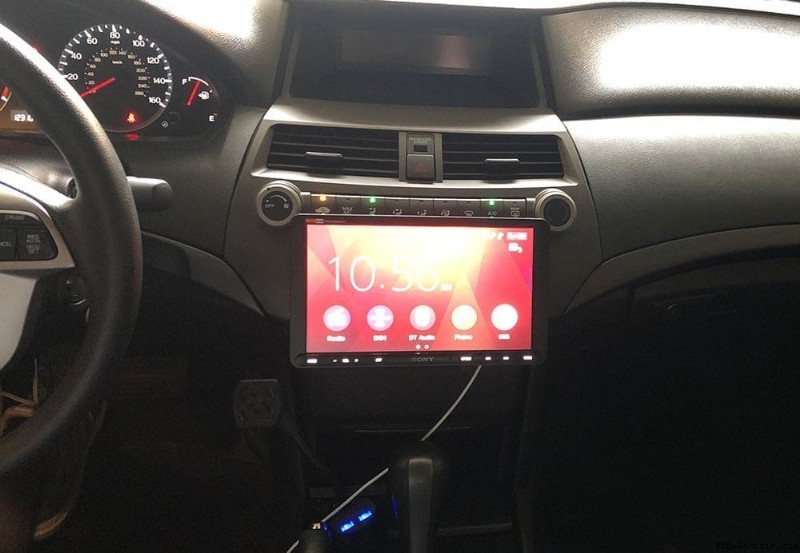
Naslednja stvar, ki jo boste želeli narediti, potem ko zaključite vse priprave za napeljavo, je, da pripravite dejansko ohišje glavne enote za namestitev v vaš novi armaturni komplet. V mojem razdelku Orodja in deli je komplet armaturne plošče Metra. Ta komplet armaturne plošče je celoten okvir, ki bo nadomestil obstoječi okvir, ki obdaja vašo klimatsko napravo in radijske gumbe OEM. Ker ga imate zunaj avtomobila, je enostavno namestiti pritrdilne nosilce na vaš poprodajni radio in ga preskusno namestiti na novo ohišje. V mojem primeru sem moral konfigurirati tudi nastavitve naklona in višine, ker ima Sony XAV-AX8000 prevelik monitor, ki ne sedi v armaturni plošči (glejte slike). Toda pri tipičnih namestitvah enojnega in dvojnega dina je treba namestiti nosilce in zagotoviti, da je globina glavne enote taka, kot bi pričakovali.
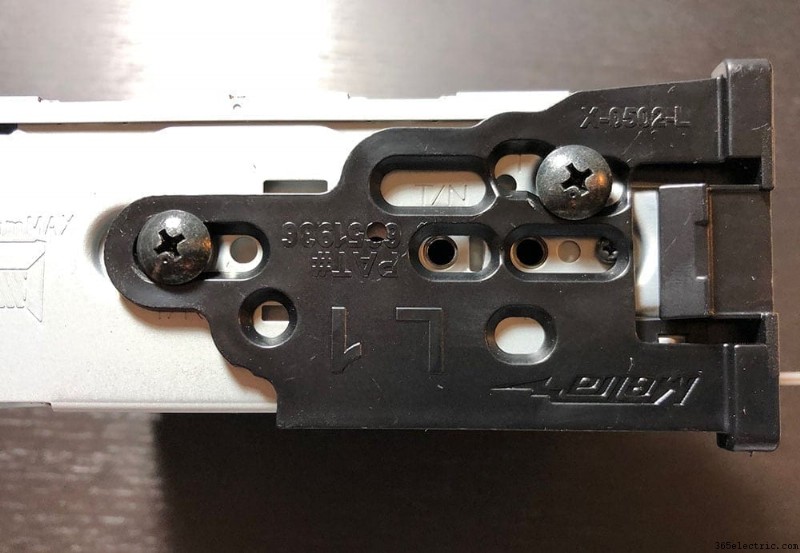
Za preizkus prileganja poiščite nosilce z enojnim ali dvojnim DIN, ki se pritrdijo ob strani vaše glavne enote. Morala bi biti dva para – eden za enojno ohišje din in eden za dvojno ohišje. Izberite tisto, ki ustreza velikosti vaše nove glavne enote. Nosilce privijte na stran vaše nove glavne enote, vendar le dovolj tesno, da ostanejo tesni pod rahlim pritiskom. Morda ga boste želeli prilagoditi, ko ga boste preizkusili v novem okvirju.
Namestite glavno enoto v okvir in zagotovite, da je globina glavne enote natanko takšna, kot želite. Če nameščate enojno glavno enoto din, bo spodnja reža dejansko predel, tako da boste morali ta predel namestiti v okvir, preden vstavite glavno enoto.
Ko končate s prilagajanjem vaše glavne enote in ste ustrezno prilagodili zaslon (če je potrebno) in nosilce ohišja, odstranite enoto z okvirja in se premaknite na naslednji korak postopka namestitve.
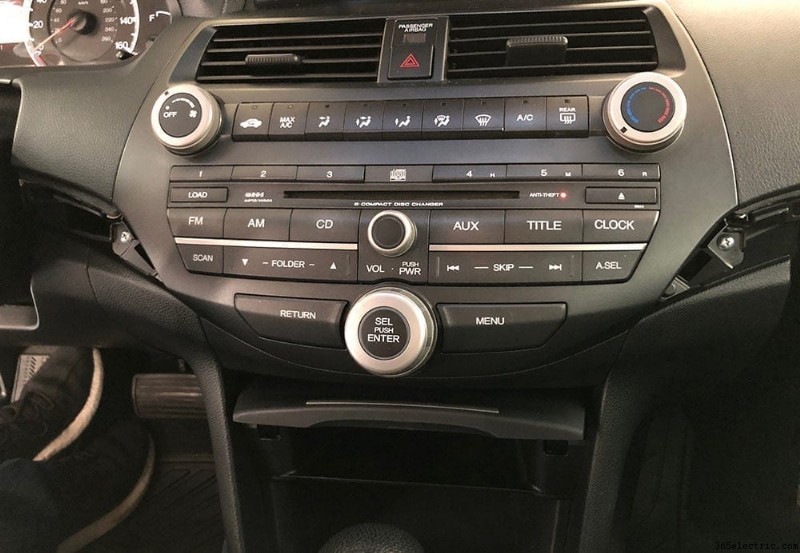
2. korak – Odstranitev glavne enote OEM vaše Honde Accord
Odstranitev okrasne plošče
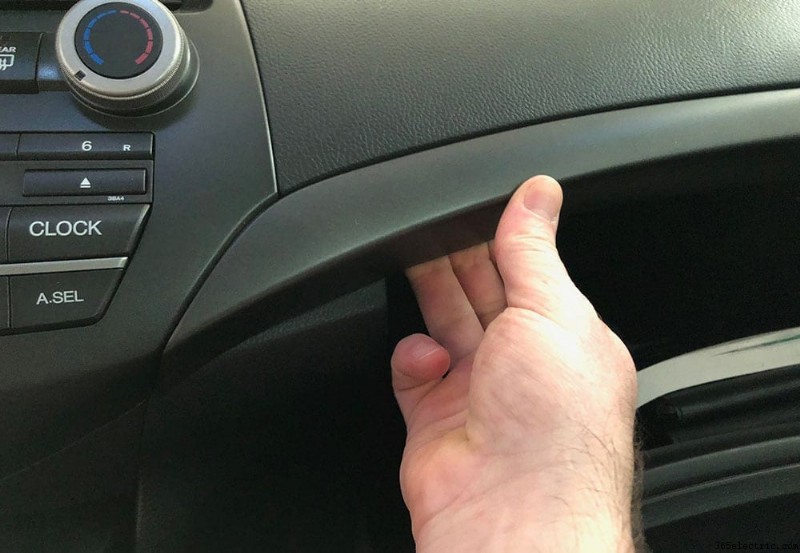
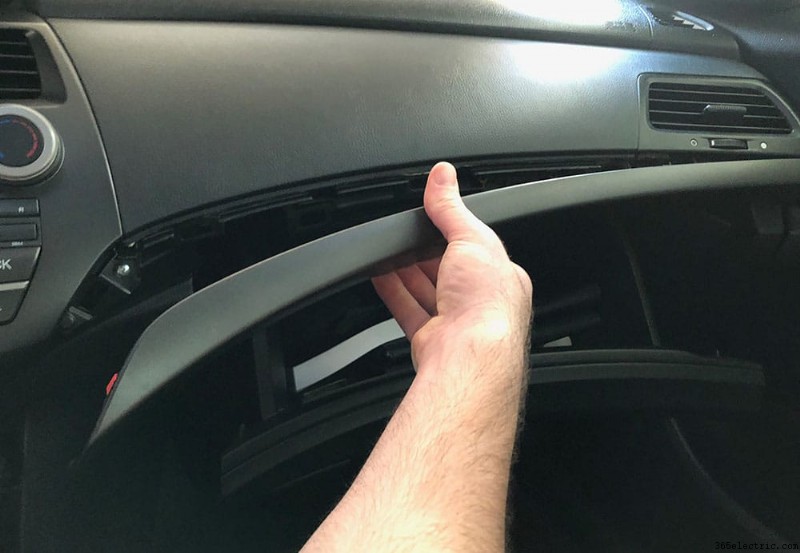
Prva obroba, ki sem jo odstranil, je obroba nad sovoznikovim predalom. Ta je razmeroma enostaven – odprite predal za rokavice in s prsti primite spodnji del obloge ter potegnite navzven, začnite najbližje glavni enoti na levi strani obloge. Eno za drugo izpnite sponke na obrobo od leve proti desni. S tem boste razkrili vijak na spodnji desni strani glavne enote OEM.
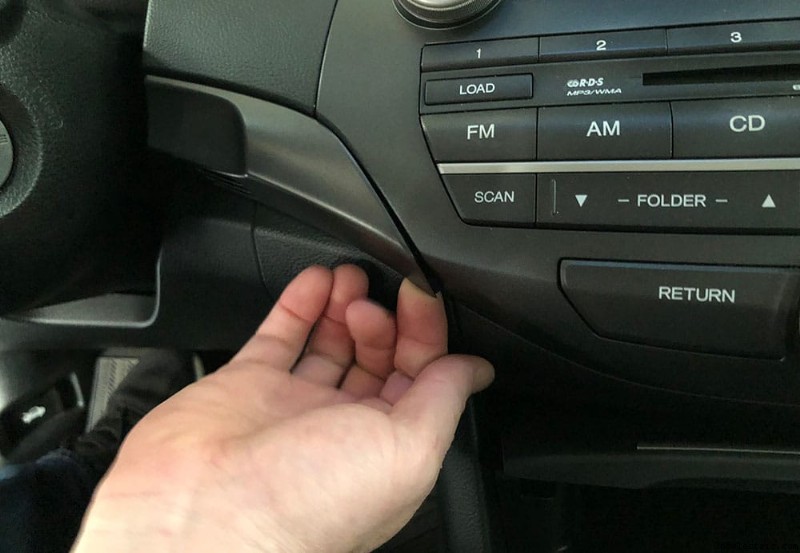
Nato se premaknite na majhen okrasni del med glavno enoto in volanskim drogom. Ta morda potrebuje klin, da ga izvlečete. Priporočam uporabo orodja za odstranjevanje plastičnih oblog, da ne popraskate obloge. S prsti sem lahko potegnil rob okrasnega dela, ki je najbližje glavni enoti, vendar boste morda morali uporabiti ustrezno orodje, da ga potegnete, če je trdovraten. Ko odstranite ta okrasni del, bo razkril še en vijak za glavno enoto.
Ko sta oba okrasna dela odstranjena in so vijaki izpostavljeni, lahko odstranite dva vijaka ob strani enote. Zdaj se premaknite na sredinsko konzolo in cubby za dostop do zadnjih 2 vijakov za odstranitev glavne enote.
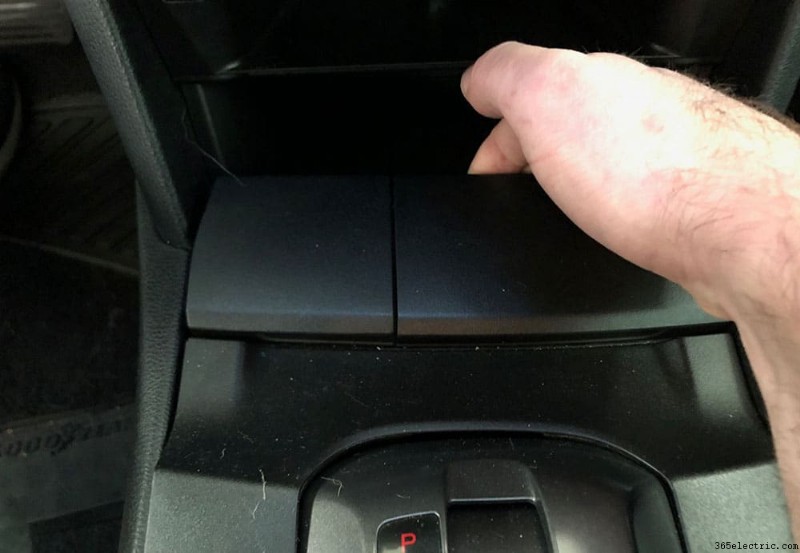
Odstranitev sredinske konzole &Cubbyja
Za dostop do zadnjih dveh vijakov na glavni enoti OEM vaše Honde Accord boste morali odstraniti oblogo sredinske konzole in cubby. Če želite to narediti, začnite tako, da dvignete zadnjo stran osrednjega okrasnega dela. Najboljše mesto za začetek radovednosti je znotraj sredinske konzole. Odprite svojo sredinsko konzolo in začnite zamahovati/privzdigniti zadnji del osrednjega okrasnega dela. Začnite od te točke in nežno dvignite navzgor, dokler ne začnete pokati prvih nekaj obrezovalnih sponk. To je dolg kos plastike, ki se razteza od sredinske konzole do prostora, vendar ni nobenih vijakov, ki bi držali ta del. Pojdite naprej, dokler ne dosežete prestavne ročice.
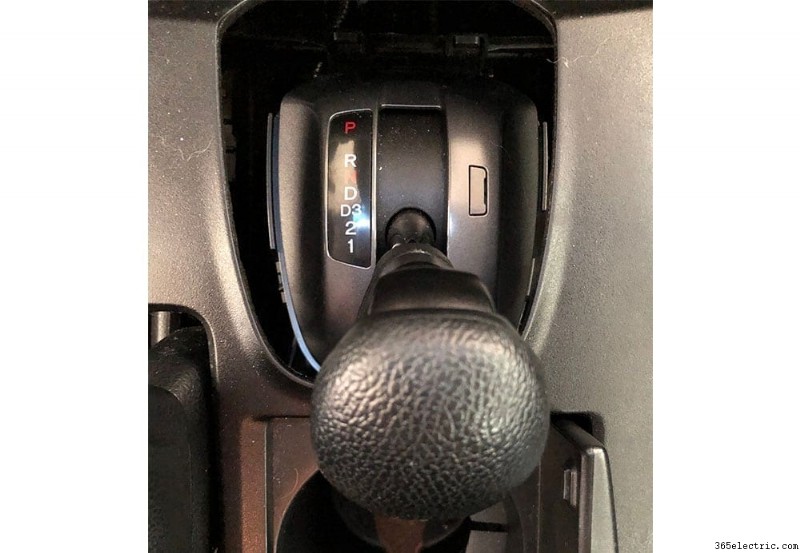
Ko dosežete prestavno ročico, boste morali avto postaviti v D1 za najlažjo odstranitev sredinskega okrasnega dela. Močno zategnite zasilno zavoro, nato prestavite avto v D1 in nadaljujte z odstranjevanjem sredinskega dela, dokler se vse sponke ne odpnejo. Na tej točki se vse sponke odpnejo in okrasni kos bo skoraj odstranjen z izjemo enega napajalnega vtiča, ki napaja vtič dodatne opreme v sprednjem predelu. Odstranite vtič tako, da ga povlečete s hrbtne strani plošče. Ko je čep odstranjen, lahko osrednji okrasni del premaknete okoli prestavnega gumba in ven iz avtomobila.
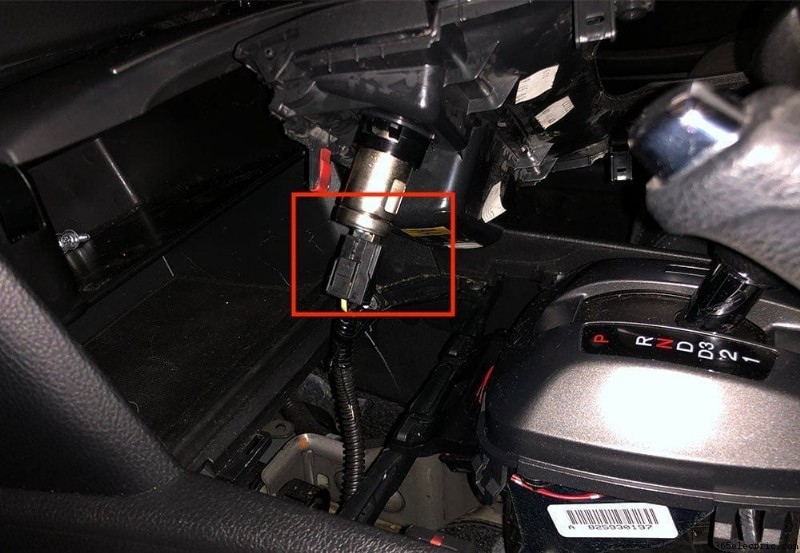
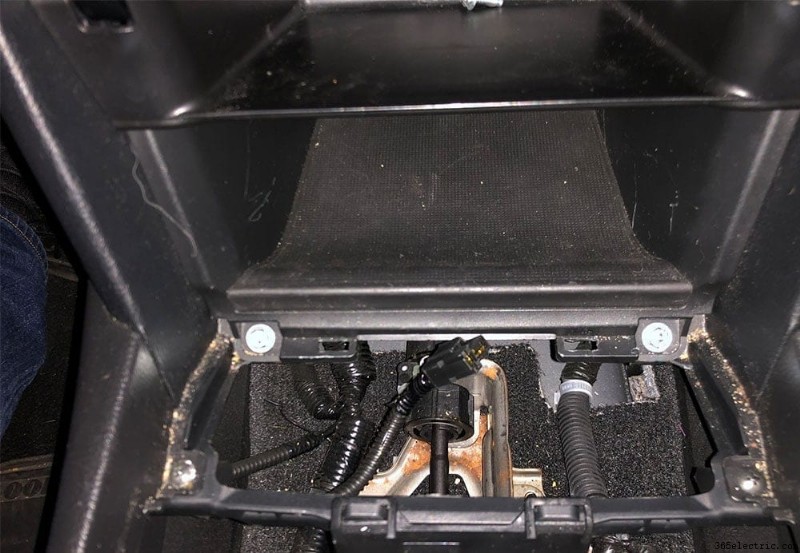
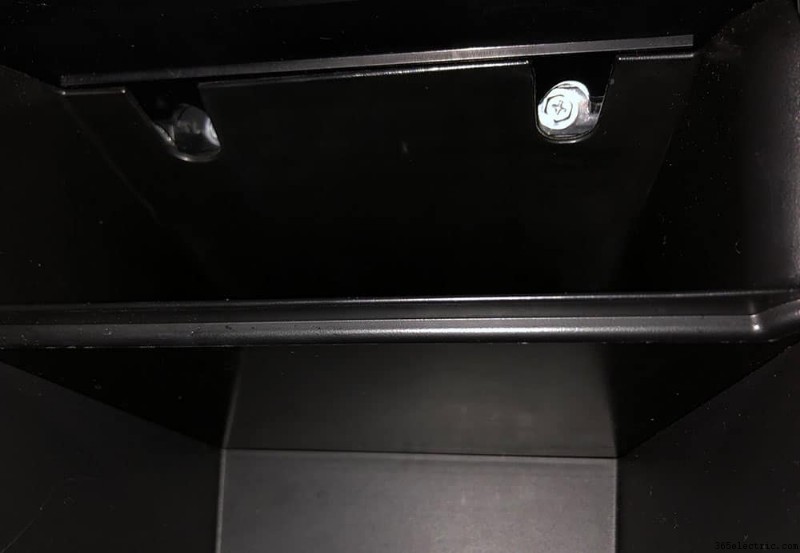
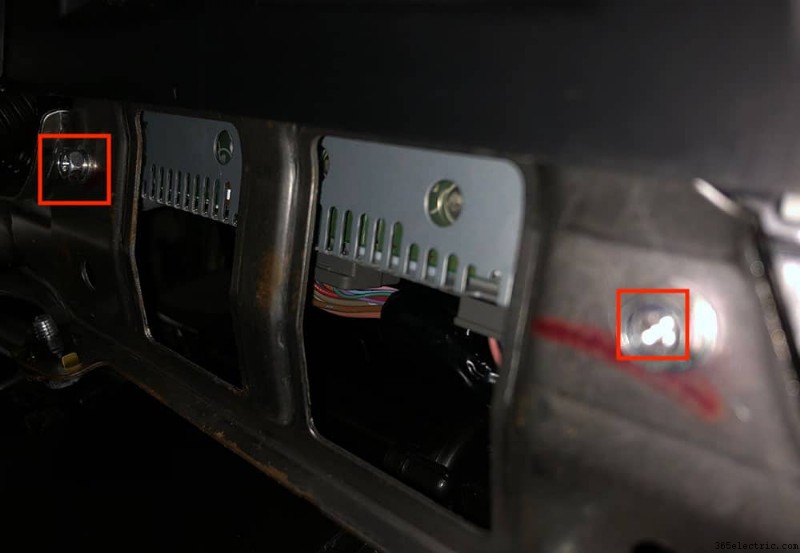
Zdaj, ko ste odstranili sredinsko oblogo, boste na dnu kabine videli dva vijaka. Odstranite ta dva vijaka. V zgornjem predelu predalčka sta dva zadnja vijaka. These are difficult see and even more difficult to remove. Us a short screw driver to access and remove these two screws and then remove the cubby by pulling directly out.
Once you've removed the cubby, you'll now be able to access the final two screws to pull your OEM head unit from within the area above the cubby.
Removing the Head Unit and Components
Now that you've removed all of the head unit screws, you can begin removing the head unit. In addition to screws, the unit also has clips that are holding the plastic trim in. Start removing the head unit by wedging the bottom edge with a flat surface and begin to pry upwards, gently. You'll hear the clips pop and you should begin to be able to remove the unit. Once the unit is loose, unclip all of the wiring that is connected to the head unit, climate control and emergency lights switch and pull the unit out of the dash.
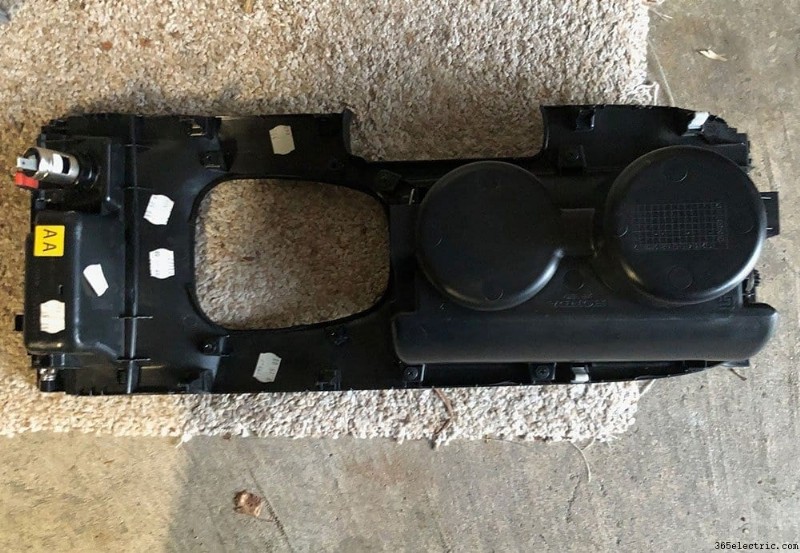
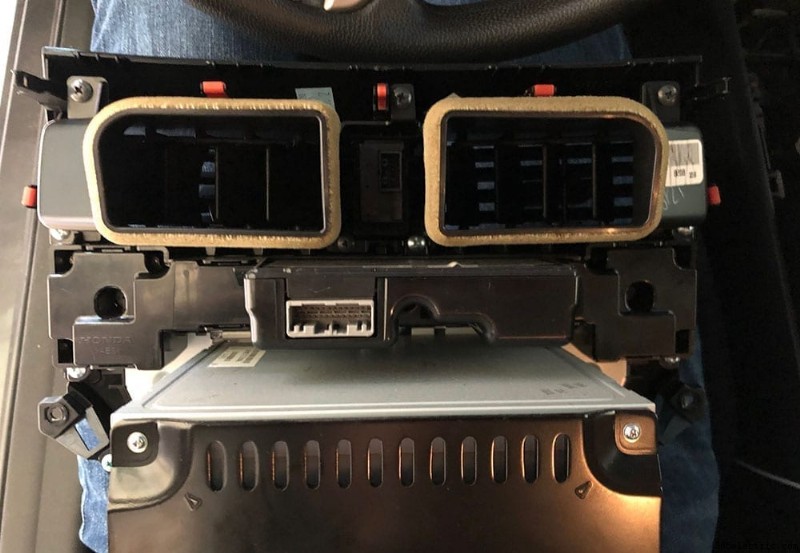
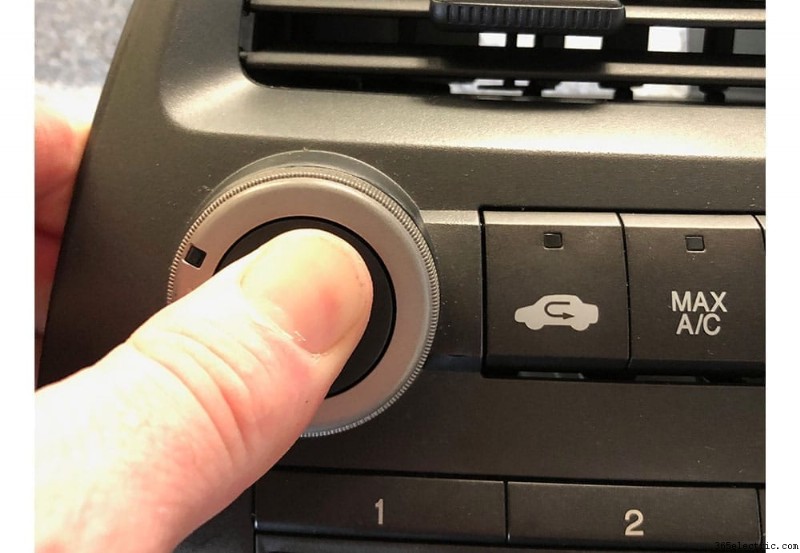
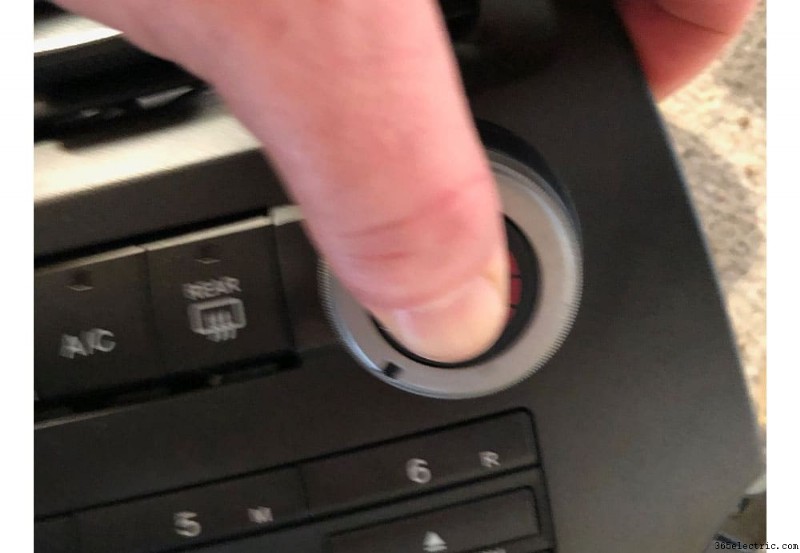
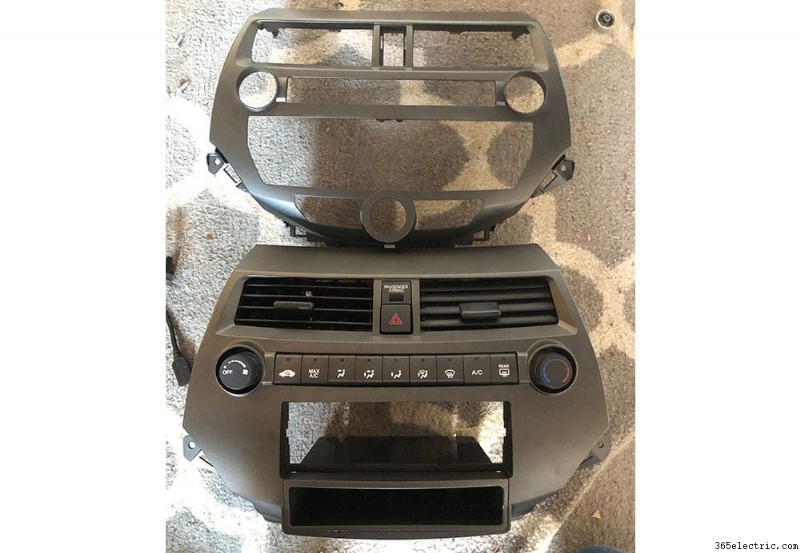
The dash trim has a number of components that you'll need to reuse and carry over to your new Metra dash kit. This includes the vents, climate control and the emergency button switch. To get access to these, you'll need to remove the head unit from the plastic trim. Remove the head unit by removing the screws in the back, then move to the climate control unit. The climate control unit also has a few screws to remove. Once you've removed those screws you'll need to pop off the two control knobs on the face in order to fully remove the climate control unit. See pictures.
The hazard/emergency button has a few clips holding it in. Gently pry them apart to push the button out towards the face of the trim.
Finally move to the vents. Remove the final screws in the old trim and pull the vents off. The remaining plastic dash trim should be completely empty and you should now be able to place the components back into your new aftermarket dash kit.

Step 3 – Re-installing Your New Aftermarket Head Unit
If you're not installing an aftermarket backup camera, you're now ready to reinstall your aftermarket dash bezel and new head unit back into the car. If you are installing a backup camera, see the Installing a Backup Camera section.
Wiring Your Microphone
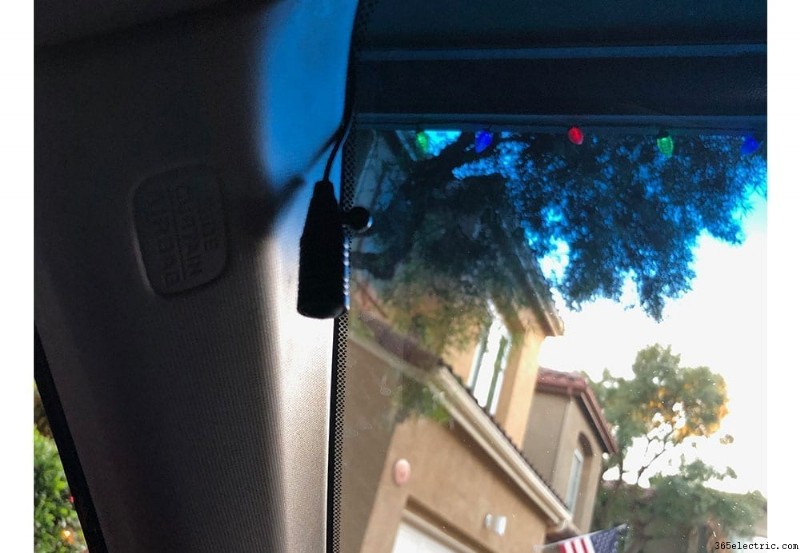
Before you put the head unit back into the car, plug the harnesses in and secure it you'll want to wire the microphone up first if you have one. I normally place my microphones in the headliner closest to the driver side front pillar bordering the windshield. So this walk through is based on that position.
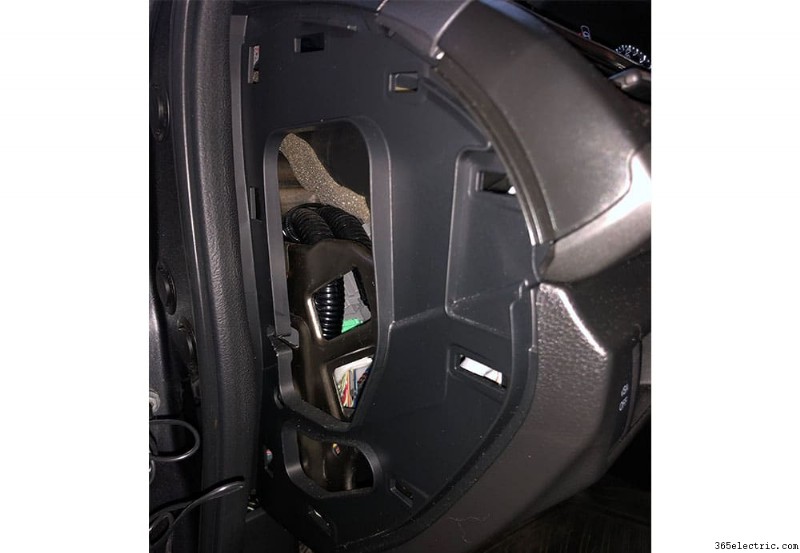
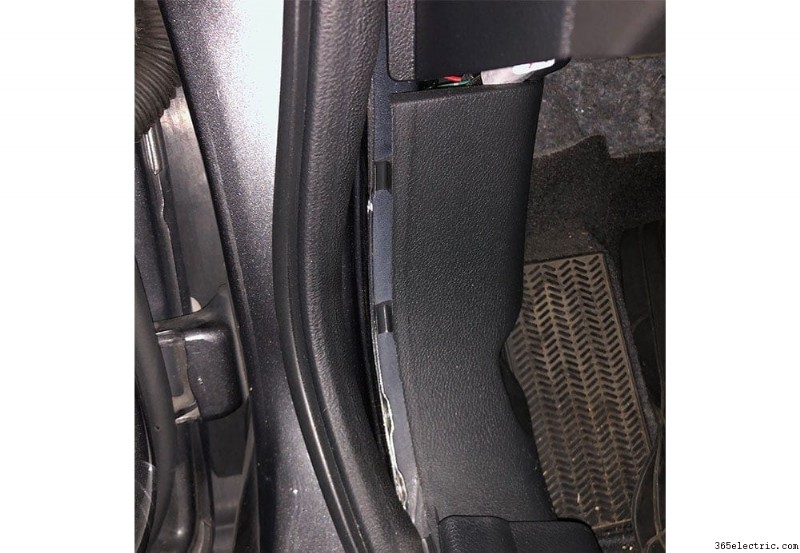
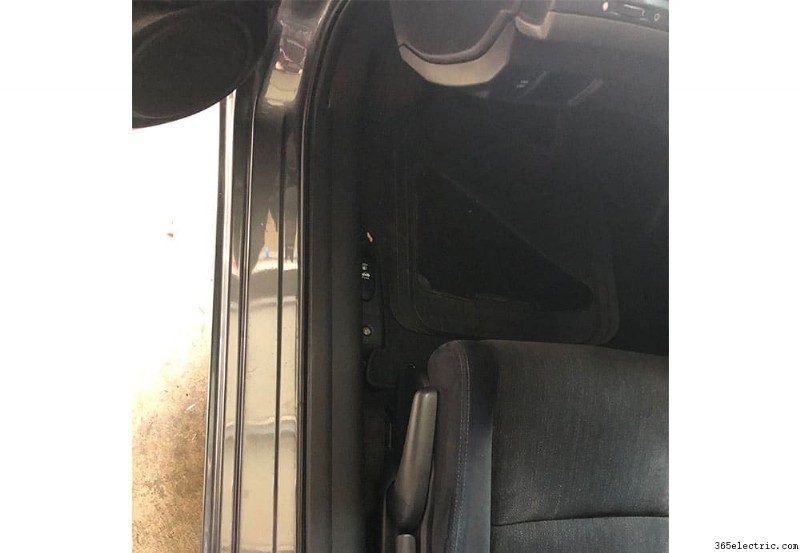
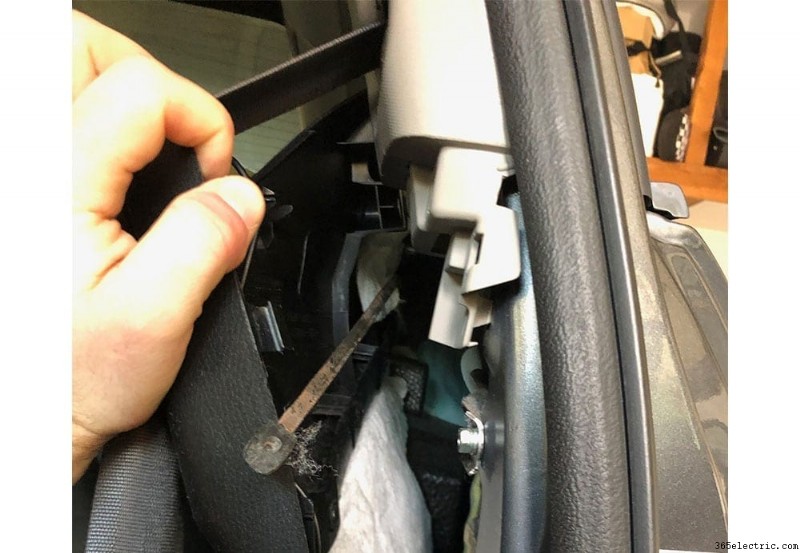
Start by removing the plastic cover on the left hand side of the dash (see image). This panel has a few clips, start by gently prying the corner to the right, closest to the vent. Once this is removed, you'll have access to run the microphone wire through and underneath the dash to the stereo compartment along with through to the pillar of the car to the headliner.
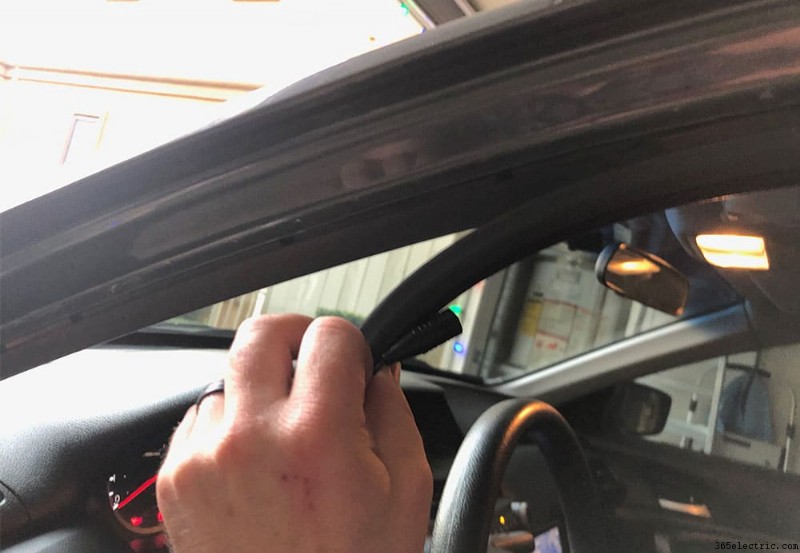
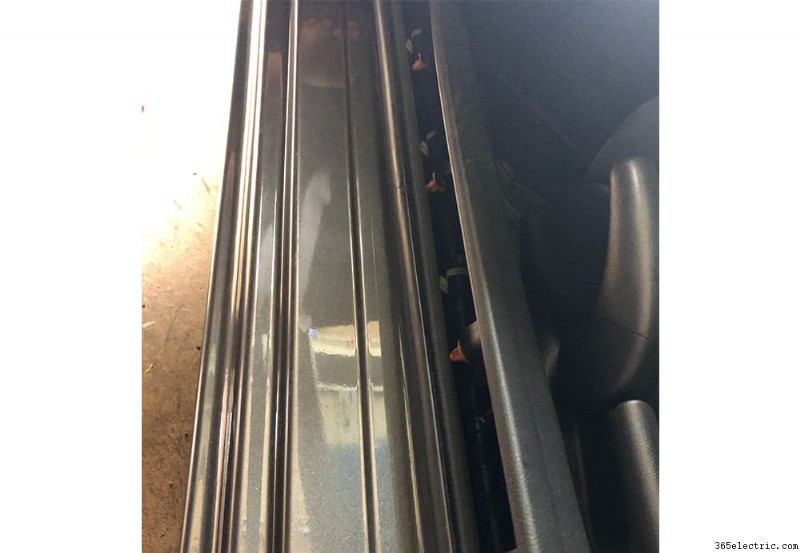
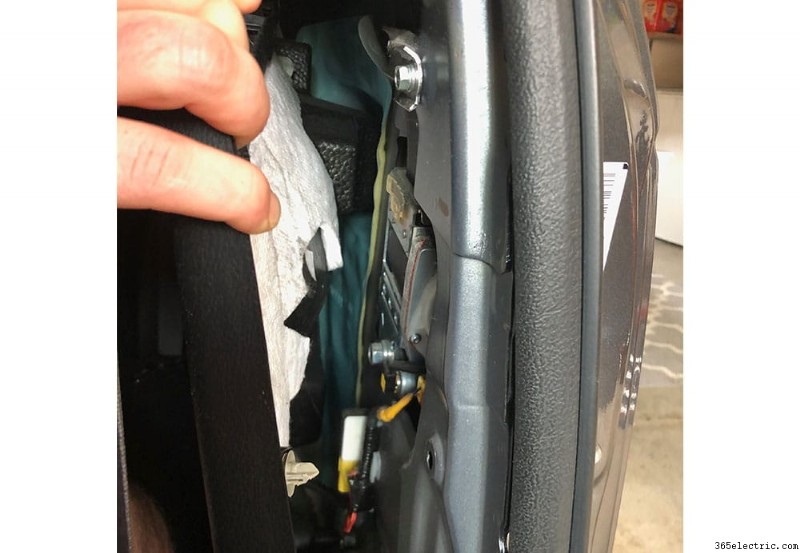
Gently pull the door seal closest to the panel that you just removed, enough to push the microphone wire behind it, in between the metal frame and the dash panel. Run the microphone wire up through the pillar cover and around through to the windshield facing side of the pillar. Clip the microphone to the headliner.
On the other side of the microphone wire, run it through the panel that you pulled, behind the dash and out through the stereo compartment where the head unit will go back in. You can zip-tie the wire behind the dash to the existing wire harness so that it doesn't drop down into your feet. Once you've ran the microphone wire into the stereo area, leave about 12 inches of slack and then bundle and zip tie the slack together so that your wire doesn't look like spaghetti behind the stereo and get in the way of the install. I zip tied it to the metal sub frame behind where the stereo will sit.
Install the Aftermarket Bezel and New Head Unit
Once the microphone is wired, you can begin to install your new bezel and head unit. Start with the wire harnesses. Clip your new aftermarket wire harness into the OEM harness. There are two clips – the primary that houses all of the wires you joined in the preparation phase and then the power antennae which has a blue wire and a wire with a male plug on it.
At this point, you should have your bezel WITHOUT the head unit installed. Keep the new aftermarket head unit out of the bezel until you've installed the bezel into the car. Install your bezel by placing it back into the dash the same way you removed it. Be sure to re-connect the hazard/emergency lights button and the climate control. Pull the microphone wire, the head unit harness (black plug) and the CRUX male plug for your steering wheel controls all out through the space in your bezel in which your head unit will be installed. Once your wiring is accessible through the bezel, place the single or double din trim piece into the bezel before you secure the new head unit. This is a slim piece of plastic that comes with the bezel to basically frame the outside of the head unit once it's installed.
Now, take your new aftermarket head unit and plug in all of the wires that you should have hanging out through your bezel. Once all of the wires are plugged in, place your head unit into the bezel until it ‘snaps' into place. Voila!
Test Your New Head Unit and Reinstall Trim
Before you screw your bezel back into place and re-install the trim, be sure that your new stereo works! Turn the car on and run through the key features – make a phone call, connect your usb device, turn on the radio, etc.
If all checks out, start to replace all of the trim back where it came from. In my tools and parts section, I recommended buying some extra trim clips. I wasn't able to find all of the clips from my center console trim so I purchased extra and replaced the missing ones before I re-installed all of the trim pieces. I recommend doing this to prevent (or help prevent) vibration noises. Before placing your trim and center console trim piece back on, I recommend pulling all of the clips and placing them directly onto the trim piece you're re-installing. Leaving them in the clip hole instead of on the trim itself makes installation much more challenging. If you place them back on the trim piece they just pop back in like they should.
Additional – Backup Camera Installation
If you're a Honda Accord owner without a backup camera and are looking to add an aftermarket camera to a supporting aftermarket head unit, we have you covered. In addition to the head unit that we installed, we also added a backup camera. In this section, we'll walk through the steps that we took to run a wired backup camera in a 2008 – 2012 Honda Accord.
If you're installing a backup camera at the same time as a new head unit, continue with this step after you are done with Step 2. If you're installing a backup camera to an existing head unit that supports a backup camera feed, complete Step 2 through the “Center Console &Cubby Removal” section first.
For our installation we used an AUTO-VOX Cam 6 license plate camera, but this walkthrough should apply for any other license plate camera or universal wired camera.\
Wiring Your Backup Camera
A wired backup camera requires you to wire reverse signal power and ground, along with a signal wire (typically an RCA that connects to the back of your head unit).
The first (and most time consuming) step is to run your camera's signal wire from the dash to the rear of your car. Start by feeding the signal wire through the bottom of the dash near the driver petals into the head unit area of the dash. Feed the wire through the opening where your head unit will be installed and leave about 12″ of extra cable for when you plug your head unit back into the harness and other signal wires.
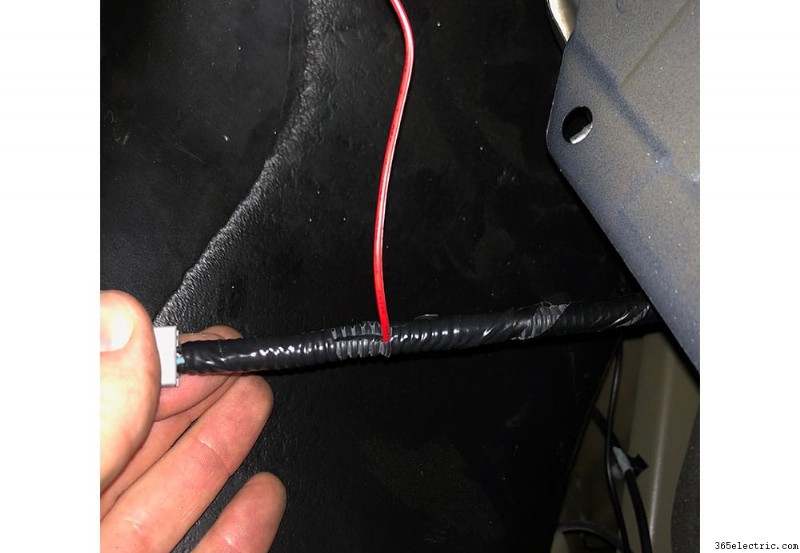
Run the wire underneath the driver side of the dash above the petals. I typically will use zip ties to secure the signal wire to an existing harness so that it doesn't become a hazard while driving. Loosen the door seal that's to the left of the kick panel (panel that's closest to the driver's left foot while seated) and run the wire along the left hand side of the panel underneath the seal.
Next, you'll need to loosen the panel along the bottom side of the door along with the panel along the driver side of the rear seats. If you have a four door, you'll need to run the wire along the column between the front and rear doors and also loosen the panel along the bottom side of the rear door to run the wire.
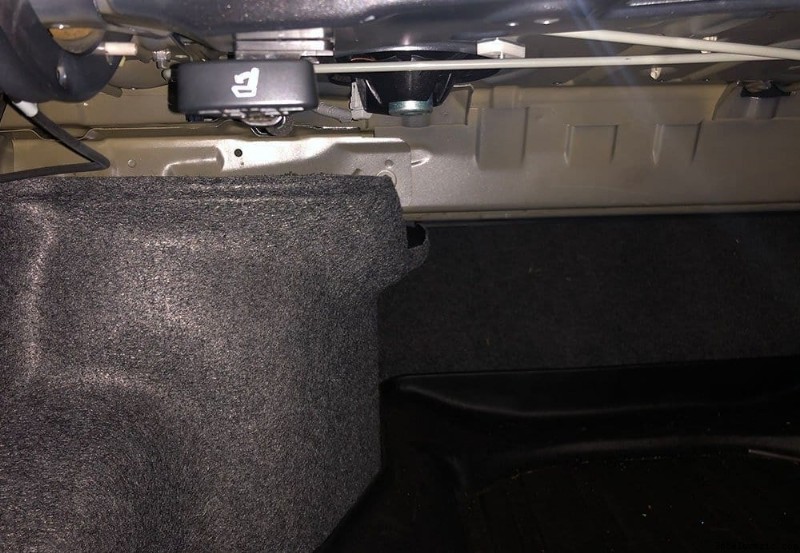
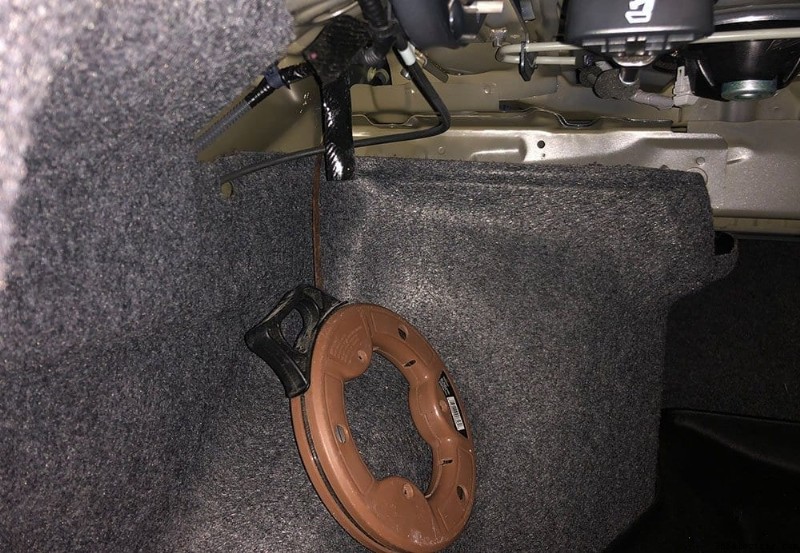
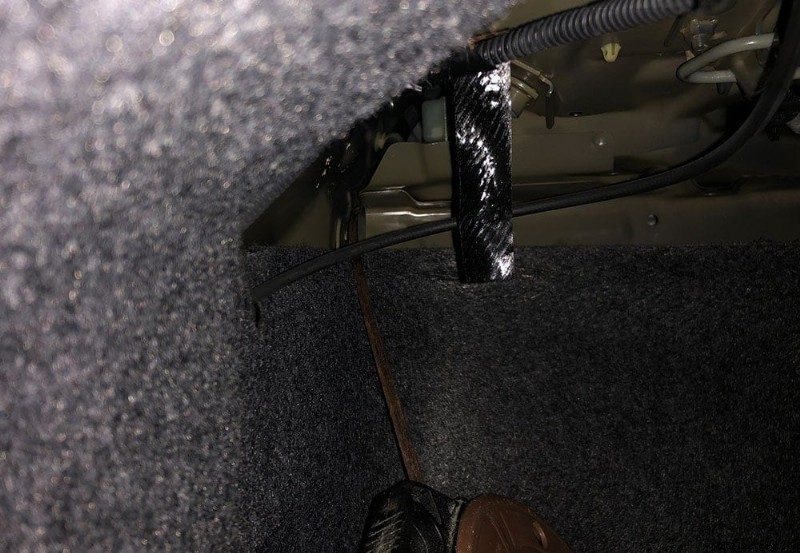
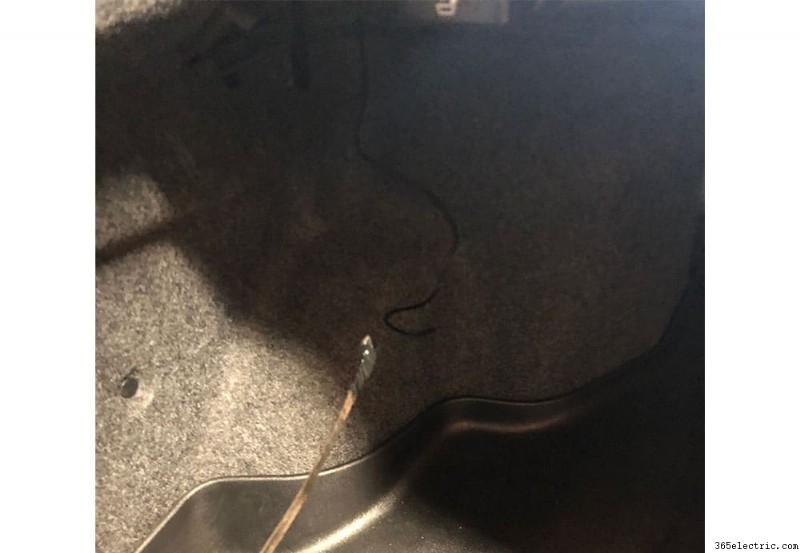
Once you've run the signal wire through the driver side floor panel, you need to wire it through to the trunk. To do this, fish it through the panel between the rear seat and the trunk. Start from the trunk side and run your fisher through the trunk into the panel that you loosened earlier.
Hook the camera signal wire to the fisher and then slowly pull the fisher through the panel to the trunk.
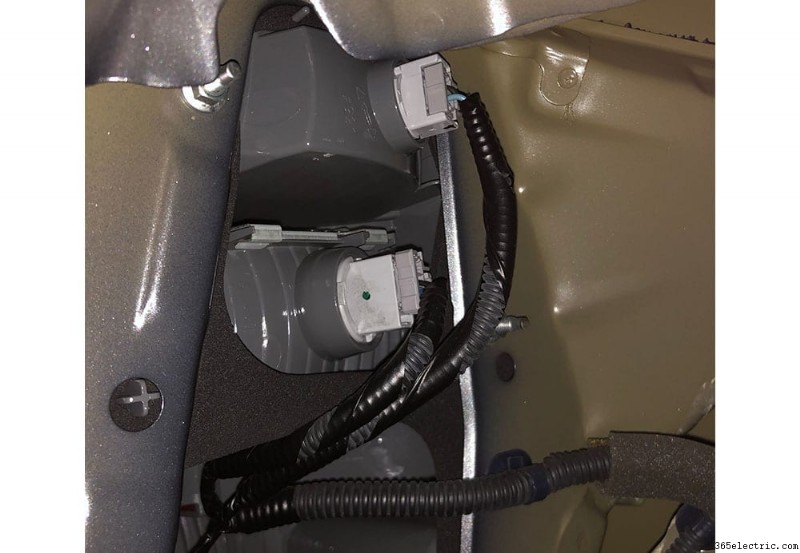
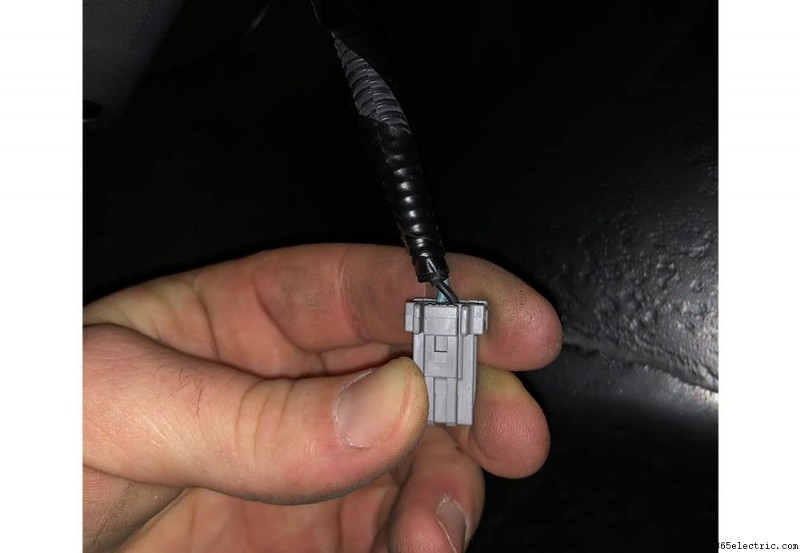
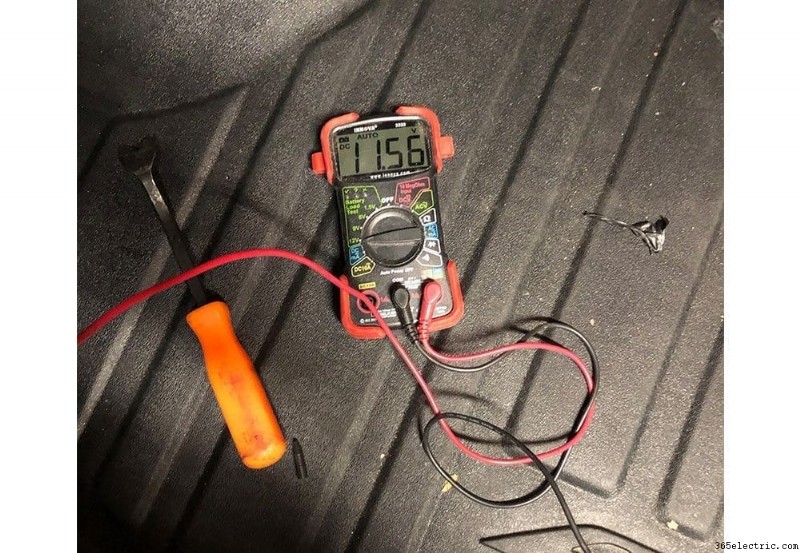
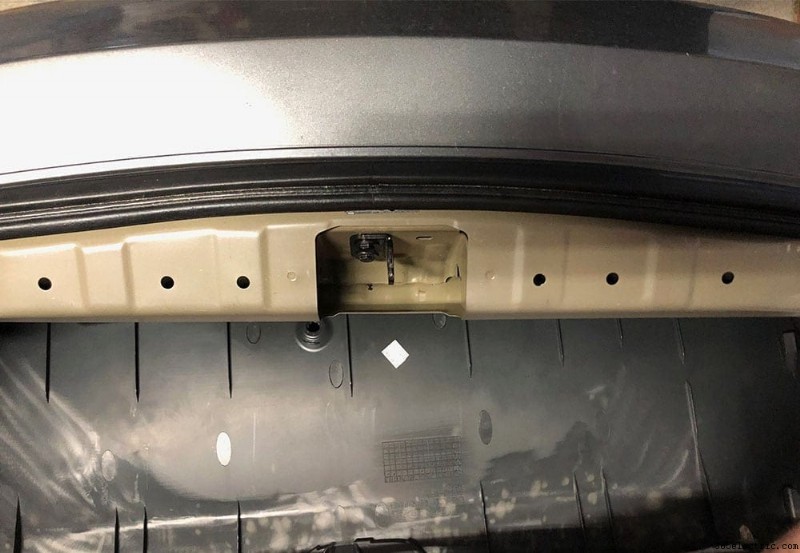
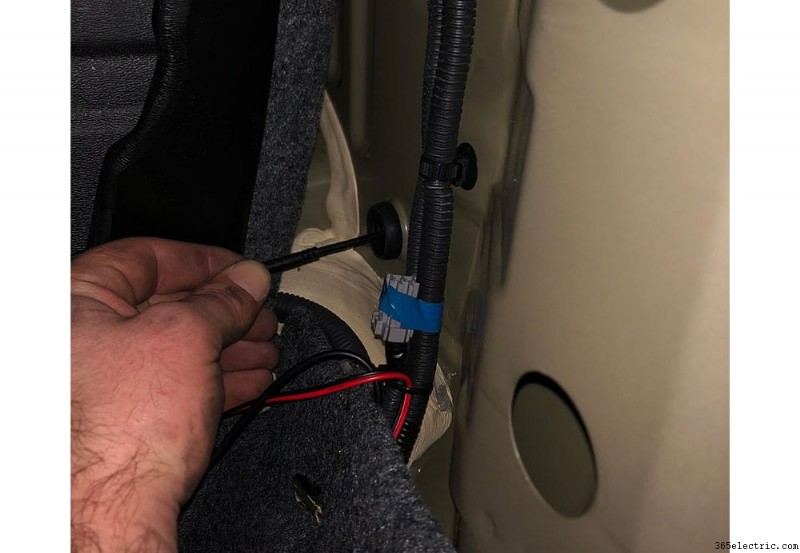
Most cameras require a signal/power wire to tell it when to turn on and when the car is in reverse. The easiest way to signal the camera when the car is in reverse is to tap into positive wire in the reverse light. To do this, you'll need to pull the panel inside the trunk to get access to the tail light.
Pull the clips to the panel and remove the panel to gain access to the tail light plugs. I tested the plugs with a voltmeter while the car was in reverse in order to determine which wire was positive and tapped into the wire for the positive source for the camera. You can use a wire tap to do this. For the negative wire, I used an existing ground that was bolted to the frame behind the plastic panel closest to the bumper.
Installing the Camera
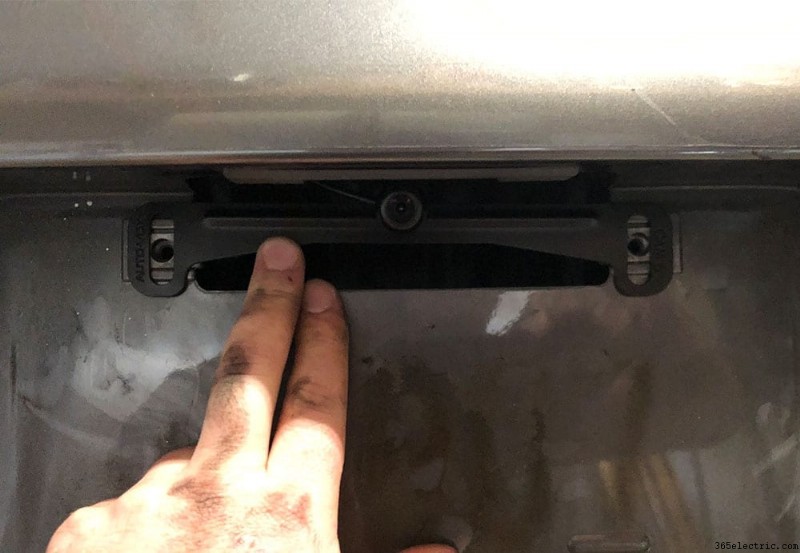
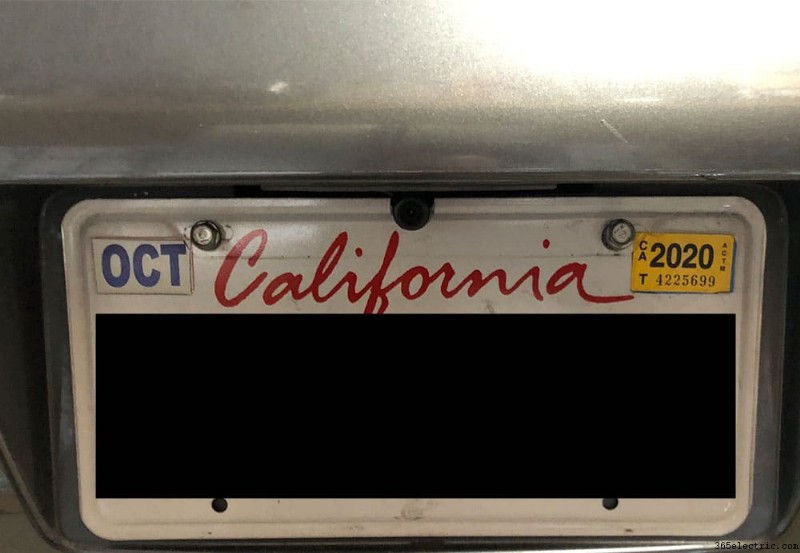
Since I used a license plate camera, there was no need to drill holes. If you choose a camera that does require custom mounting you'll need to find a good location for the camera and mount it. I would recommend above the license plate.
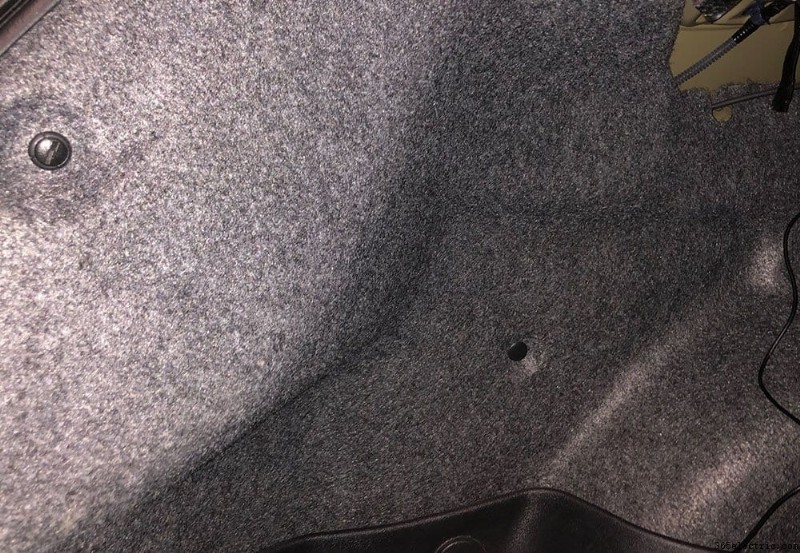
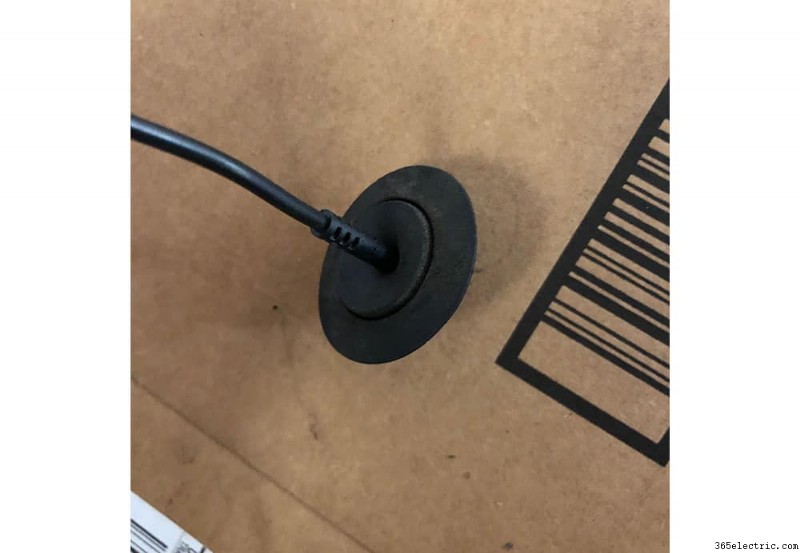
Before you mount the camera (license plate or not), feed the wire through the hole above the license plate and behind the bumper. Behind the plastic, there's a grommet that will lead directly into the back of the trunk where your positive, negative and signal wire should already be. Use a knife or drill to poke a hole in the grommet large enough to run the wire through it and place the grommet back into the hole with the wire fed through it. Once it's through the grommet, you should be able to access it from within the trunk area and connect it to the existing wires you've already ran.
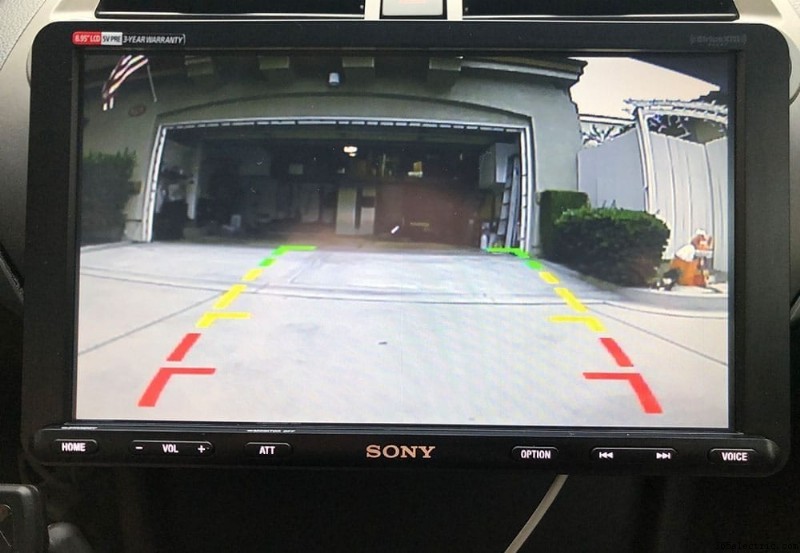
The final step is to pull any extra wire through the grommet, and mount your camera. Once everything is plugged in and mounted you're ready to test! Plug in your camera signal wire into the back of your head unit, turn on the car and put it in reverse!
Thanks for reading! Please use the comments below if you have any questions/comments!