Zamenjava aktuatorja vrat Honda Accord 2008-2012
V tem članku: Vodili vas bomo skozi korake, potrebne za zamenjavo pokvarjenega aktivatorja vrat na Hondi Accord, letnik 2008 – 2012.
- Potrebna orodja
- Potrebni deli
- 1. korak:Odstranitev vratne plošče
- 2. korak:Odstranitev pokvarjenega pogona vrat
- 3. korak:Priprava vašega novega pogona vrat
- 4. korak:Ponovna namestitev aktuatorja in vratne plošče
Težavnost projekta:enostavno
Predvideni čas:1,5 ure (ali manj)
Aktivator voznikovih stranskih vrat na moji Hondi Accord iz leta 2009 je pred približno 6 meseci začel povzročati hrup pri zaklepanju in odklepanju. Posebej opazno je bilo, ko so se vrata zaprla in se je avto začel kotaliti v pogonu – samodejno zaklepanje. Zvenelo je nekoliko kot stokanje (zaradi pomanjkanja boljšega izraza).
Končno se je pred približno dvema tednoma prenehal odzivati na občasno zaklepanje in odklepanje. Opazil sem, da se je vsakič, ko sem se oddaljil od zavorne luči, poskušala zakleniti – zavorna luč za zavorno lučjo. Ugotovil sem, da se vrata na voznikovi strani ne zaklepajo in da jih funkcija samodejnega zaklepanja kar naprej poskuša zakleniti vsakič, ko se avto začne premikati. To je bila moja čakalna vrsta za zamenjavo.
V tem članku vas bom vodil skozi korake za odstranitev vratne plošče in zamenjavo aktuatorja vrat vaše Honde. Pravzaprav je čisto preprosto. Ne pozabite:za dobro prakso in varno hrambo ne pozabite odklopiti negativne strani akumulatorja vašega vozila pred kakršnimi koli električnimi deli, da preprečite pok varovalk ali električne poškodbe vašega avtomobila!
Potrebni deli
V resnici je samo en del (ali dva, če delate dvoja vrata):
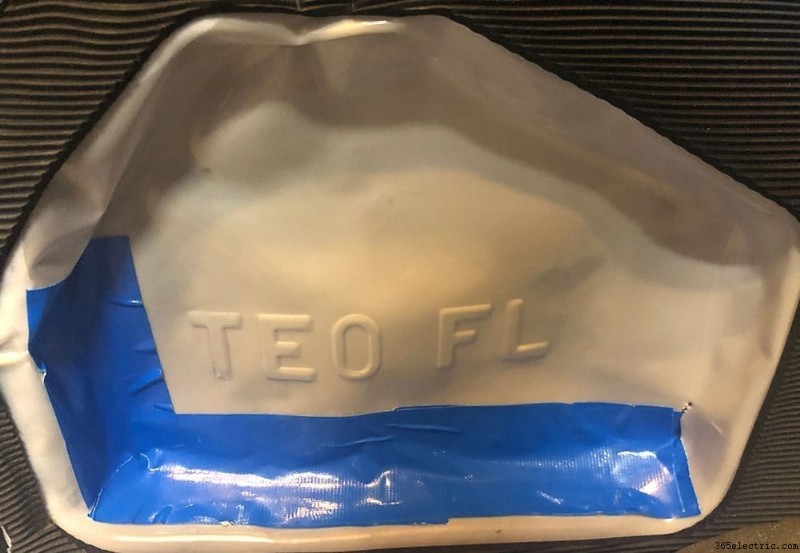
- Aktuator na voznikovi strani za Hondo Accord 2008–2012 – 37 USD
- Aktuator na sovoznikovi strani za Hondo Accord 2008–2012 – 32 USD
Potrebna orodja
Ta projekt je bil precej neposreden in preprost ter je zahteval le nekaj orodij:
- križni izvijač
- Ploščati izvijač
- 10 mm ključ ali nasadni ključ in raglja
- Plastično orodje za dviganje
- Super lepilo
- Lepilni trak
1. korak:Odstranitev vratne plošče
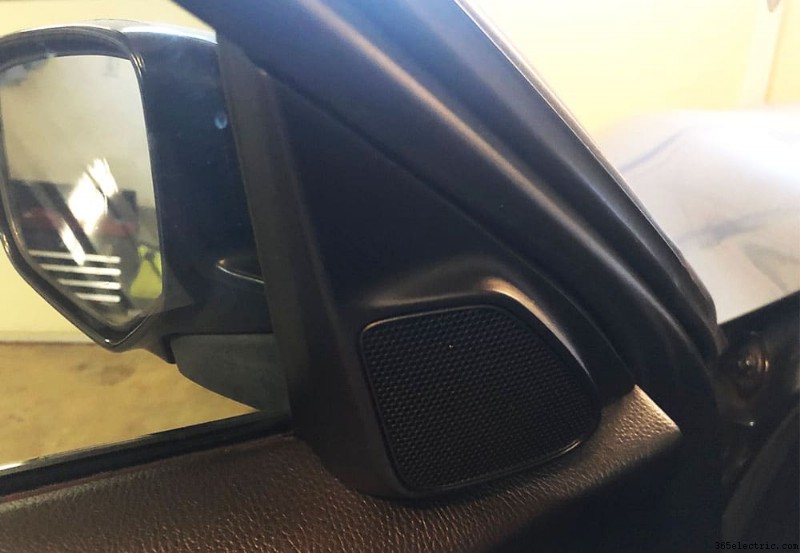
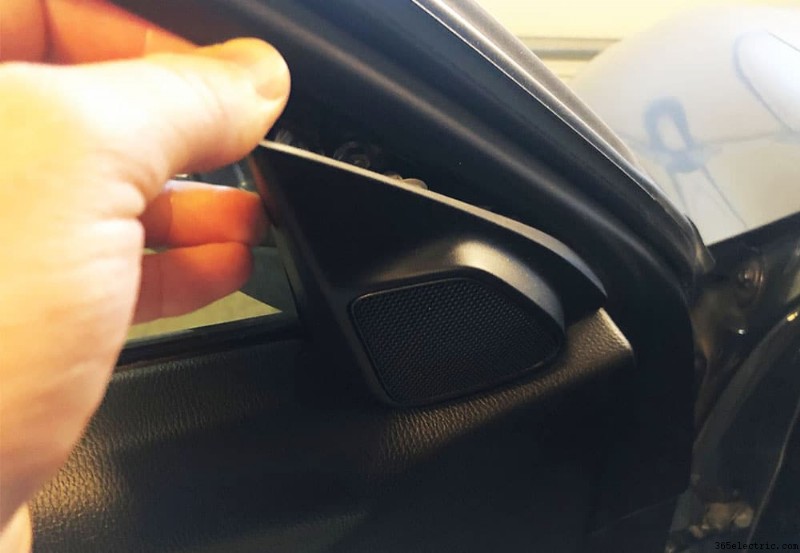
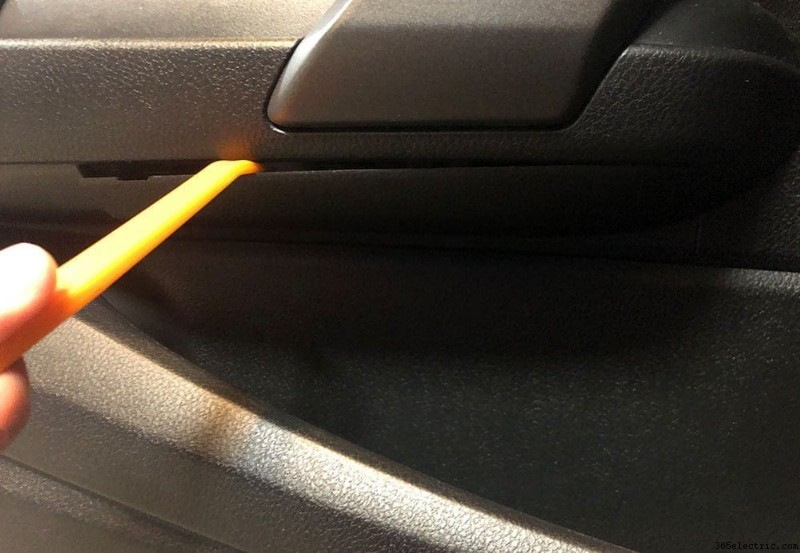
Prva stvar, ki jo morate storiti, je, da odstranite vijake vratne plošče ter odpnete in odstranite vratne plošče vašega Accorda. Če želite to narediti, začnite z visokotoncem na zgornji strani vrat. Postavite prste med okence in ploščo visokotonca in nežno povlecite. Za njim je ena sama sponka, tako da se odpne z relativno lahkoto. Ko odpnete, odstranite vtič enojnega visokotonskega zvočnika in postavite visokotonski zvočnik na stran.

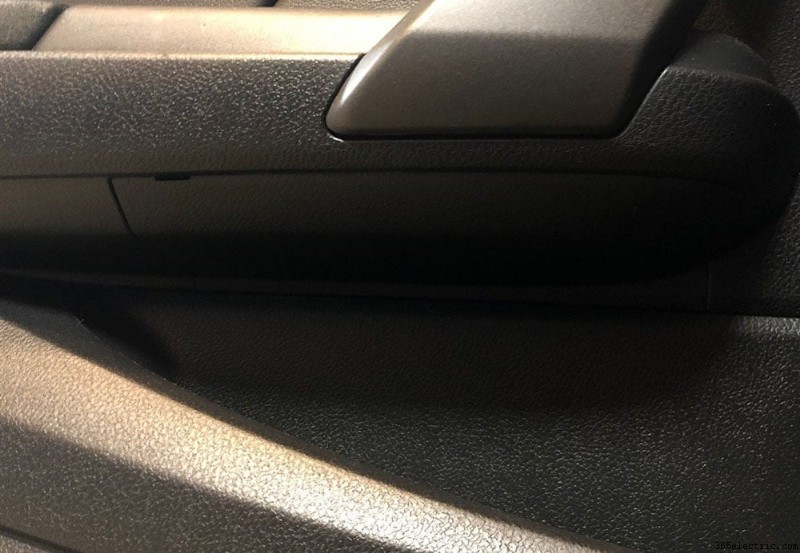
Ko odstranite visokotonec, se pomaknite navzdol do kljuke vrat. Za kljuko vrat je okrasni pokrov, ki pokriva tri vijake. Na vrhu plastičnega pokrova boste opazili majhno sponko. Z majhnim ploščatim izvijačem potisnite sponko navznoter in povlecite ploščo, da razkrijete tri vijake vrat. Odvijte vse tri vijake in jih postavite na stran za ponovno namestitev vrat.
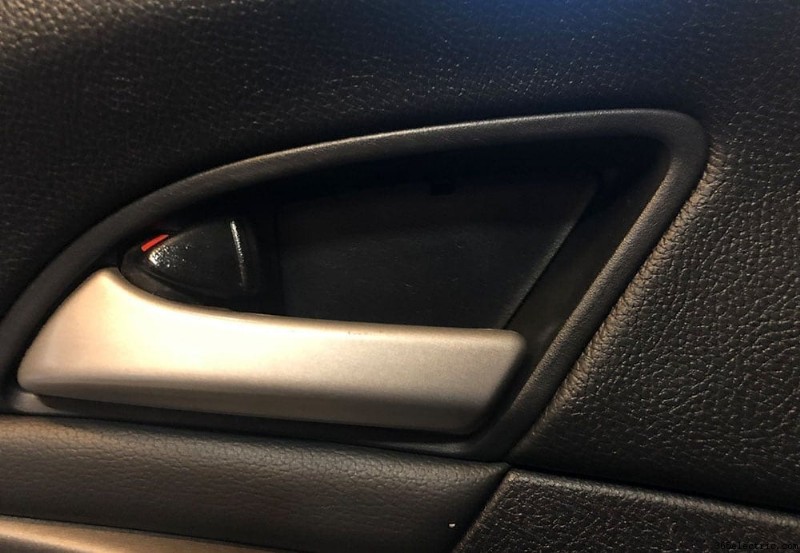
Na naslonu za roke in ročaju je še en vijak, ki ga je treba odstraniti. Vijak je pod gumijastim pokrovom, ki je nameščen na dnu vratnega ročaja. S ploščato glavo zagozdite med vogal in dvignite pokrov, da dobite dostop do vijaka pod njim. Nato odvijte ta enojni vijak vratne plošče.
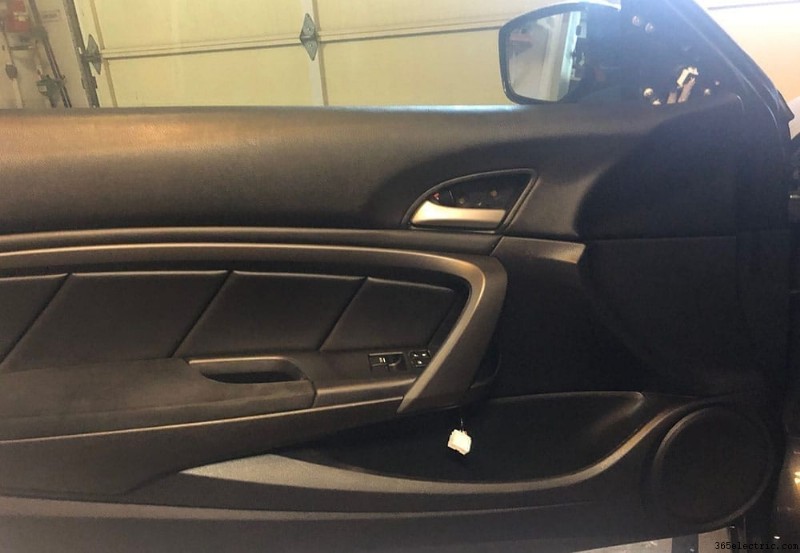
Zadnji vijak, ki ga boste morali odstraniti, je za ploščo na spodnji strani kljuke vrat. Z orodjem za zagozdo potisnite ploščo navzdol, da odstranite in pridobite dostop do vijaka za njo. Odvijte zadnji vijak in ga postavite na stran. Nato odpnite bele in sive čepe s plošče vrat in ju potisnite za ploščo v vrata. Tako se bodo vaša vrata lahko prosto premikala, ko potegnete ploščo z vrat.

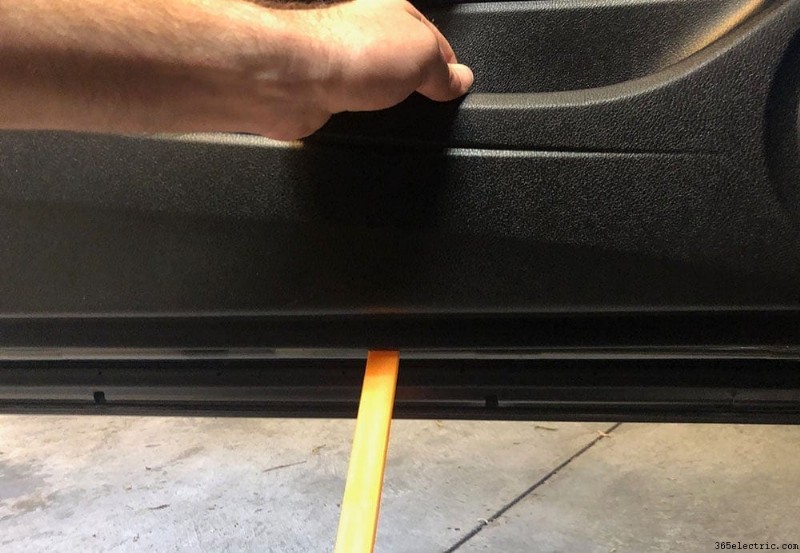
Ko ste odstranili vse vijake, visokotonec in stikalne vtičnice, ste pripravljeni, da osvobodite ploščo in jo odstranite iz vrat. To do this, wedge a large pry tool on the bottom side of the panel. If you don't have a pry tool large enough there's actually a space that your fingers will fit in along the bottom side of the panel.
Pulling from the very bottom side of the panel and from the cubby area, pull the door panel outwards away from the door to unclip all of the bottom door clips. Typically this will be a loud and abrupt ‘POP' and the bottom side of the panel will break free. There are clips along side the entire bottom of the panel and one or two on the side.
Once all of the clips are free, lift upwards on your door panel to remove it. Once it's lifted away from the door the last piece you'll need to pull free from the panel is the handle. There's a few plastic clips on the back side of the handle that you'll just need to lift upwards to break the handle free and detach it from the door panel.
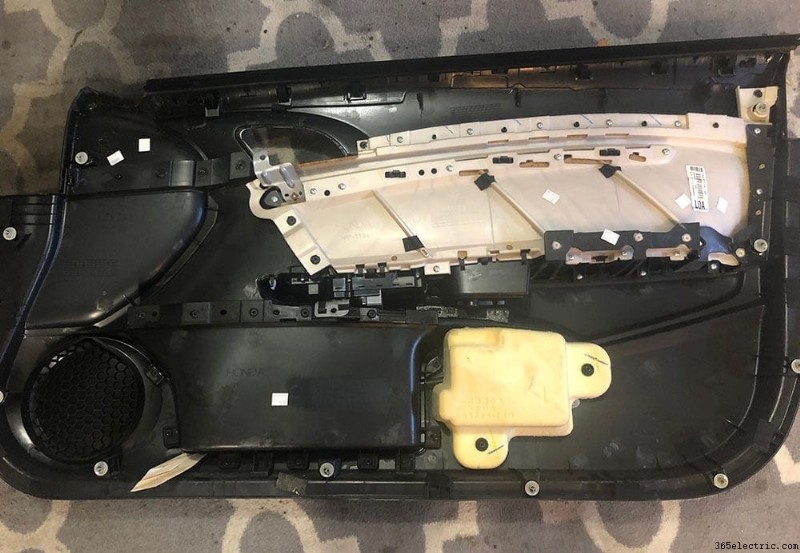
Place it on a rug or towel to prevent any scratching of the surface.
Step 2:Removing Your Broken Door Actuator
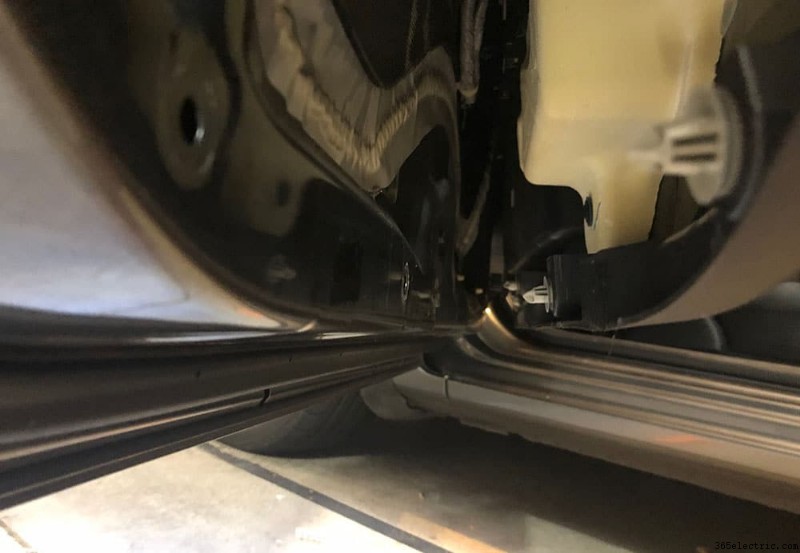
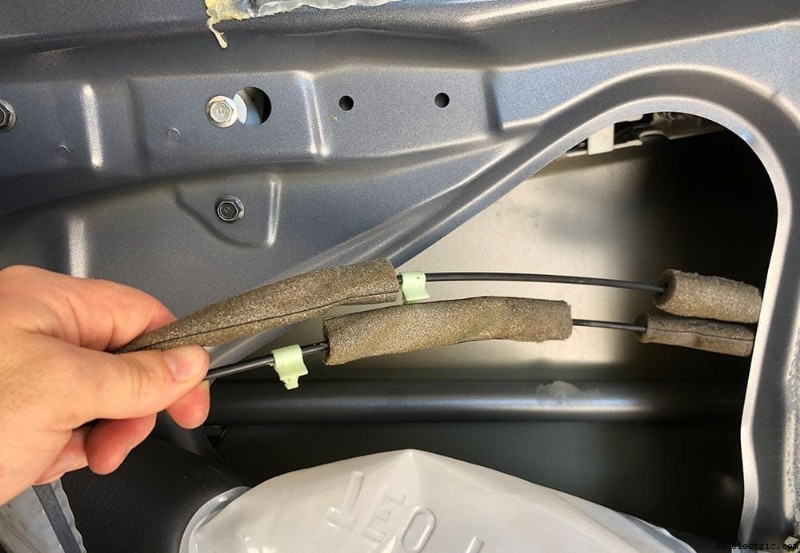
With your door panel removed, you now will be able to gain access to the back side of the door and ultimately the actuator. To begin, you'll need to get behind the damping material that covers the opening of the door panel so that you can reach and access the cable and actuator rod. You can do this by running a razor blade along the adhesive that holds the damping material to the door and peel the material back a foot or two – enough to reach the actuator. In my case I cut a sizable slit in the center to try to limit the damage to the damping.
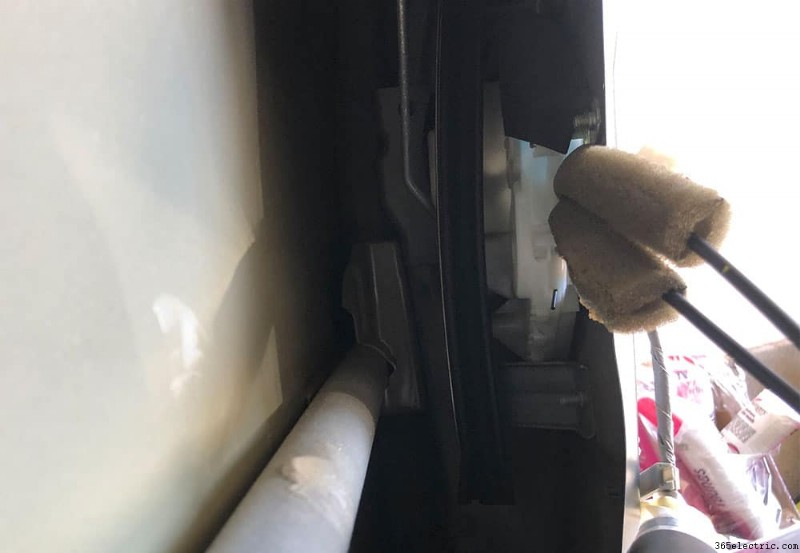
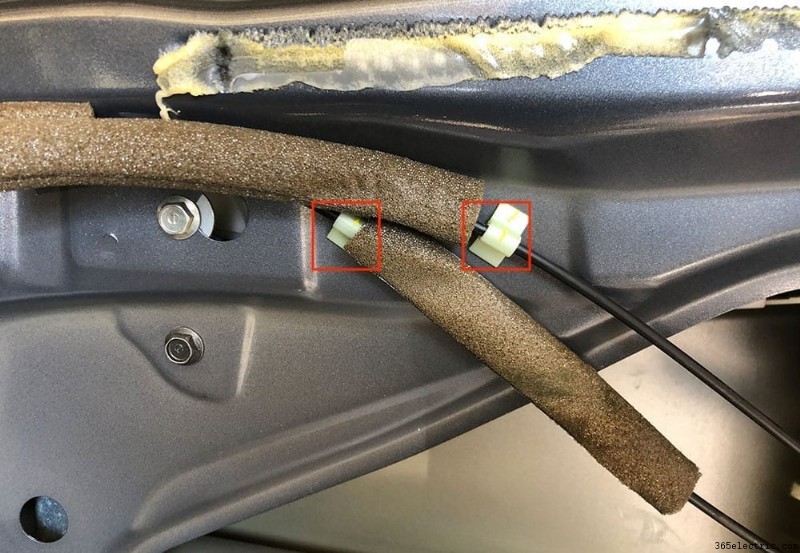
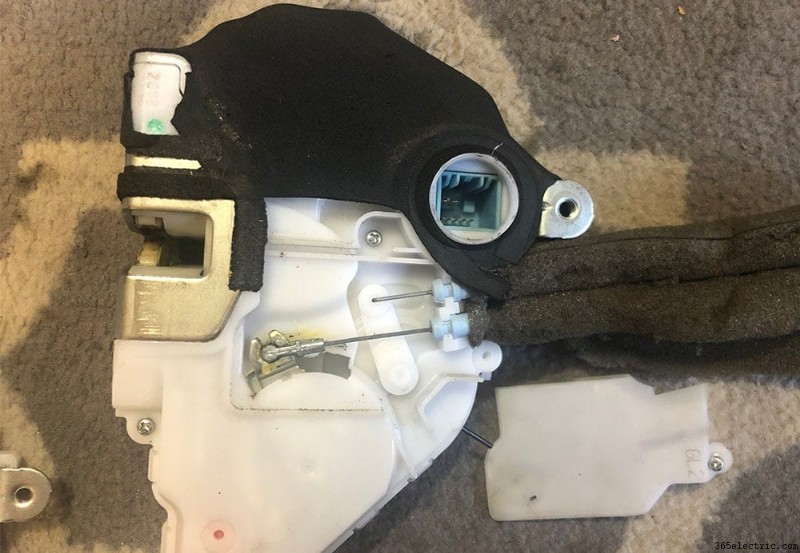
Next, you'll need to unclip the door latch cable that runs along the door and into the back side of the actuator. Once unclipped you can either feed the cables and latch through the damping material or you can leave it hanging for now until you remove the actuator.
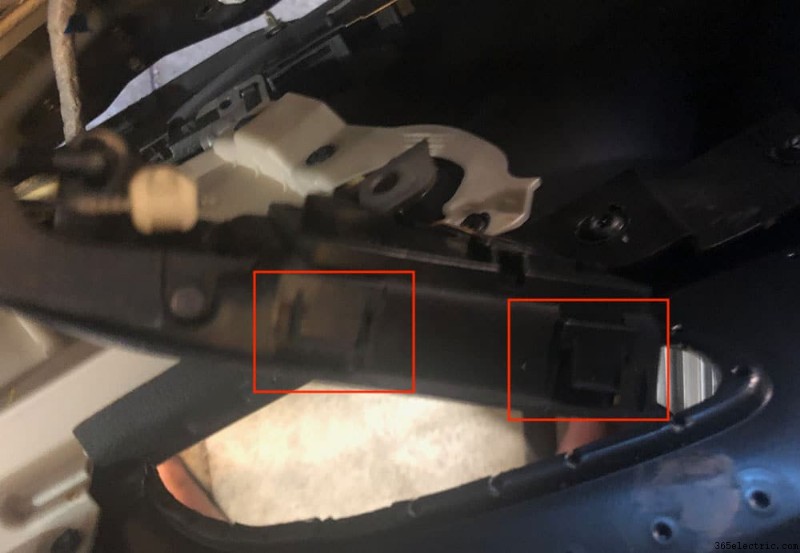
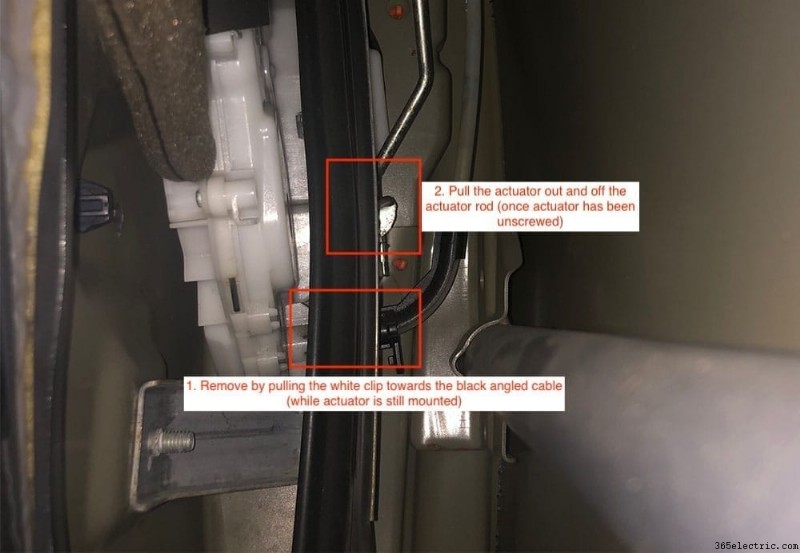
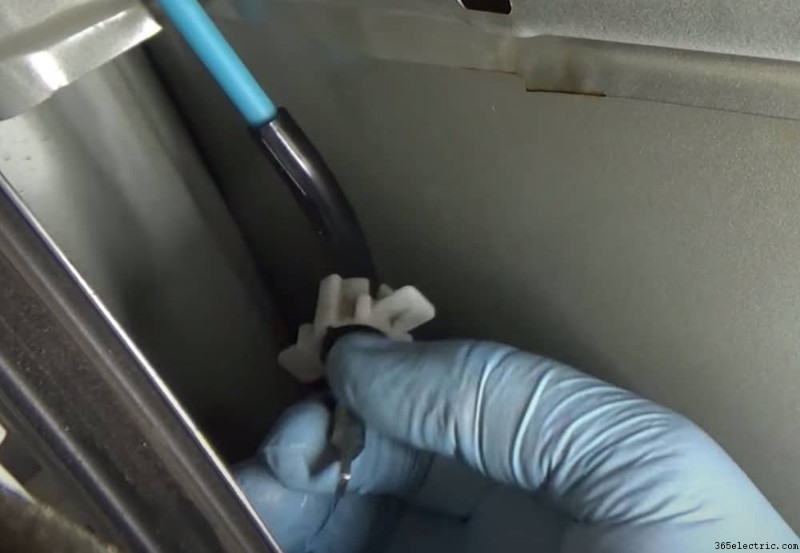
Using the slit in the damping to access the actuator, for those who are replacing the driver side actuator you'll need to remove a single cable that feeds directly into the back side of the actuator (*note this single cable that goes to the back-side of the actuator is only located on the driver side door actuator) . To do this, you need to grasp the white clip that surrounds the black cable housing and pull it away from the actuator to get it to unclip. Once it's unclipped you can remove the cable from the actuator itself (see images). Finally, pull out the plug that powers the actuator.
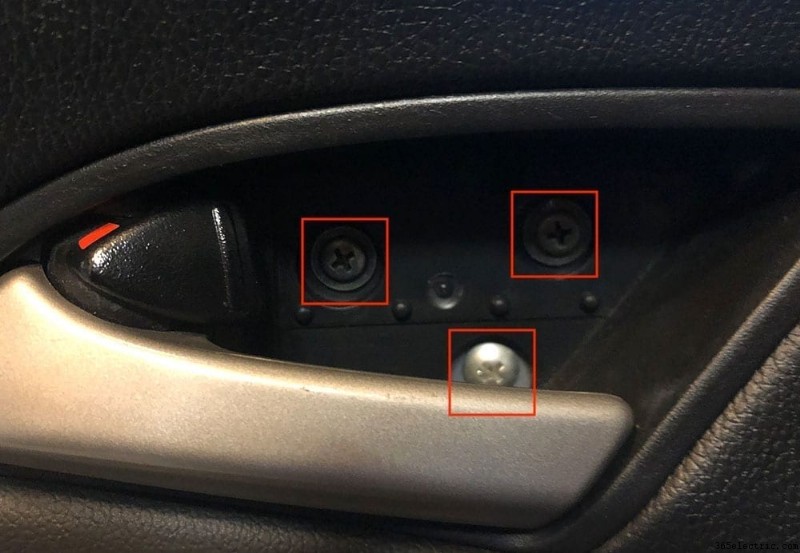
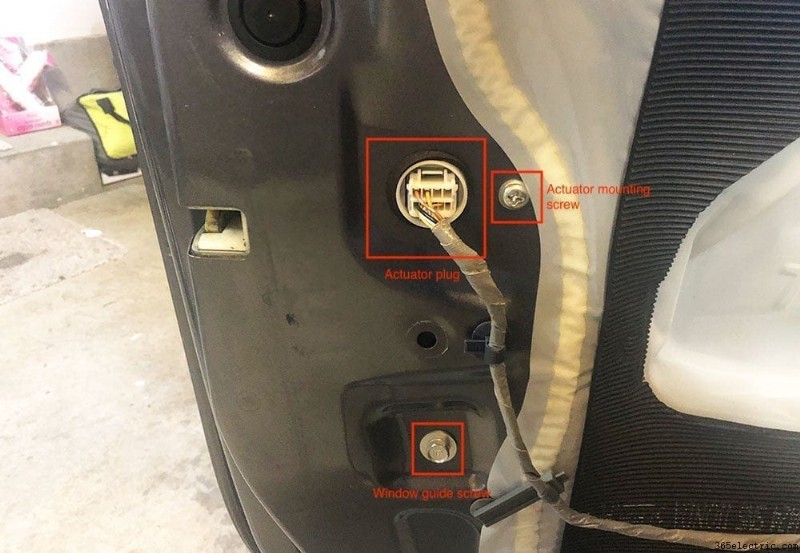
With the cables unhooked from the door and the single cable removed from the back side of the actuator you're ready to unmount the actuator from the door. There are a total of 4 phillips screws that hold the actuator to the door. Remove all 4 screws along with the 10mm bolt that holds the window guide behind the door. This will allow you to pull the actuator from behind the door a little easier with the window guide pushed aside.
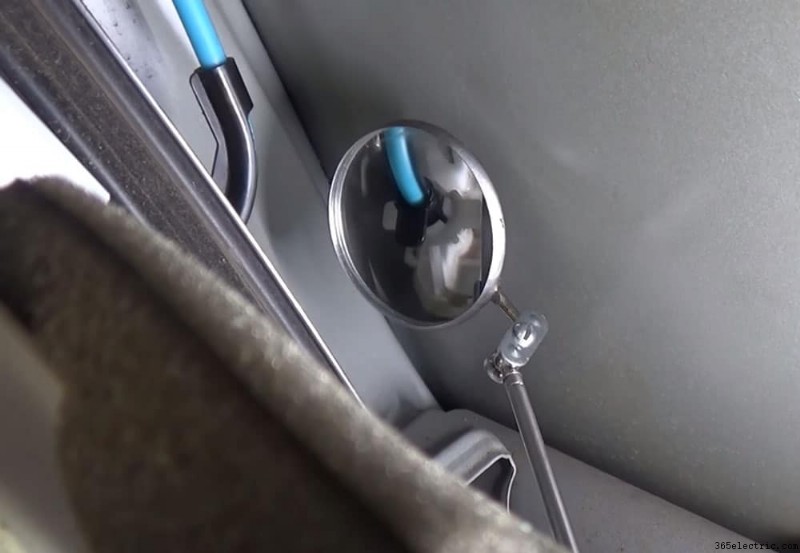
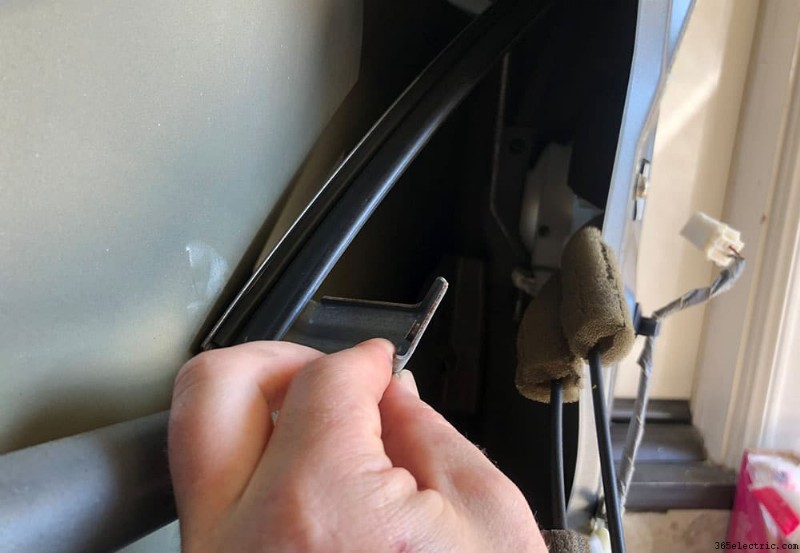
Start to pull the actuator from the door, working the remaining rod out. Once the rod is removed you can pull actuator out completely and begin the process of preparing your new actuator.

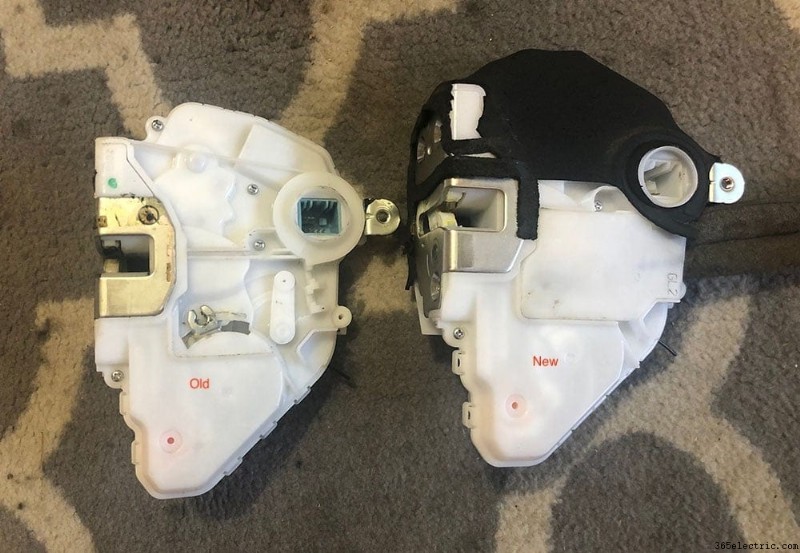
Step 3:Prepping Your New Door Actuator
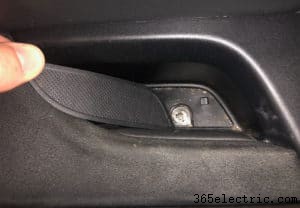
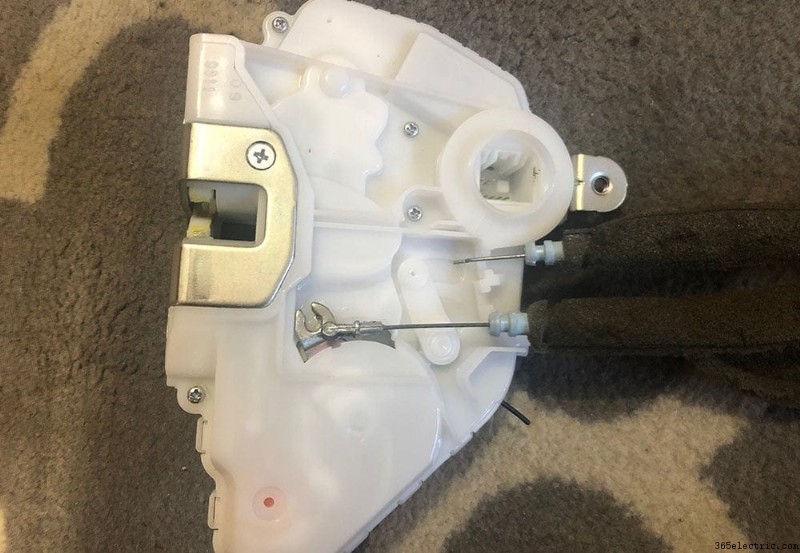
There's a couple things you'll need to do to prepare your new door actuator for installation. First, the door handle cables that run to the interior door handle will need to be pulled from the old actuator and installed on the new one. There's a panel that covers the cables with a single phillips screw holding the cover in place. Unscrew the panel to gain access to the two cables.
Remove the two cables from the old actuator and then place it onto the new one along with the cable cover, screwing it back into place.
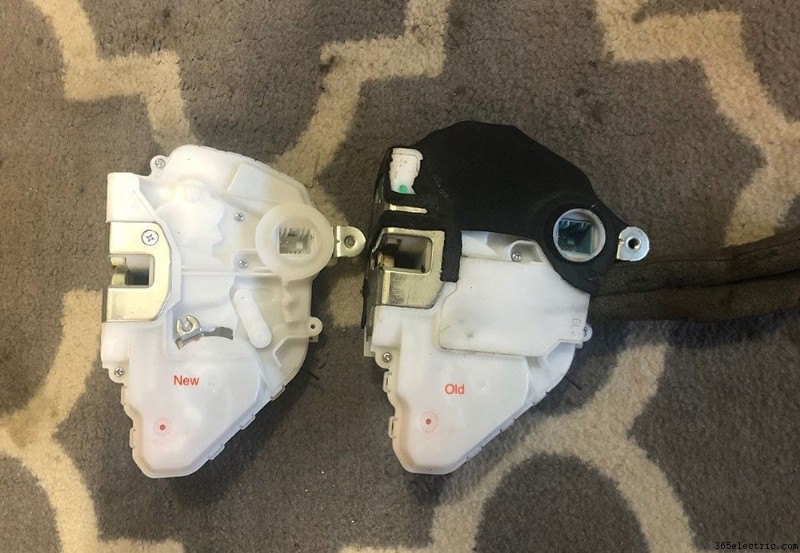
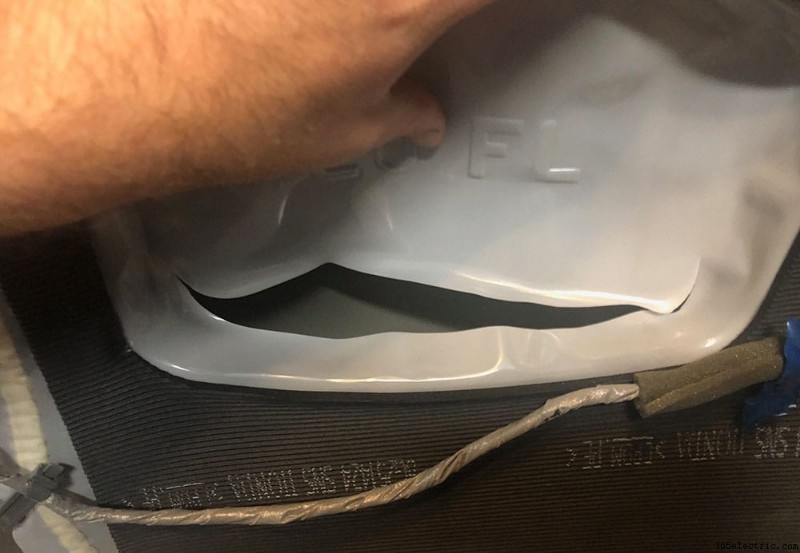
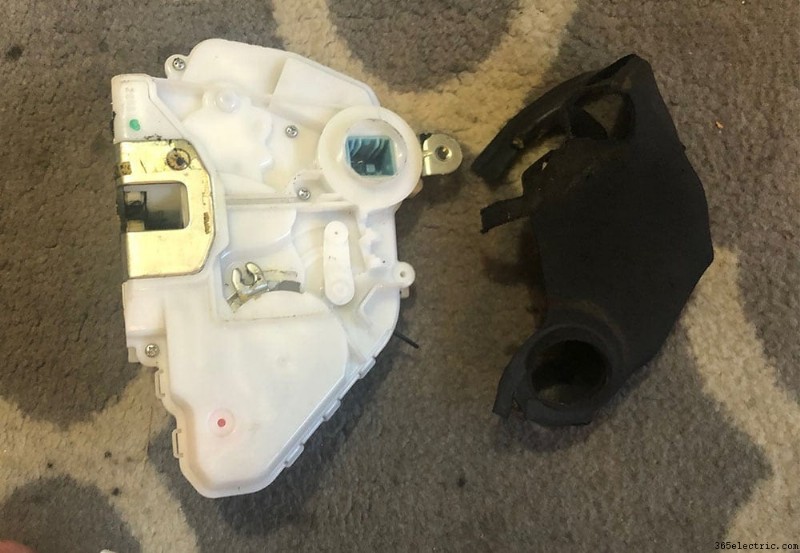
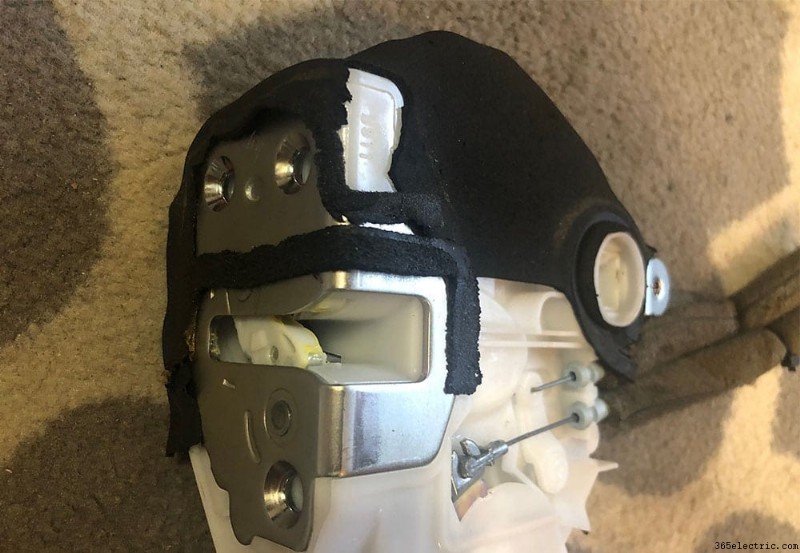
Once the cables are in place on the new actuator, the only thing left to do is to remove the old padding that's on the old actuator and place it onto the new one. Unfortunately, the new actuator doesn't come with the padding so it'll need to be reused from the old, broken unit.
I used a razor blade to separate the padding from the actuator with minimal damage and then used a few dabs of super glue to fuse it to the new one. For the most part, the padding is placed between the door and the actuator so naturally when it's mounted it'll stay in place.
Step 4:Re-installing Your Actuator and Door Panel
The rest of the process is pretty simple. Re-install your actuator, feeding the actuator rod back into the actuator and then mounting it to the door. Plug the actuator plug back in, then insert and re-clip the single cable back into the backside of the actuator.
After the actuator is mounted and the cables are in place, be sure to re-install your window guide and screw it in, along with clipping back the door handle cables to the door.
At this point, you're ready to test your new actuator. Close your door (note that you should ensure the door is unlocked before you close it), and then use your remove to lock and unlock to ensure your new actuator is working properly.
As for the slit that you cut (if you cut one) into the damping, I used some heavy duty duct tape to seal it back up. With the damping fixed you can re-install the door panel, ensuring that the window and door lock buttons are plugged back in. Re-install your tweeter, and you're done!
Hope you enjoyed the how-to, please feel free to leave us a note or ask questions in the comments below!