Kako:Zamenjava zvočnikov na vratih na 09-18 Ram 1500
Potreben čas:3 ure 30 minut
Težavnost:enostavno
Ramov stereo 4. gen 1500 je bil takrat spodoben. Če je imela 3. generacija par 6x9 spredaj in 6,5-palčne koaksialne zadaj, je 4. generacija imela sistem s 6 zvočniki. Ta sistem s 6 zvočniki je sestavljen iz dveh parov 6×9-palčnih zvočnikov v sprednjih in zadnjih vratih skupaj s parom 3 1/2-palčnih zvočnikov v armaturni plošči.
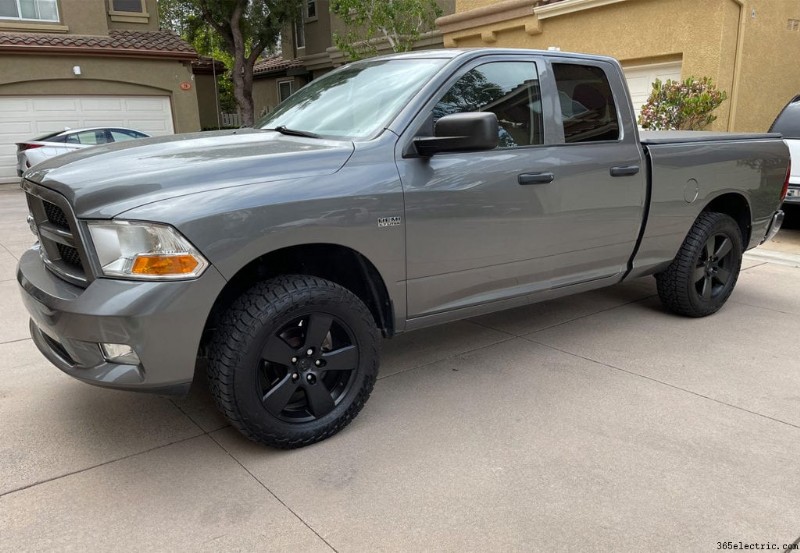
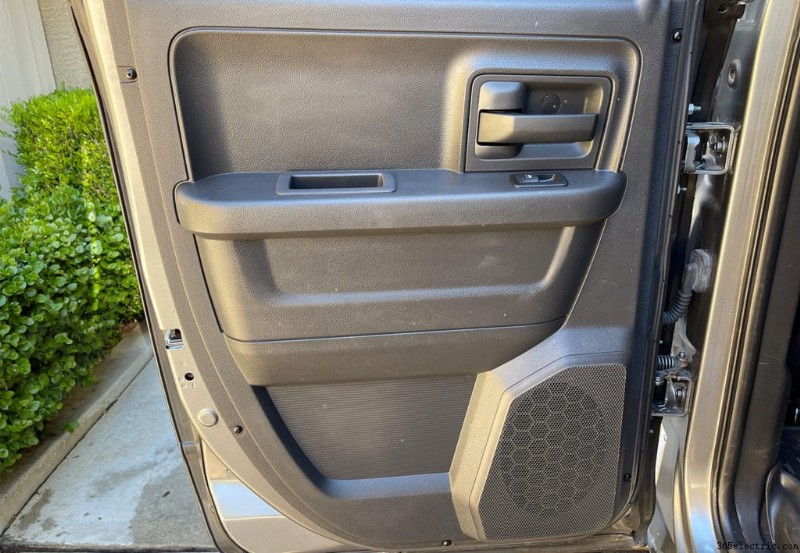
V današnjem članku bom nadgradil zvočnike na sprednjih in zadnjih vratih v kabini Ram 1500 Express Quad Cab 4. generacije iz leta 2012. Stereo sem že nadgradil in pod sedež namestil električni nizkotonec, zaradi česar je bil odličen kandidat za dober par zvočnikov. Za nadgradnjo bom uporabil Sonyjevo novo linijo zvočnikov Mobile ES. Tukaj je pogled na tovornjak.
Ne glede na to, ali je vaš zvočnik pokvarjen ali pa želite samo solidno nadgradnjo za več glasnosti in jasnosti, je postopek namestitve enak. Na koncu članka bi morali imeti vse, kar potrebujete za namestitev nadgrajenih ali nadomestnih zvočnikov v vratne plošče vašega Ram.
Potrebni deli in orodja
Orodja:
- Philips in ploščati izvijač
- Torx nastavek ali izvijač T-20
- 5 mm vtičnica in zaskok
- Orodje za dviganje plastične plošče
- Orodje za dviganje plastične sponke
- Nož za suhomontažo
- Spajkalnik in spajkalnik (preverite 3. korak, če ga potrebujete)
Deli:
- 6×9″ zvočniki (2 para, če uporabljate sprednje in zadnje)
- Metra 72-6514 (izbirno, odvisno od 3. koraka)
- Žica za zvočnik (preverite 3. korak, če jo potrebujete)
Kako zamenjati zvočnike na prednjih vratih
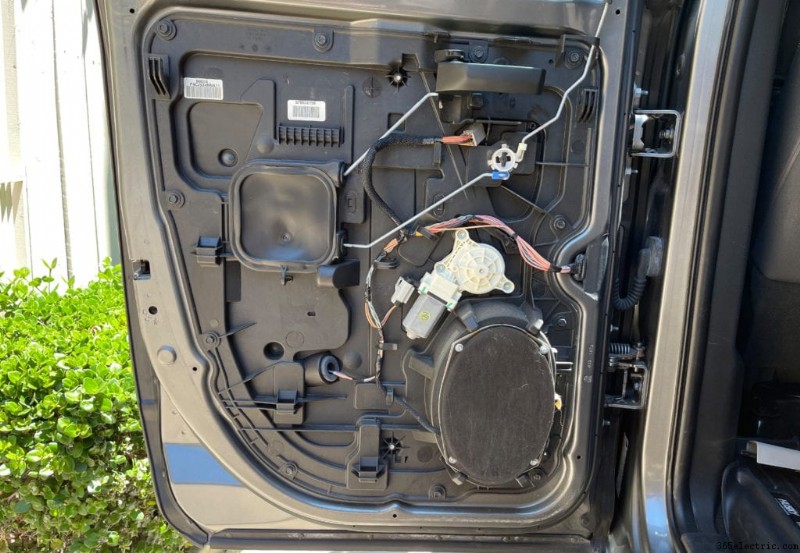
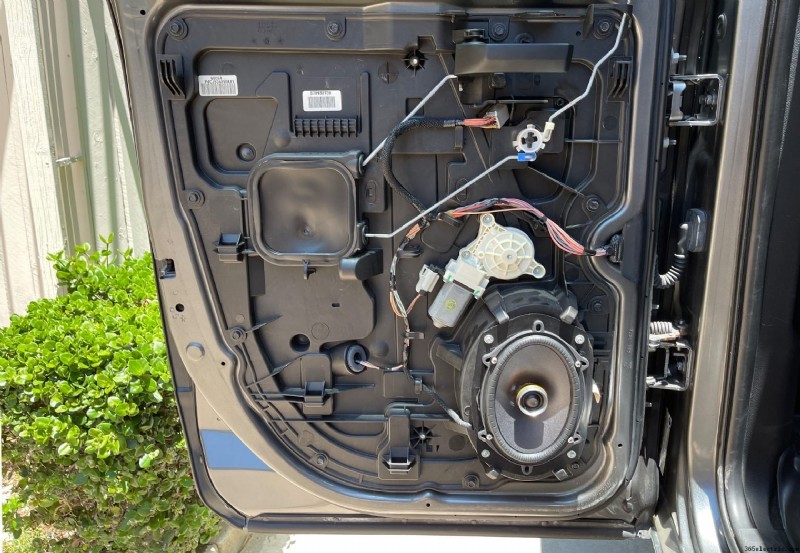
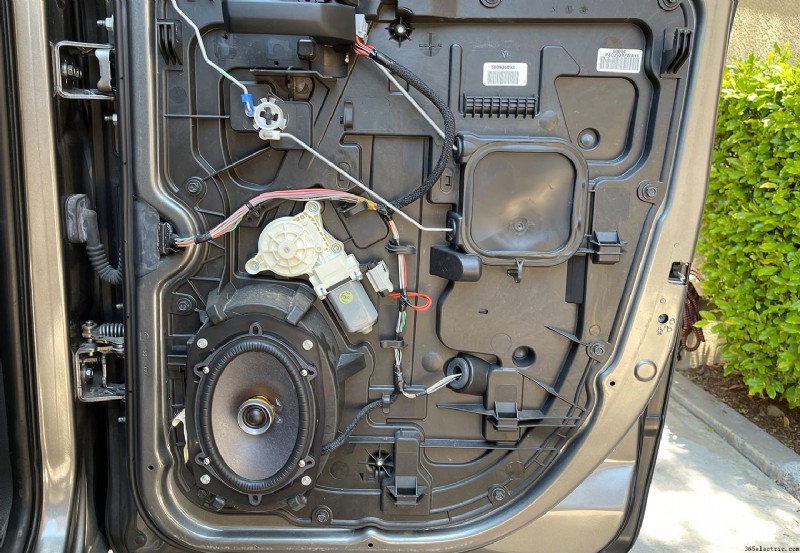
Prvo, kar sem začel pri tem tovornjaku, so bili zvočniki na prednjih vratih. Za dostop do zvočnikov morate najprej odstraniti vratno ploščo. Je precej preprost in hiter.
1. korak:Odstranite vratno ploščo
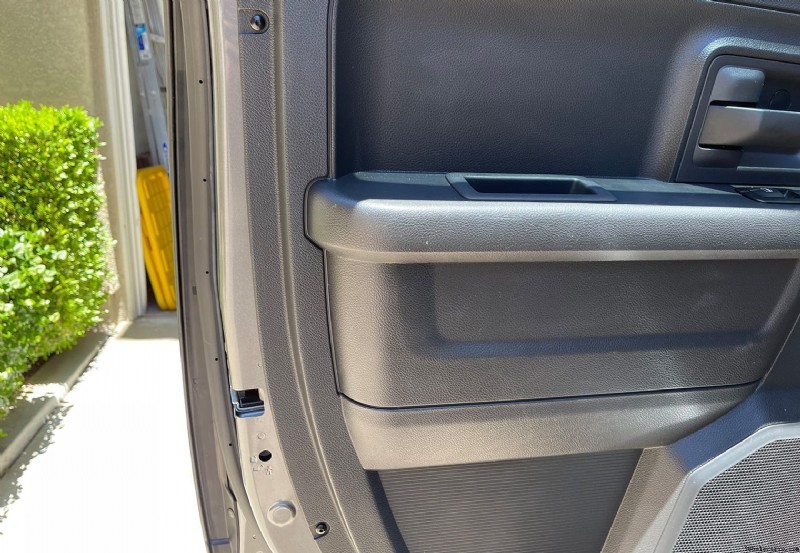
Plošče sprednjih vrat imajo skupaj 6 vijačnih sponk, za katere boste potrebovali nastavek T-20 torx, da jih odvijete in nato izvlečete. Dva sta na levi, dva na dnu in dva na desni. Odstranite vse te sponke in jih postavite na varno mesto.
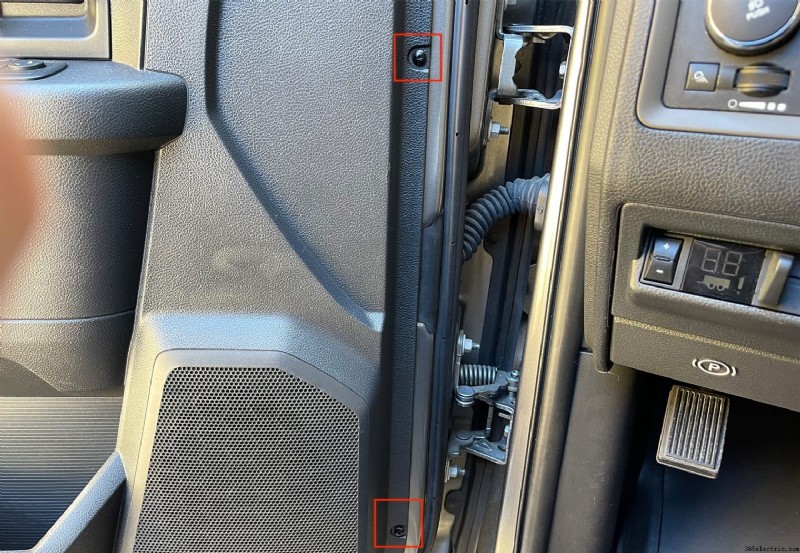

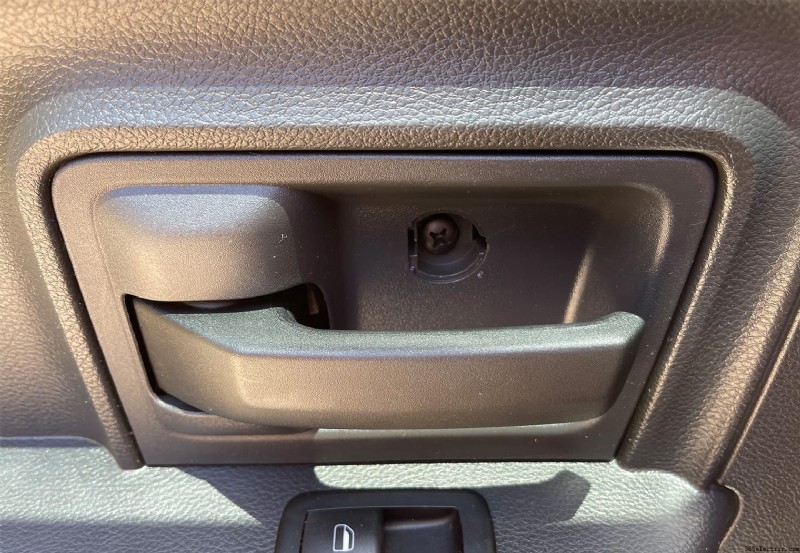
Nato boste morali odstraniti enojni križni vijak, ki se nahaja za ročajem. Z majhno ploščato glavo odstranite pokrov vijaka, ki se nahaja neposredno za ročajem, in z velikim križnim izvijačem odstranite vijak. Ko odstranite vijak, povlecite majhno ploščo, ki obdaja ročaj.

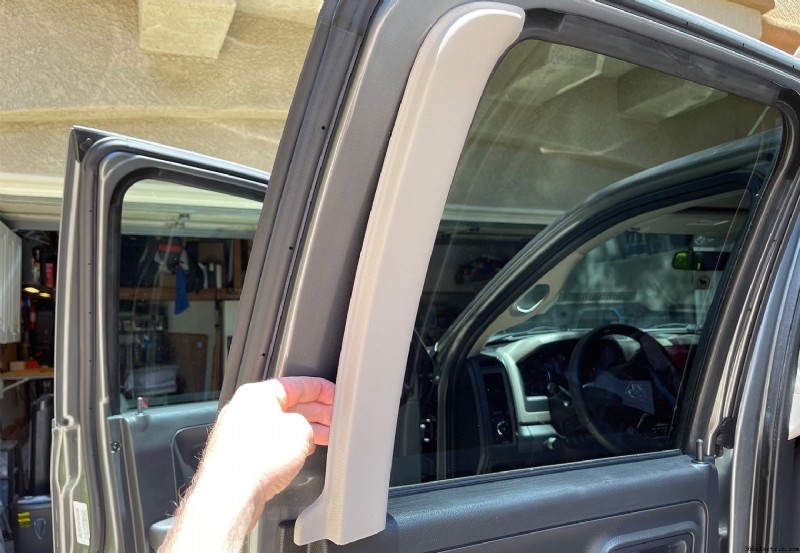
Ko ste zdaj odstranili vse vijake s plošče, boste morali odpeti obrobo na zgornjem, notranjem delu vrat. To naredite tako, da zgornjo stran te plošče povlečete navzven in celotno ploščo boste enostavno odstranili.
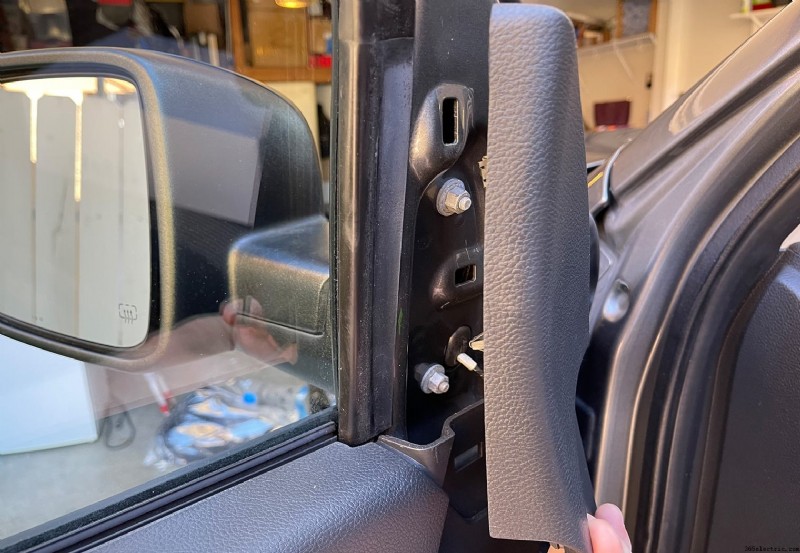
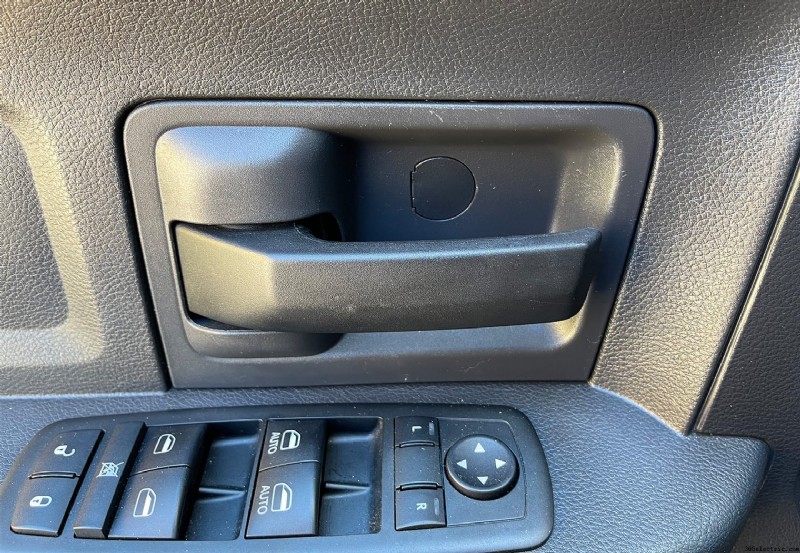
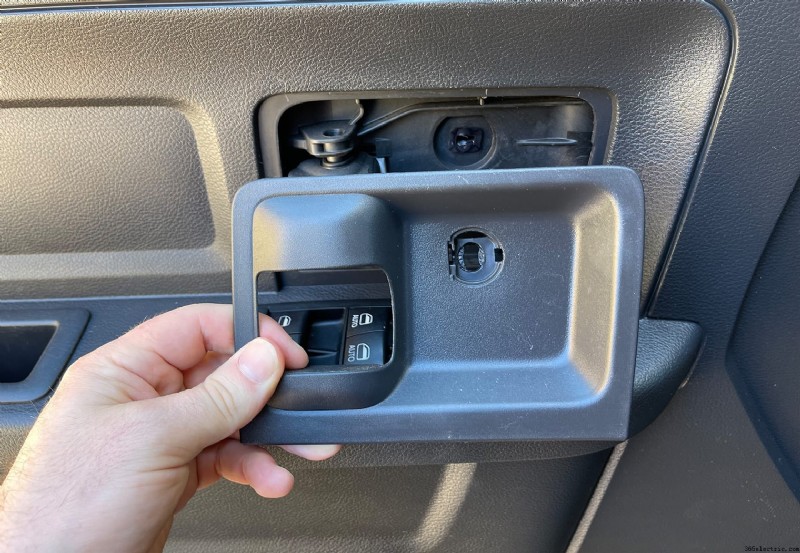
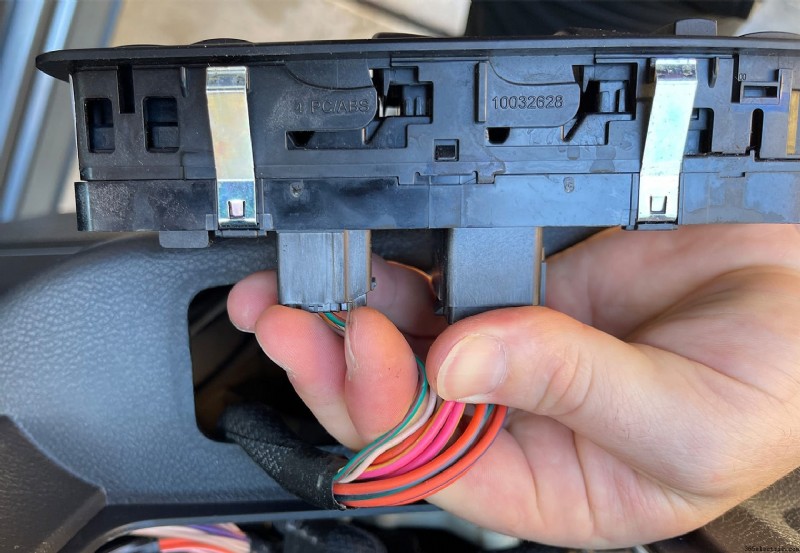
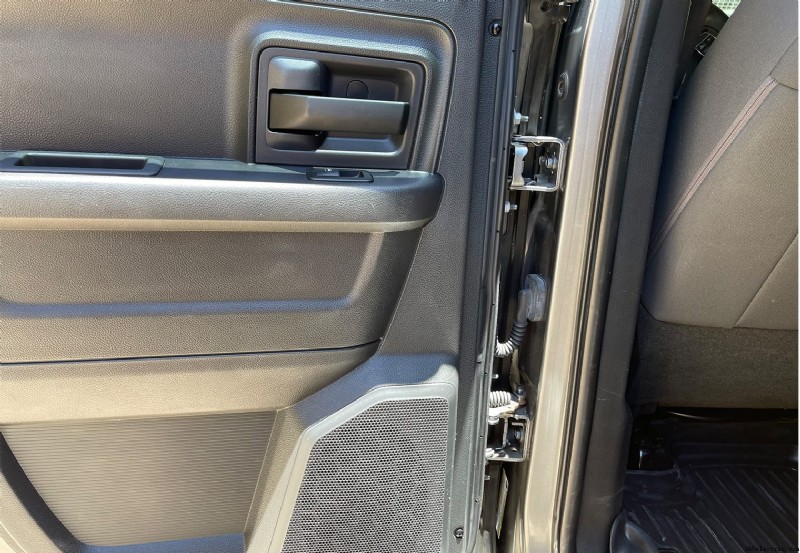
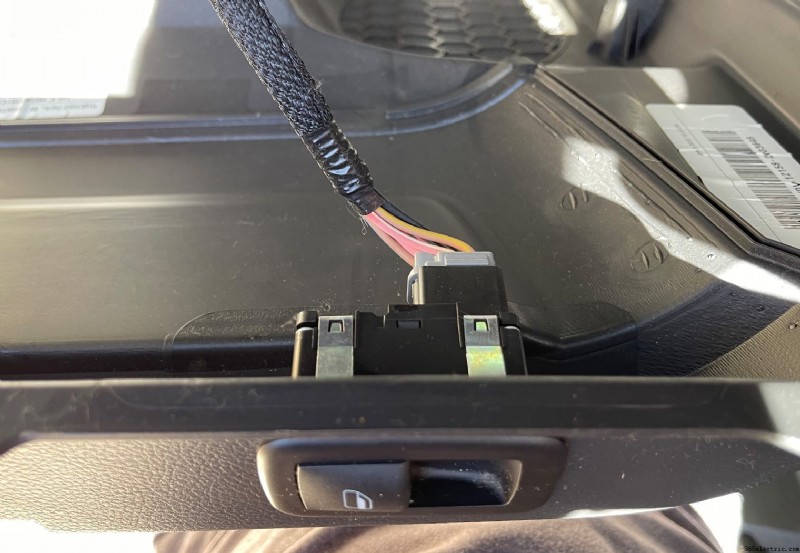
Zdaj lahko pri tem koraku začnete odstranjevati vratno ploščo ali pa odstranite nadzorno ploščo okna/ključavnice in jo najprej odklopite. Najprej sem odstranil vratno ploščo in nato odpel nadzorno ploščo na vratih, vendar je vaša izbira.
Če želite odstraniti vratno ploščo na tej točki, samo dvignite ploščo navzgor in nato navzven. Nato sem ponovno odpel nadzorno ploščo, tako da spodnje fotografije prikazujejo to. Lahko pa uporabite tudi orodje za dviganje, da odpnete nadzorno ploščo okna, jo odklopite in nato odstranite ploščo vrat.
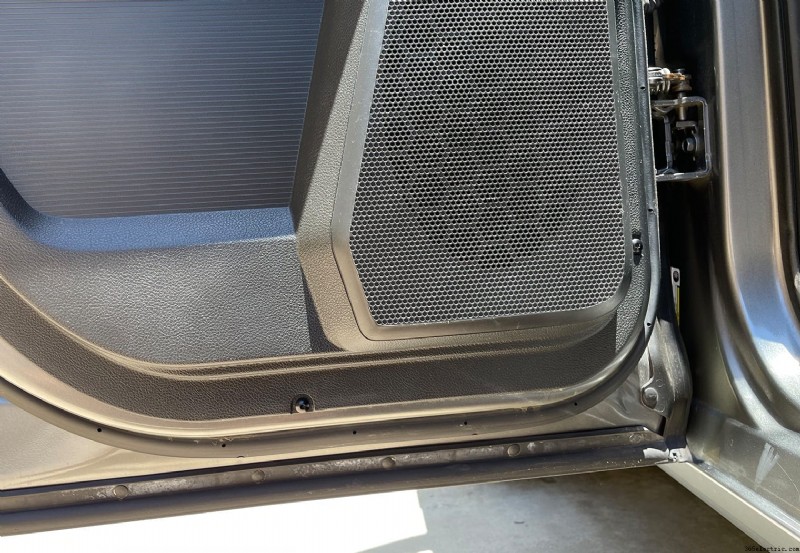
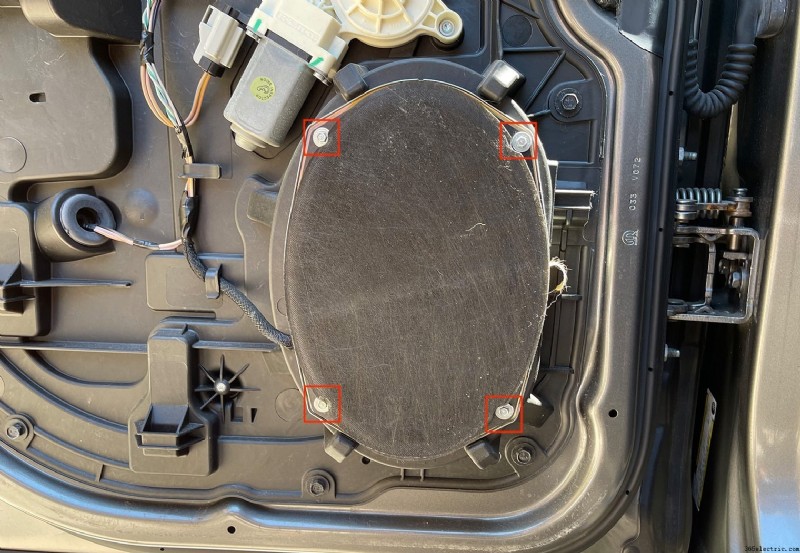
2. korak:Odstranite zvočnik
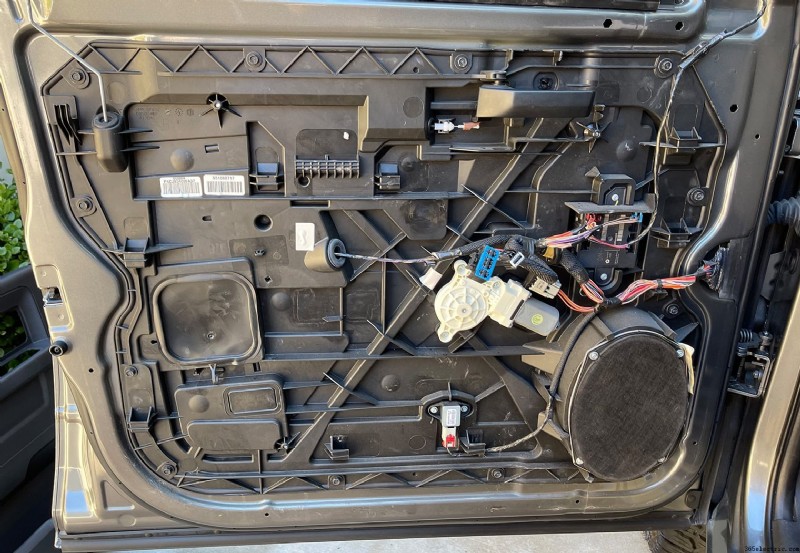
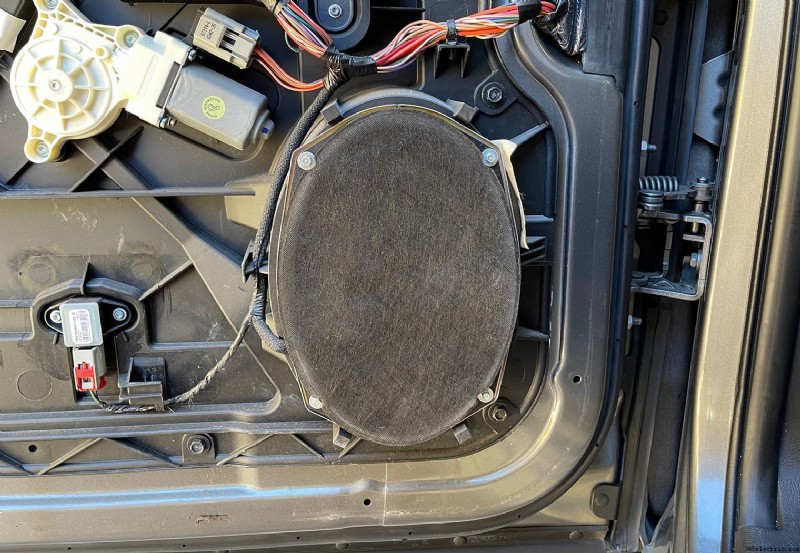
To je najlažji del tega postopka. Zvočnik na vratih je pritrjen s 4 vijaki. Za odstranitev vijakov sem uporabil 5 mm vtičnico (čeprav je verjetno standardna velikost). Odstranite vijake, nato bo zvočnik zlahka prišel ven. Odklopite zvočnik in ga popolnoma odstranite iz vozila.
3. korak:Priprava novih zvočnikov
Ta korak ni obvezen in ga je mogoče izvesti na več različnih načinov. Osebno vedno rad ponovno uporabim obstoječe sponke za zvočnike, da ustvarim adapter za nove zvočnike. Če želite tudi prihraniti 15 dolarjev, je to dober način za to. Druga možnost je nakup Metrinega 77-6514 (en komplet na par zvočnikov). Če se odločite za adapterje Metra, ne boste potrebovali žice za zvočnike, spajkalnika ali spajkalnika, navedenega v razdelku Deli in orodja, in lahko preskočite na 4. korak.
Kakor koli že, ne glede na to, ali izdelate svoje, kot sem jaz, ali jih kupite, bodo adapterji omogočili, da bodo novi zvočniki plug and play. Ni vam treba skrbeti za spajkanje zvočnika na mestu na vratih ali kako drugače ožičenje novega zvočnika z omejenim prostorom na vratih.
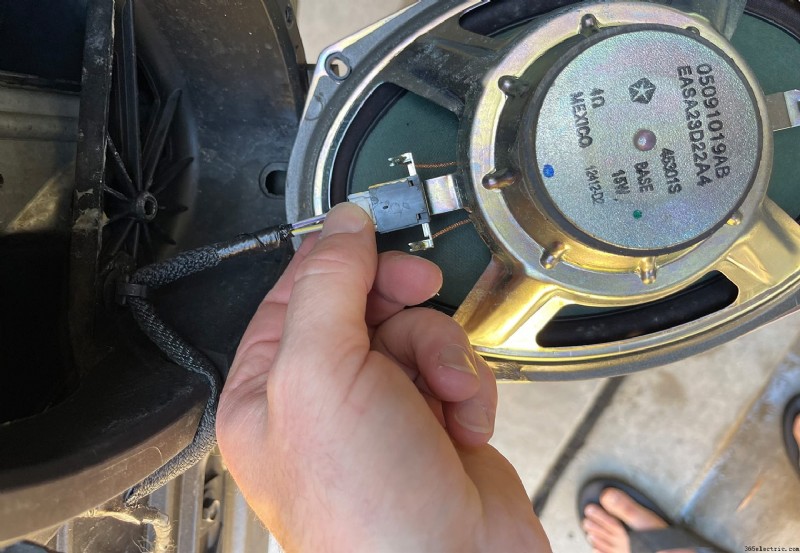
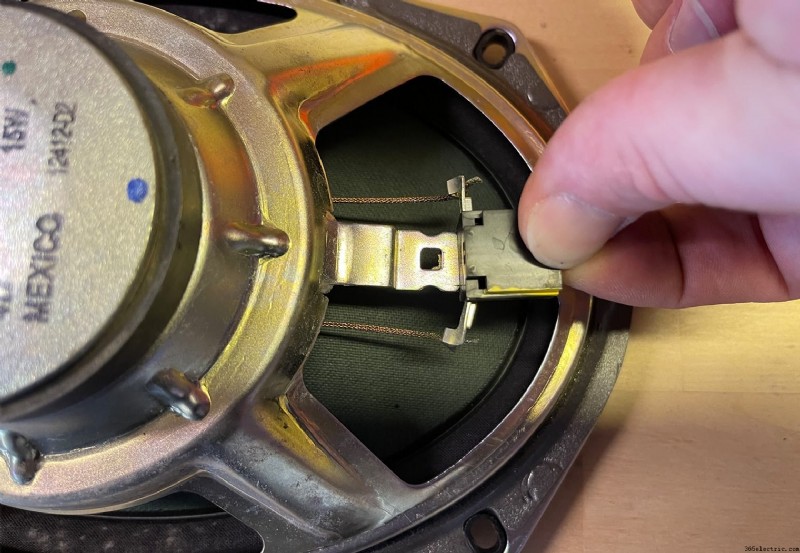
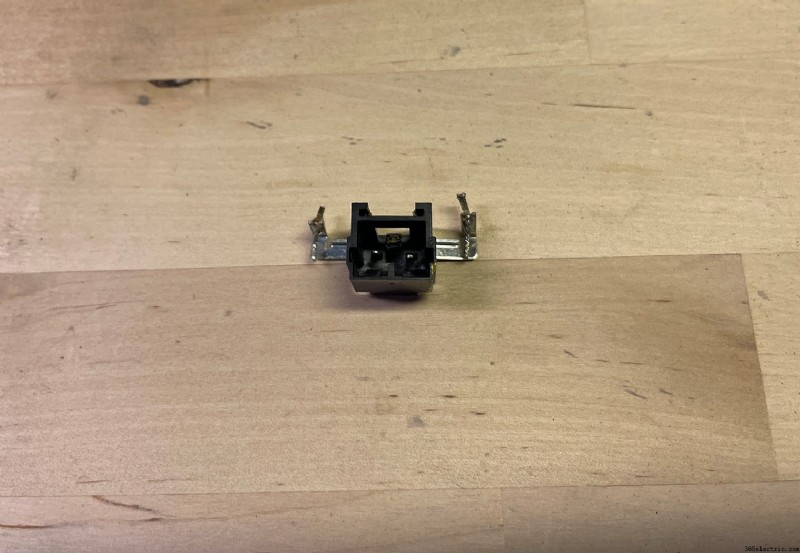
Če želite ustvariti svoje adapterje, morate najprej odrezati žice na hrbtni strani vtiča, ki je na zvočniku (ne v vratih!), nato pa s ploščatim izvijačem odpeti vtič iz okvirja zvočnika.
Ko je vtič odstranjen, morate zdaj ugotoviti, katera stran vtiča je pozitivna in katera negativna, da boste vedeli, kako ga povezati z novim zvočnikom. To naredite tako, da odstranjeni vtič vrnete na vratno ploščo in ga priključite. Nato uporabite naslednje barve žic, da ugotovite, katera stran vtiča je pozitivna in katera negativna:
- Žica sprednjega levega zvočnika (+):siva/vijolična
- Žica sprednjega levega zvočnika (-):siva/rumena
- Žica sprednjega desnega zvočnika (+):temno zelena/vijolična
- Žica sprednjega desnega zvočnika (-):temno zelena/rumena
Označite pozitivno stran, da jo lahko pravilno povežete z novim zvočnikom. V mojem primeru je bil vtič dejansko že označen na pozitivni strani z rumenim markerjem. Tvoja je lahko ali pa tudi ne. Ko je vaš vtič označen, lahko zdaj začnete pripravljati in priključiti vtič na svoj novi zvočnik.
Če želite to narediti, s spajkalnikom odstranite staro žico zvočnika in pokositrite vtič z novim spajkom. Nato z žico 2-3″ prispajkajte pozitivno in negativno žico na vtič.
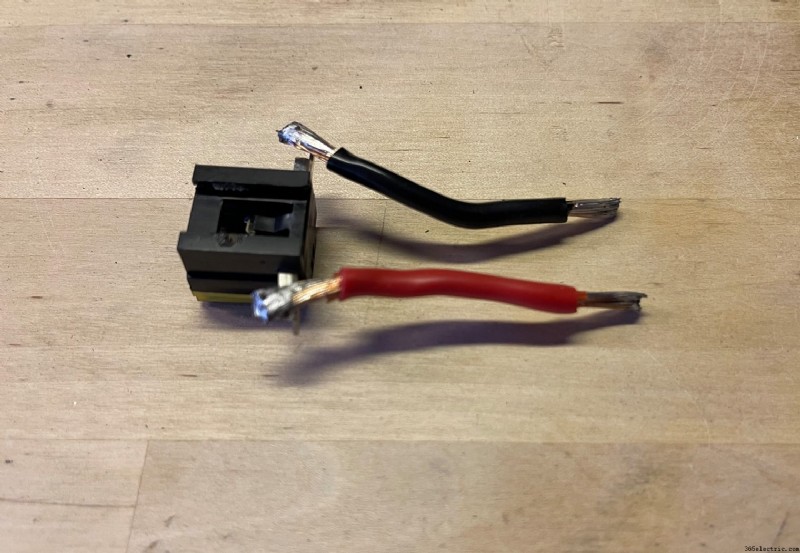
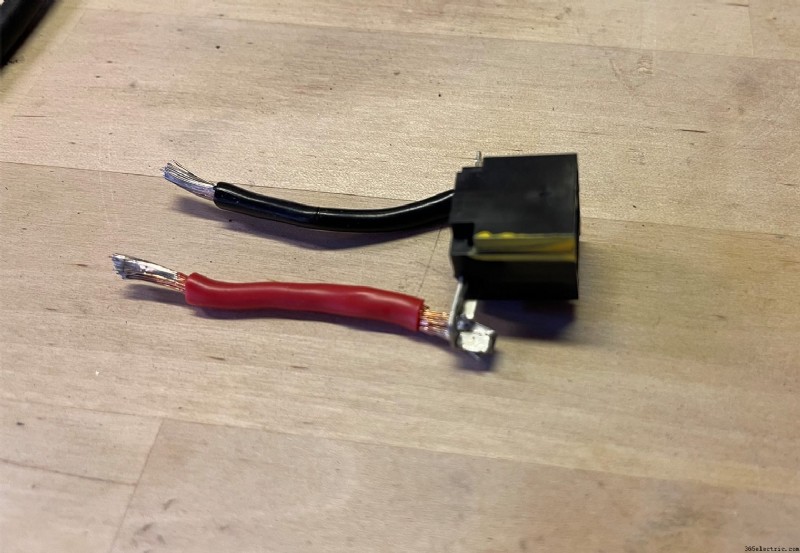
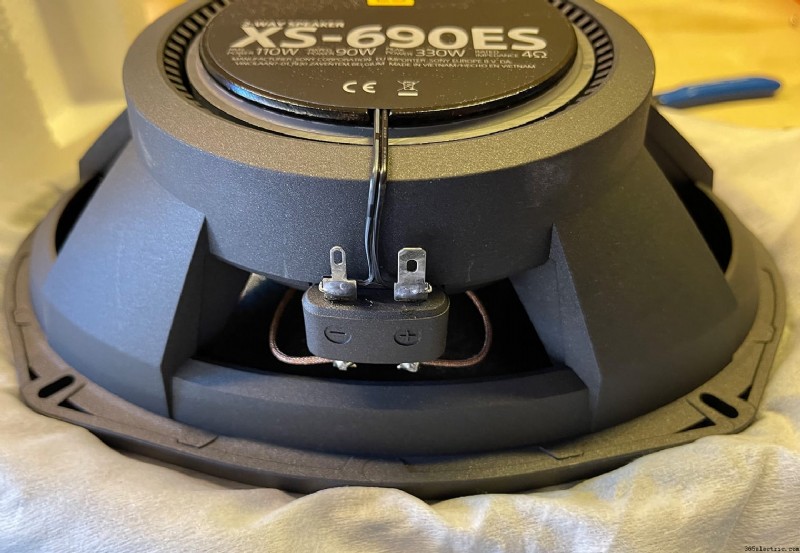
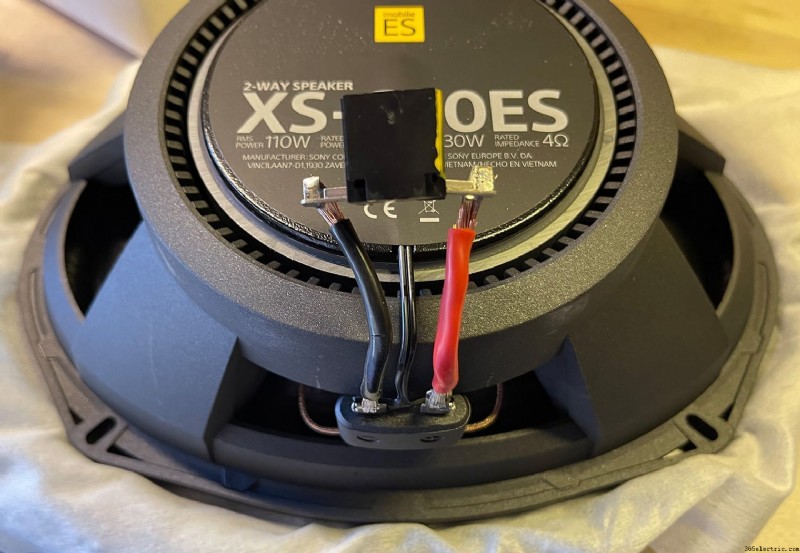
Ko ste pripravili vtič za zvočnike, ga boste zdaj pritrdili na priključke zvočnikov. To sem naredil tako, da sem ga spajkal neposredno na priključne kable zvočnika Sony, ki sem ga uporabljal.
To boste želeli storiti z vsemi zvočniki, ki jih nameščate hkrati, verjetno zato, da kar najbolje izkoristite svoj čas.
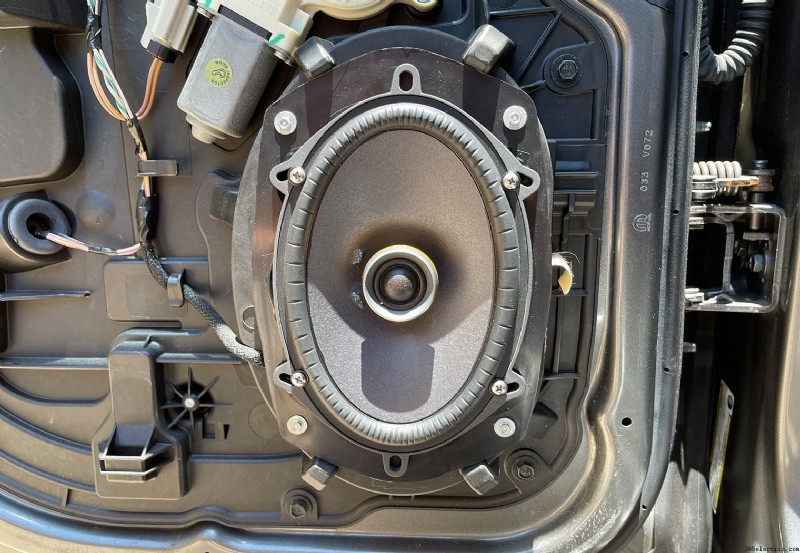
4. korak:Namestite nove zvočnike
Ko so zvočniki pripravljeni, je namestitev tako preprosta kot odstranitev večine zvočnikov. Vaš novi zvočnik boste preprosto priključili in ga privili nazaj.
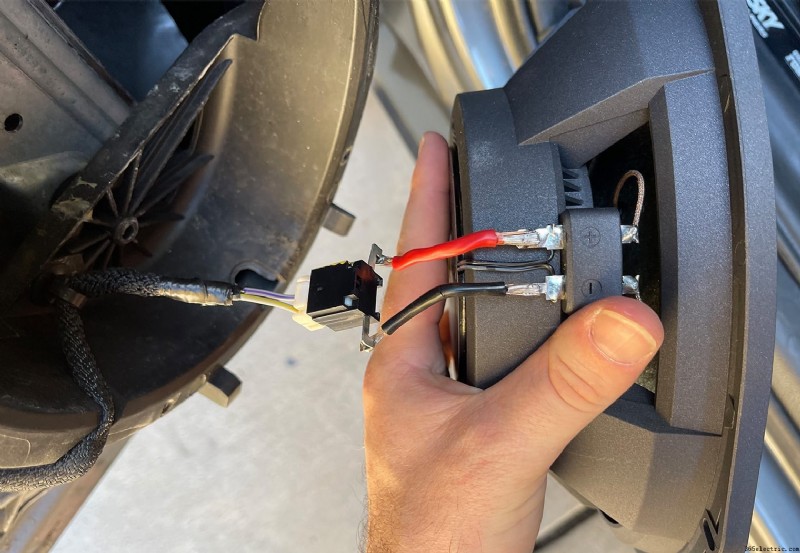
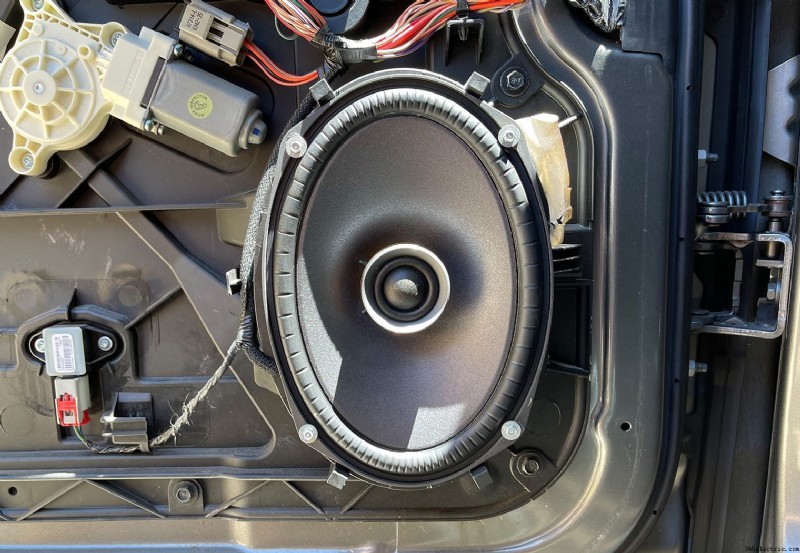
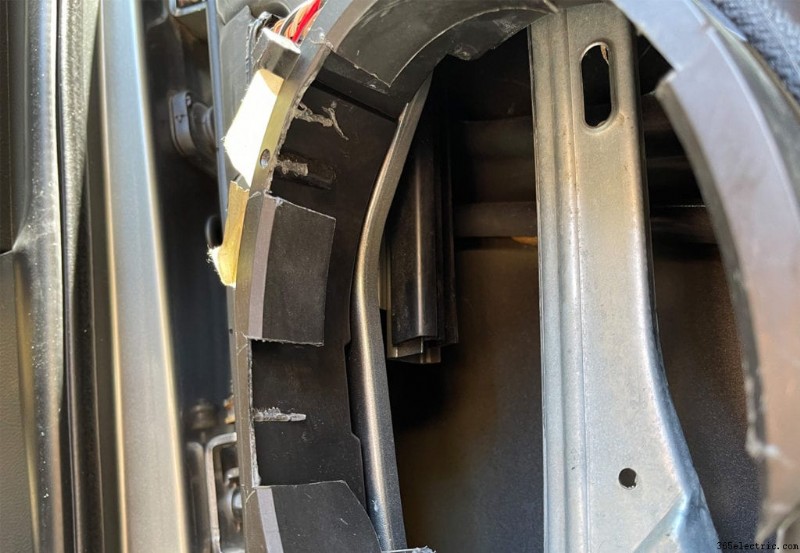
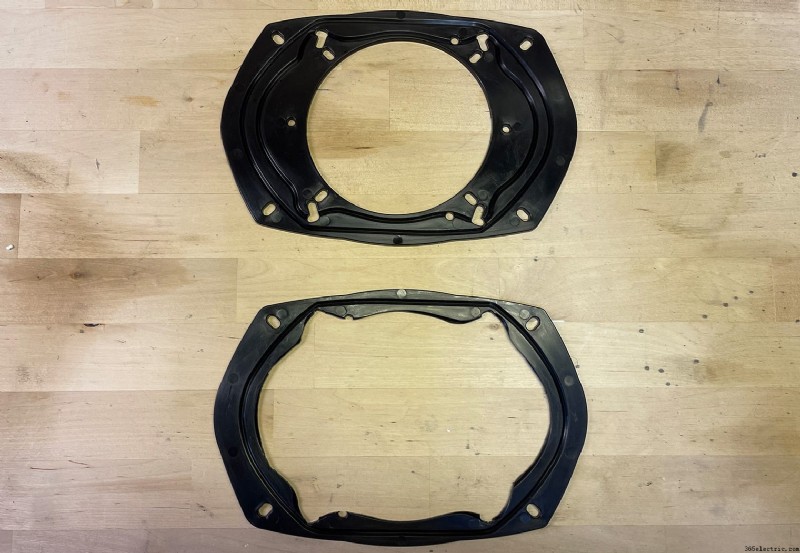
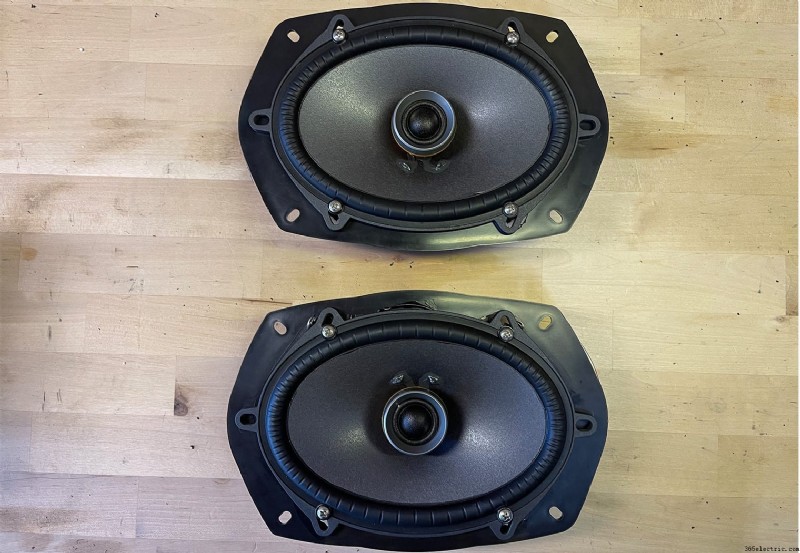
Vendar, če se odločite namestiti Sony XS-690ES 6x9s, ki sem ga izbral jaz, boste morali spremeniti nosilec vratne plošče, da se prilega ohišju s petimi žarki. To ni tipično, vendar ti zvočniki niso kot vsi zvočniki in imajo večji okvir kot večina.
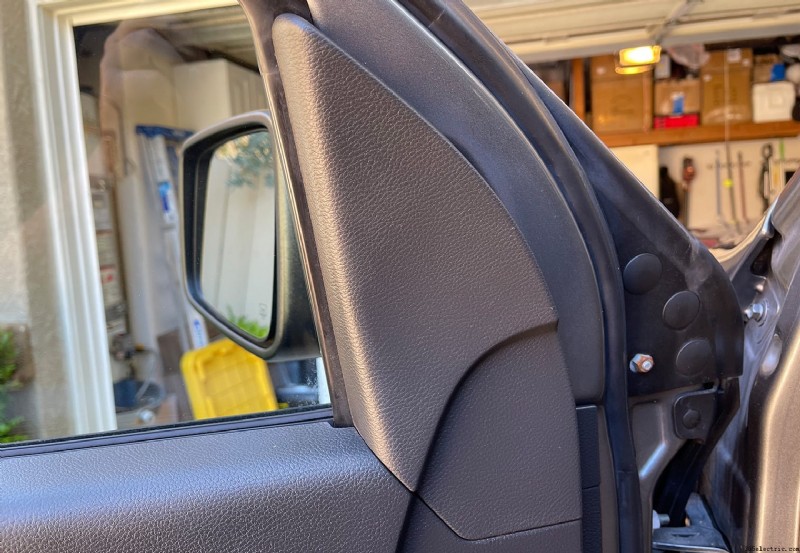
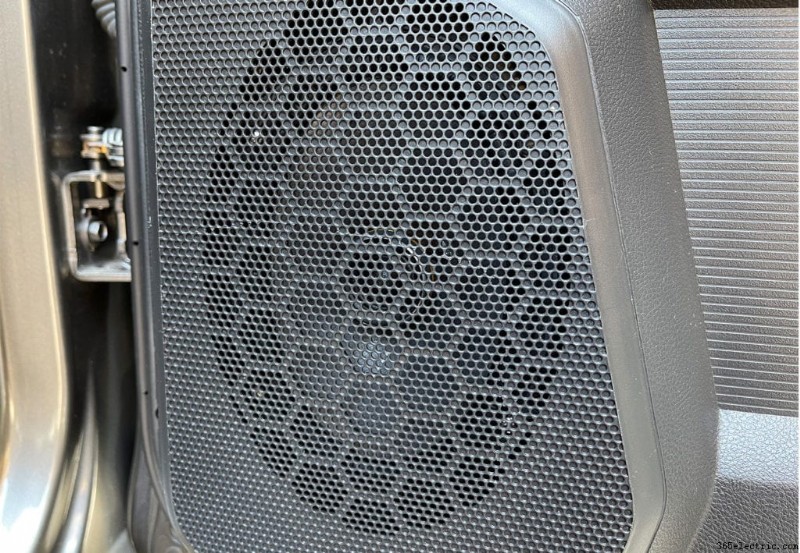
If you don't want to go through this process, you can take a look at some speaker alternatives listed on our best 6×9 speaker buying guide. Most speakers will not have a deep and wide frame like these Sonys and should just slide right in. The end product should look something like this!

Step 5:Re-Install Door Panel
With your speakers installed, turn on your stereo first to test out the sound of your speakers and ensure that everything is working as expected. If everything sounds good, re-install the door panels in the reverse order as described in step 1.
How to Replace the Rear Door Speakers
The process for changing out the rear door speakers is nearly identical to the fronts that I walked through above. The only difference is really the door panel but the process is the exact same. I'll go through the rear doors here with a little more brevity than I did the fronts.
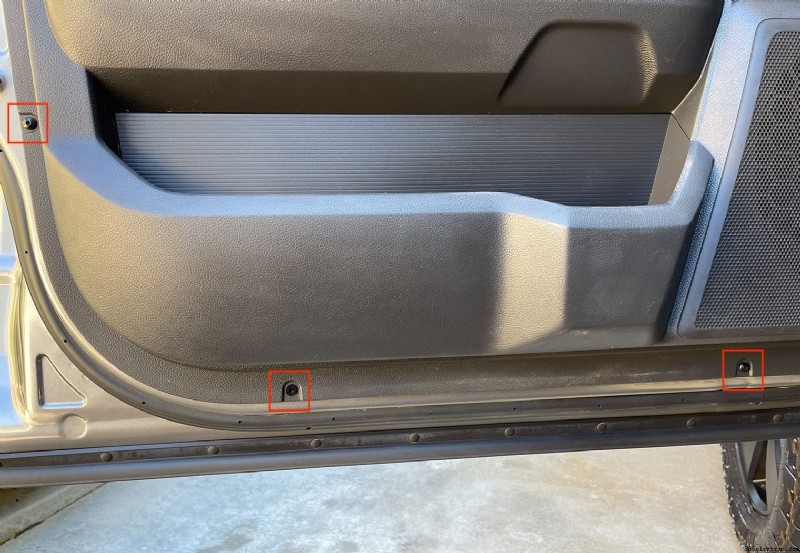
Step 1:Remove the Door Panel
On the rear doors of this quad cab there were 5 torx screw clips (vs the 6 in the front door panel). Remove these 5 clips using a T-20 torx bit and a clip puller or prying tool.
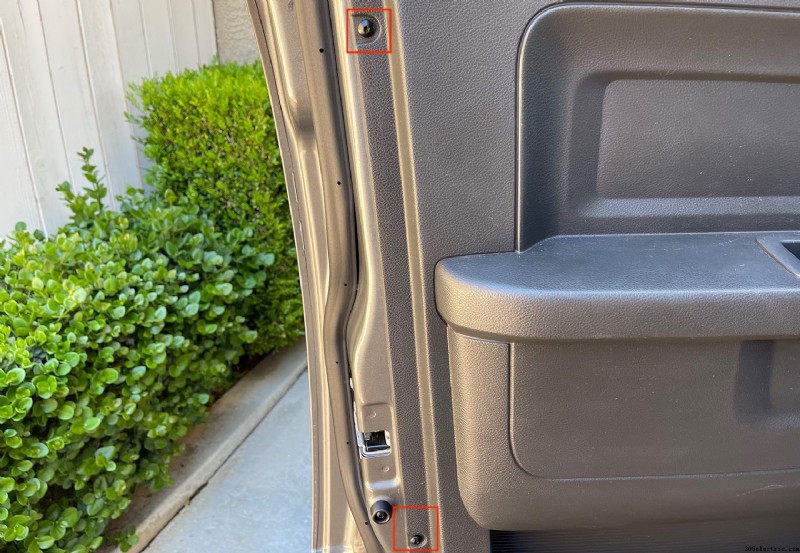
With these clips removed, locate and remove the phillips screw that's behind the door handle. Remove the cover first to expose the screw using a small flathead then remove the screw. With the screw removed, you'll then remove the trim piece that surrounds the handle.

Next, remove and unplug the window control. You can do this either now or after you lift the door panel off the door. It's up to you.
Finally, remove the trim piece that's above the panel on the outer edge of the door by simply pulling on it. It will unclip and remove relatively easily. Set it aside in a safe spot.
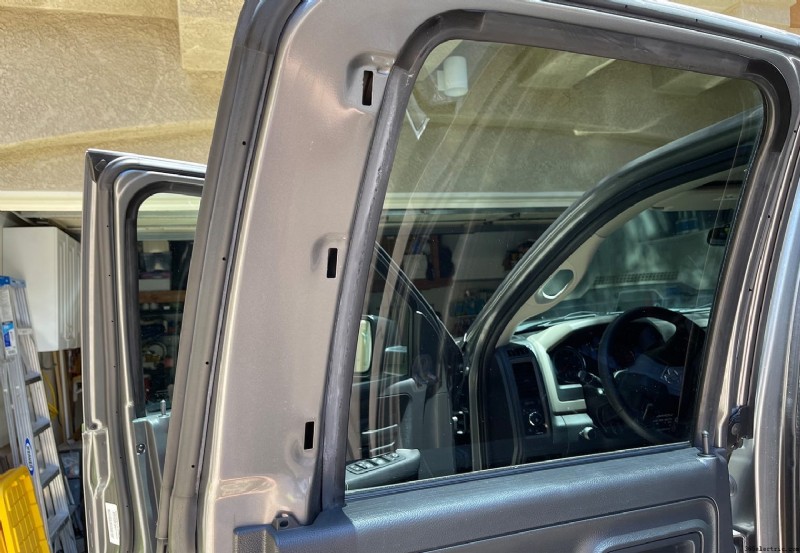
At this point, you can remove the door panel. Do this by simply lifting upwards and outwards on the door panel and it should lift right off. There should not be any additional clips or screws holding the panel to the door. This will expose the speaker and underlying door components.
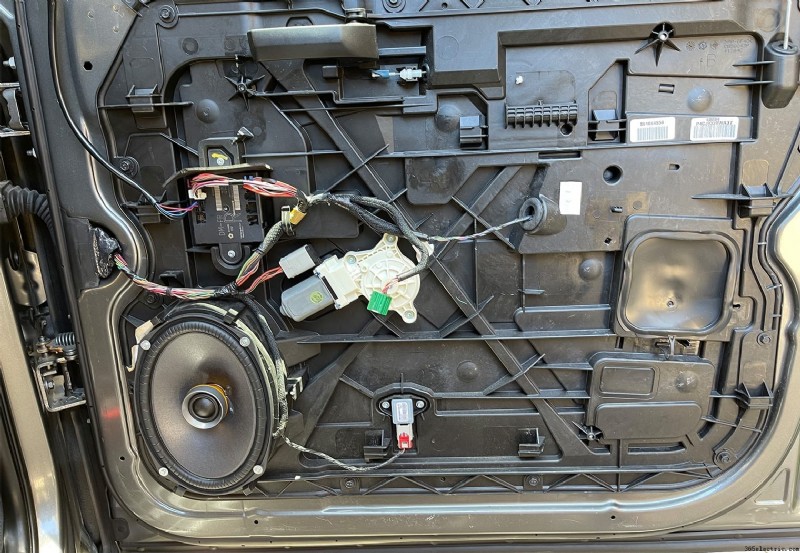
Step 2:Remove the Speaker
Like the front door speakers, the rear door speakers are 6x9s and held into place by four screws. I used a 5mm socket to remove the screws. Once the screws are removed you can begin to remove the speaker from the door panel and unplug it from the harness.
Step 3:Prepping New Speakers
Please follow the steps in Step 3 of the Front Door Speakers. The only difference will be the wiring colors you'll use to match the positive and negative side of your OEM plug to your new speaker terminals (if you choose to wire them yourself). If you are using Metra's 77-6514, then you can simply connect the adapters to the speaker terminals on your new speakers and proceed to step 4.
For reference, the speaker colors on the rear doors are as follows:
- Rear Left Speaker Wire (+):Gray/Dark Green
- Rear Left Speaker Wire (-):Gray/Light Green
- Rear Right Speaker Wire (+):Dark Green/Gray
- Rear Right Speaker Wire (-):Dark Green/Light Green
Step 4:Install the New Speakers
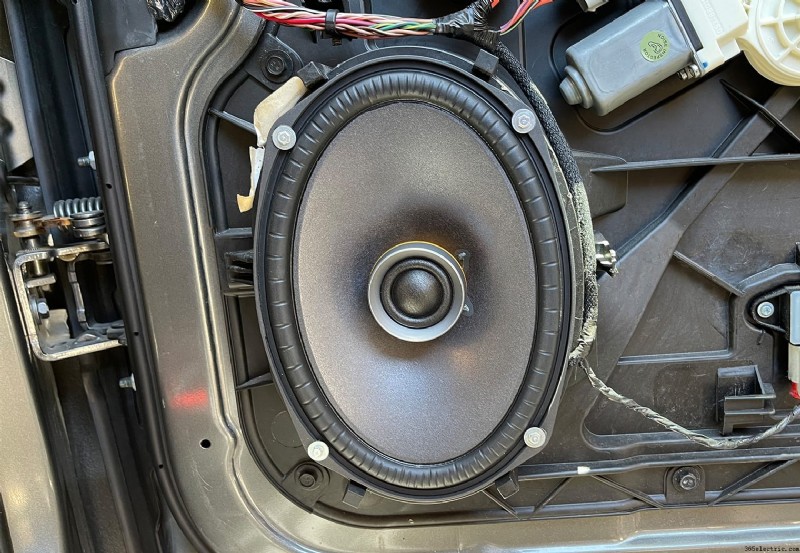
With your new speakers prepped with their plug, you can now simply plug them into the OEM harness and screw the new speakers back in. In the images below, I actually used Sony's 6×8 speakers instead of 6x9s using a speaker adapter plate to mount them. If your installing 6x9s you'll simply screw them directly into the OEM mounting position.
If you decide to install the Sony XS-690ES 6x9s in the rear, just like I mentioned while installing them in the front door panels above, you'll have to alter the OEM mounting in order to fit the five-beam structure into the OEM mounting position by cutting out slots for the beams. This won't be necessary for most other 6×9 inch speakers.
And if, for some reason, you want to use a 6×8 you'll need cut out the adapter plate and mount the 6×8 speaker to the plate. Then, you can install the speaker in the 6×9 location. My recommendation would be to just purchase a 6×9 if you haven't already. But, if you have 6x8s handy like I did, here's what the added step looks like.
First, cut out the adapter plate to fit the 6×8 speaker. Then use the rear mounting plate that your speaker came with to mount the speaker to the plate. These adapter plates will adapt a 6×9 to a 6×8, 5×7 or a 6.5″ speaker so you need to cut it out to fit a 6×8 specifically.
Once that step is completed, you can just mount the 6×8 and its adapter straight to the 6×9 opening. Again, if you're installing a 6×9 in the rear you can disregard the adapter plates and this added step. Here's the end result.
Step 5:Re-Install Door Panel
With your speakers installed in the rear door panels, turn on your stereo first to test out the sound of your speakers and ensure that everything is working as expected. If everything sounds good, re-install the door panels in the reverse order as described in step 1.
Conclusion
Overall, this installation was pretty straight forward and easy to do. The hardest part was fitting these high performance Sony speakers into the OEM mounting location since the frame of the speakers is wider than the OEM 6×9 speakers. An alternative to cutting out the OEM mounts like I did would be to try a set of 6×9 inch mounting spacers. I didn't try this but it's pretty common and might resolve the frame width problems a bit. Without this modification, it would have cut out an hour or so of my time. The installation, in general, is a perfect DIY for a Saturday and should be doable for even a novice.
After the speakers were installed, wow what a difference. Significantly cleaner, louder, fuller sound than the OEM speakers. I was really surprised with the volume and sound quality with just the head unit power from Sony's XAV-AX8100 too. This wasn't an amplified system and I don't think I really want to amplify it after hearing it. Combined with Sony's XS-AW8 that I previously installed under the driver seat, this is a really great setup that's ideal for a DIYer!