12 smernic za odpravljanje težav Hoover WindTunnel – vključeni videoposnetki
Ko ste uporabljali Hoover WindTunnel, včasih ne deluje dobro ali pa preneha delovati. Danes bomo razpravljali o odpravljanju težav Hoover WindTunnel. No, preden nadaljujem s tem, se moram vrniti v preteklost.
Zelo obožujem svojega psa – čokoladni laboratorij – toda v zadnjem času je hiša začela smrdeti. Mogoče sem potreboval drug sesalnik, da bi zamenjal sesalnik s posodo.

Ker sem v določenih letih, sem imel dolgoletne izkušnje s čiščenjem doma. Odraščal sem s sesalnikom za posodo in uporabljal sem sesalnik za posodo v svojem glavnem življenju. Ne, ne istega, imel sem več.
Sovražil sem vonj po izcedku iz sedanjega sesalnika, čeprav vsakič zamenjam vrečko, in dvomil sem se, kako dobro pobira dlake hišnih ljubljenčkov.
Opravil sem malo raziskav v Googlu, preveril pri različnih strokovnjakih za preglede in našel sem najboljši sesalnik pod 100 USD.
In – ta model Hoover Windtunnel se je pojavil kot rešitelj in ne previsoka cena. Torej, čeprav mislim, da vložiti nekaj dostojnega denarja za dober aparat običajno ni slaba strategija.
Ta Hoover WindTunnel je očistil moje odeje in preproge, kot da niso bile oprane že dolgo časa, in čez noč je moja hiša bolje dišala. Moje podloge so bile svetlejše in prijetne. Res – dvignilo maso. Vsaj vesel sem in pripravljen sem izraziti njegove slabe stvari, dokler čisti mojo hišo.
Ko ste uporabljali Hoover WindTunnel, včasih ne deluje dobro ali pa preneha delovati.
Danes bomo rešili to težavo.
12 najboljših smernic
To je ena najpogostejših težav Hoover WindTunnel. Razlogi za težavo so opisani spodaj.
Preverite zamašitev
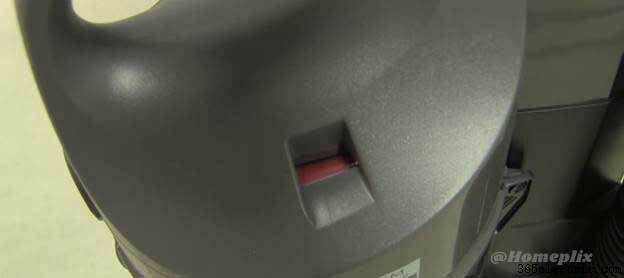
Najprej preverite lučko indikatorja delovanja, ko zasveti rdeče, to običajno pomeni, da je nekaj zamašilo vaš vakuum.
Torej je zamašek povzročil, da se vaš sesalnik izklopi.
Odstranite cev z obeh koncev in vse preverite. Vzemite ročaj metle očistite ga s palico, da izbijete vse, kar se je morda zataknilo.
Nato odstranite pokrov s šobe in preverite spodnjo cev.
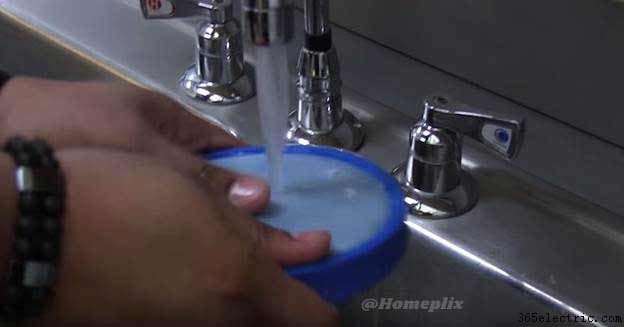
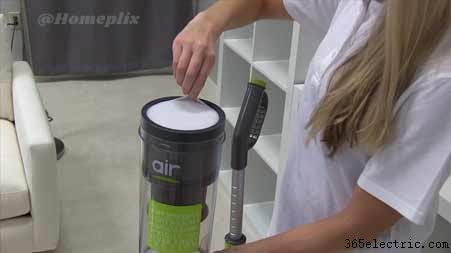
Če ne deluje pravilno, je morda zamašen filter da to preverite, odstranite posodo za umazanijo in dvignite filter.
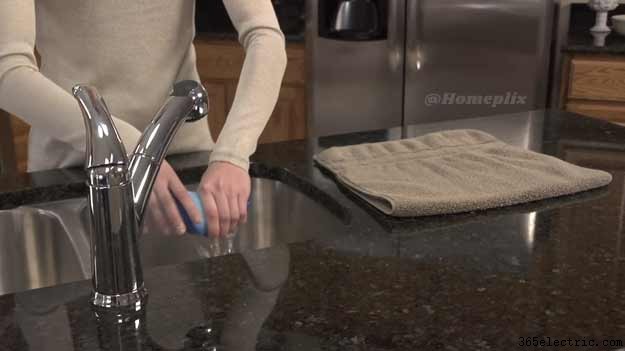
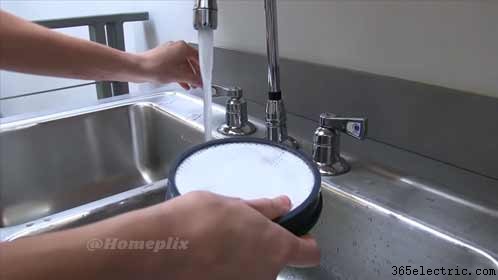
Njegov prah morate očistiti in eno ali dve minuti izpirati pod toplo vodo in pustiti ga boste morali sušiti cel dan.
Preverite zvitek ščetke
Preverite svoj valj krtač WindTunnel . Če se vaš čopič ne vrti, še enkrat preverite način preklopa, da se prepričate, da niste način samo za začetek.
Če je kakršna koli blokada ali dlaka, vzemite nož, da prerežete vzdolž tega zvitka krtače in odstranite vse dodatne dlake iz oblike.
Ugotovite, da je to enostavno, le odviti morate vijake likalne plošče, da likalno ploščo povlečete s stroja in zamenjate najboljše. To je vse, kar morate storiti za vzdrževanje.
Ta pas lahko najdete na večini krajev in to bi moralo odpraviti vašo težavo.
Večino primerov zataknjene krtačne palice je enostavno očistiti, ostanke morate preprosto potegniti iz krtačne palice.
Toda v nekaterih vakuumih ta metoda ne deluje pravilno. Če morate odstraniti problematično blokado, kot je krtačna palica Dyson, ki se ne vrti, lahko krtačno palico preprosto vzamete iz ohišja za hitro vzdrževanje.
Čiščenje filtra
WindTunnel ima dva filtra. Primarni filter je treba po potrebi očistiti vsaka dva meseca.
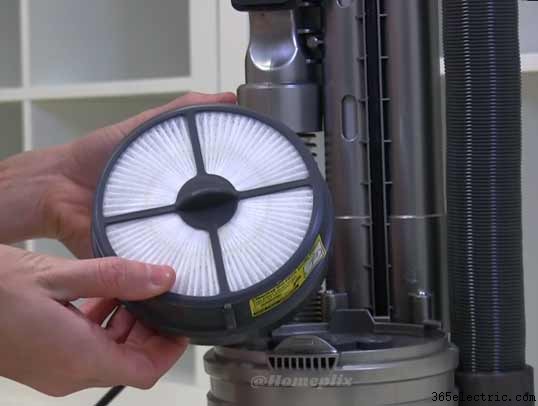
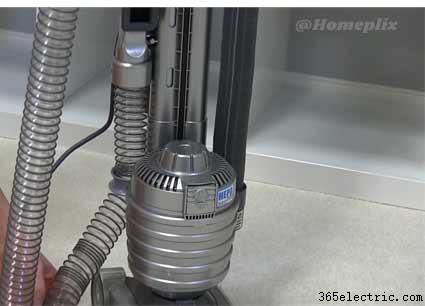
Nazadnje, če imate še vedno težave, preverite filter HEPA tako, da ga izvlečete, in če je filter zelo umazan ali obrabljen, ga morate očistiti.
Na uradni spletni strani podjetja Hoovers lahko naročite nadomestni filter za približno 10 USD, najdete pa ga lahko tudi na Amazonu.
Če imate druge težave s sesalnikom, pokličite službo za pomoč uporabnikom. Za ta stroj imate 2-letno omejeno garancijo.
Tukaj imate preprosto rešitev, ko vaš WindTunnel izgubi sesalno moč. Običajno povzroča zamaške.
Najprej preverite indikatorsko lučko na vrhu vaše skodlice za umazanijo . Če je rdeče, nekaj omejuje pretok zraka.
Tukaj smo razpravljali o tem, kako lahko to popravite.
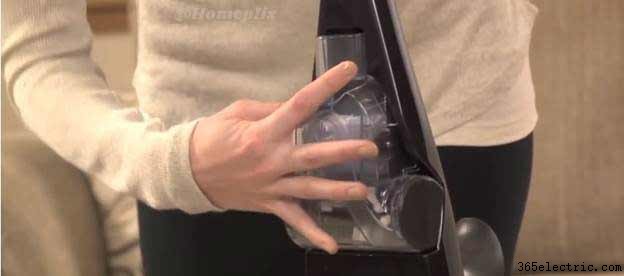
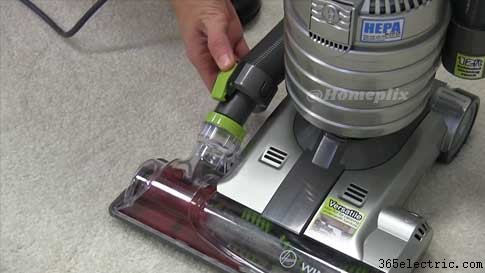
Najprej odstranite posodo za umazanijo, jo odprite in preverite filter.
Preverite spodnjo stran, če je umazana, jo sperite s toplo vodo in pustite 24 ur, da se posuši.
Pazite, da ga postavite na rob, da se enakomerno posuši. Tudi če ga redno izpirate, če namestite filter, ki se ne zatakne v celoti nazaj v posodo za umazanijo, lahko še lažje zamašite filter.
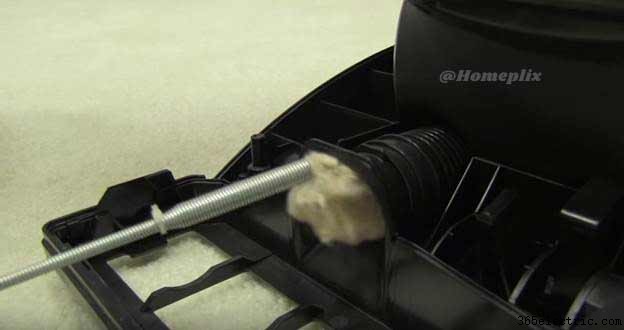
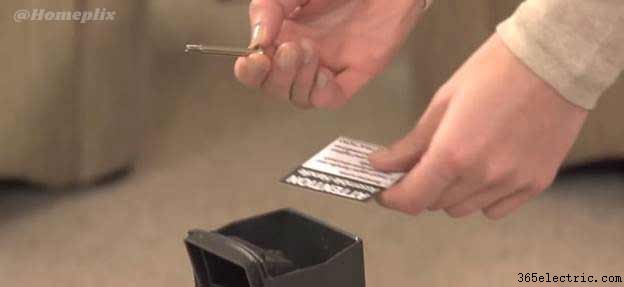
Nato preverite, ali je glavna cev zamašena. Odstranite ga s stroja in z ročajem metle izbijte vse ostanke, ki so se morda zataknili v njem.
Zdaj lahko preverite še eno mesto. Če sta ti dve jasni in še vedno nimate močnega sesanja.
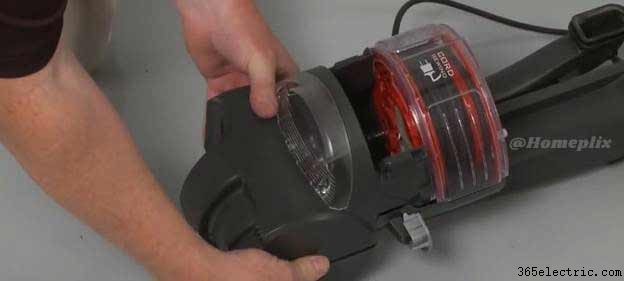
Odstranite pokrov in nato vzemite ven krtačni valj ter zdaj preverite, ali je spodnja cev zamašena.

Uporabite lahko orodje za zajem da odstranite morebitne zamaške.
Orodje Grabber je pomembno orodje, ki ga potrebujete, preden se lotite odpravljanja podobnih težav, kot je ponastavitev vakuumskega motorja Shark. Prepričajte se, da jih imate, preden začnete z odpravljanjem težav.
Zdaj pa vse o vodnikih za popravilo samohodnih naprav WindTunnel.
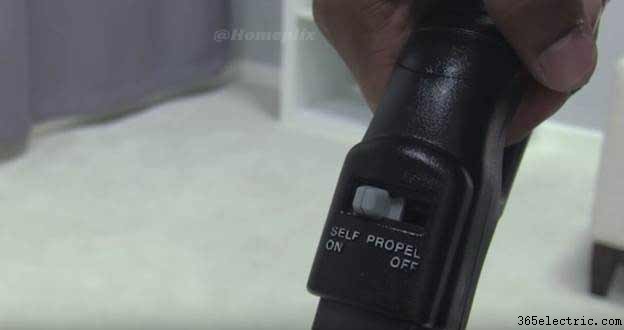
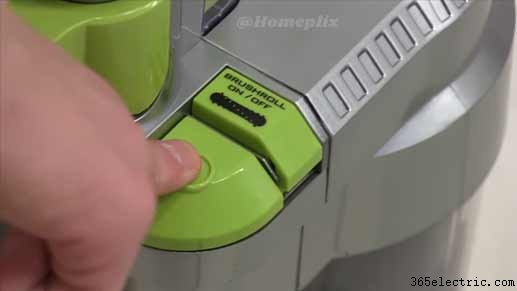
Če je vaše posnetke težko pritisniti, se prepričajte, da je samohodni gumb vklopljen.
Če ne opazite takojšnjega izboljšanja, je vaš ročaj morda preveč ohlapen.
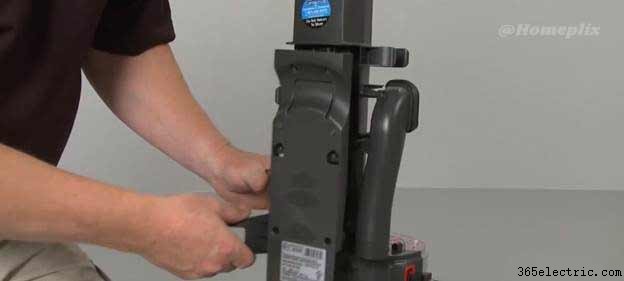
To je preprosta rešitev, najprej izklopite in odklopite svoj Hoover. Nato odstranite vijake s hrbtne strani ročaja.
Prepričajte se, da sta samohodno stikalo in stikalo za vklop na ročaju izklopljena.
Prepričajte se tudi, da je stikalo za vklop na ohišju naprave nastavljeno na izklop.
Nato vstavite ročaj nazaj v enoto in ga trdno privijte. Zdaj ga priključite, potisnite stikalo za vklop in vklopite funkcijo samohodnega pogona.
Za konec še o nastavitvi višine. Najprej morate začeti z najvišjo nastavitvijo.
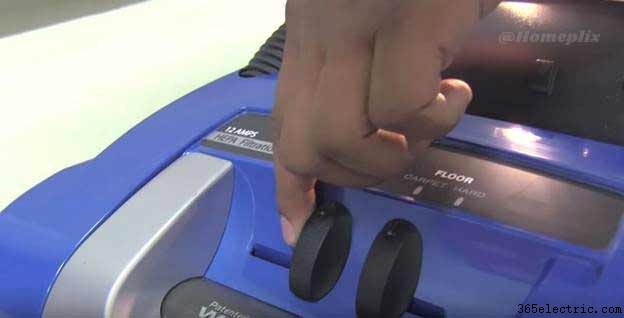
Nato se pomikajte navzdol, dokler ne slišite, kako se ščetine zvitka krtače dotikajo preproge in občutite, kako vakuum gladko drsi po preprogi.
Čiščenje filtrov vam bo pomagalo, da bo vaš sesalnik WindTunnel deloval z najvišjo zmogljivostjo.
Obstajata dva filtra, primarnega je treba očistiti vsaka dva meseca ali po potrebi, filtre HEPA pa je treba očistiti vsakih šest mesecev za optimalno delovanje.
Za začetek postavite sesalnik v pokončni položaj. Izklopite napajanje in izvlecite napajalni kabel.
Odstranite posodo za umazanijo iz čistilnika in obrnite pokrov, da se odpre. Nato odstranite filter, ki ga je mogoče spirati, in ga spirajte z vodo dve minuti ali dokler voda ne postane bistra, iztisnite odvečno vodo in pustite, da se suši vsaj 24 ur.
Mokrega filtra, ki ga je mogoče izpirati, nikoli ne vstavite nazaj v čistilnik. Ko je popolnoma suh, zamenjajte filter in obrnite pokrov posode za umazanijo, da se zapre.
Drugi filter je HEPA filter. Najdete ga lahko na vrhu osnovne plošče, da ga očistite in potisnete ven.
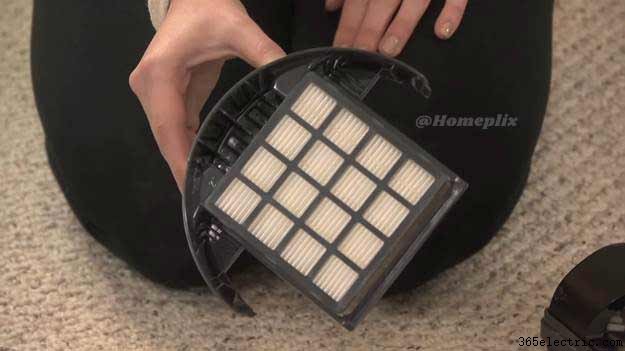
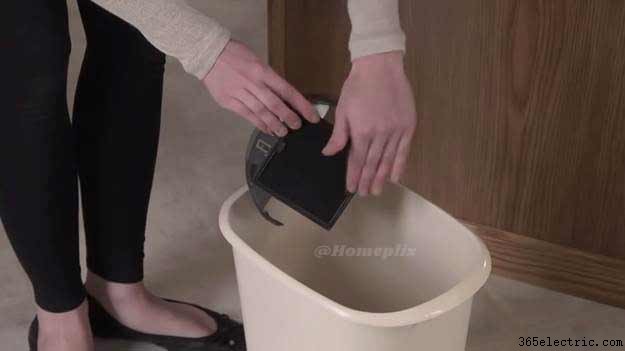
Tega filtra ne umivajte z vodo, preprosto udarite s filtrom ob notranjost koša za smeti, da iztisnete umazanijo in ostanke.
Zamenjajte filter in se prepričajte, da slišite, da se zaskoči. Za zamenjavo filtrov uporabite samo pooblaščene dele Hoover.
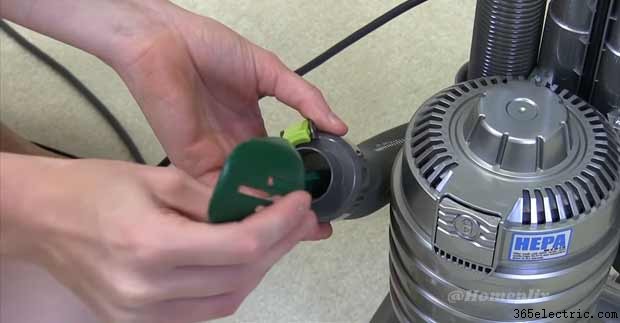
Najprej morate odstraniti HEPA filter tako, da izvlečete plastični okvir filtra. Filter je treba očistiti samo s pipo in ne umivati ali spirati HEPA filtra.
Po potrkanju po čiščenju filtra preprosto znova vstavite okvir filtra nazaj v podstavek Hoover, dokler ne klikne.
Upoštevajte, da ob pravilni uporabi in vzdrževanju filtra HEPA ni treba zamenjati v garancijskem obdobju.
If a replacement is needed to be sure to get the Hoover HEPA filter designed for your vacuum.
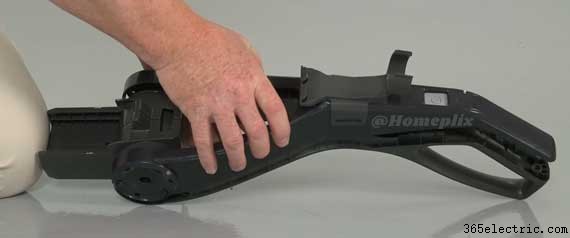
Hoover WindTunnel repairs will require you to disassemble the product before you attempt this make sure the power cord is unplugged.
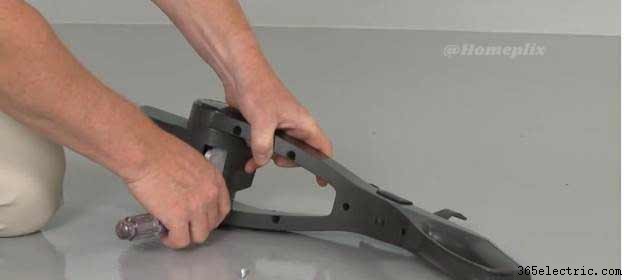
To access the belt or brush roll you will need to remove the bottom plate.
The plate may be secured by screws or by latches remove the screws or slide the latches out of the way and pull the plate off.
Then you should pull out the brush roll and detach it from the belt if necessary.

When the repair is complete first loop the belt around the brush roll and aligns the tabs on the sides of the roll with the notches in the frame.
Then reposition the bottom plate and secure the latches or screws. To access the start switch first remove the upper filter assembly.
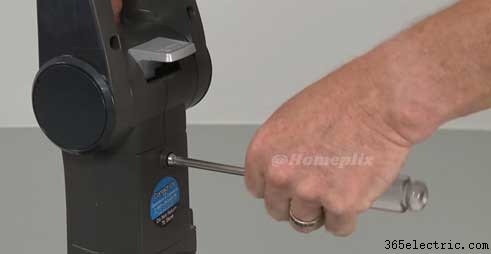
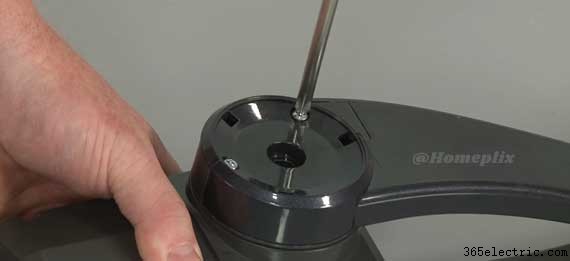
Now remove the screw to release the handle assembly.
Remove the screws holding the handle assembly together use a small flat-head screwdriver to detach the hinge caps.
Now remove the bolt and remove the hinge screws to separate the two halves of the handle assembly.
When the repair is complete join the two halves of the handle assembly together.
Replace the hinge screws then insert and secure the bolt. Snap-on the hinge caps. Reinstall the rest of the handle assembly screws and slide the handle into position.
Secure the screw and snap the upper filter assembly into place.
If applicable to your model you can access the rewind cord housing and motor assembly by first removing the HEPA filter.
Now lift off the upper filter assembly and remove the screws to release the cord housing plate.
Your next step is to remove the hose.
Now uninstall the screws to release the hose fitting remove the screws securing the vacuum cleaners back panel and any guides or supports.
Then pull the panel off.
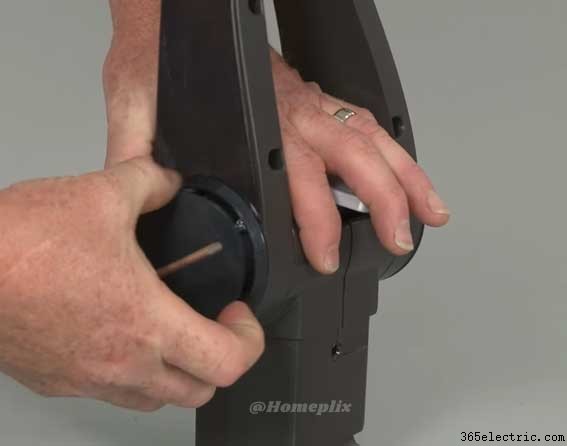
Remove the screws securing the hinge covers and unclip both covers.
Now unhook the belt from the motor shaft and lift the handle cord reel and motor assembly of the base.
Remove the screws securing the motor housing pull off the retaining clip if necessary and separate the housing.

If required you can now remove all of the screws securing the cord housing cover.
When the repair is complete reinstall the cord housing cover and secures the screws.
Join together the two halves of the motor housing. Snap the retaining clip into place if necessary and replace the screws to secure.
Now align the motor housing with the base and hook the belt onto the motor shaft.
Snap the hinge covers into place and replace the screws to secure. Next, reposition the back panel as well as any guides or supports and secure them with the screws.
Realign the hose fitting and secure the screws, reattach the hose replace the cord housing plate and reinstall the screws to secure.
Reposition the upper filter assembly and reinsert the HEPA filter with the vacuum cleaner fully reassembled you should test the product to make sure it’s functioning properly.
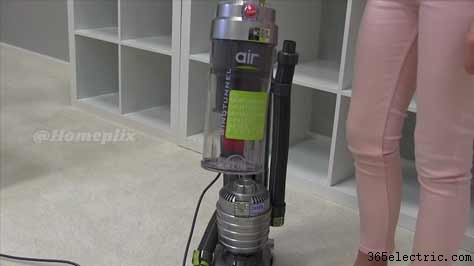
The main pieces to your WindTunnel Hoover are.
- The vacuum base
- The handle
- The dirt cup
- Extension tube
- Crevice tool
- Upholstery tool
- An air-powered turbine hand tool
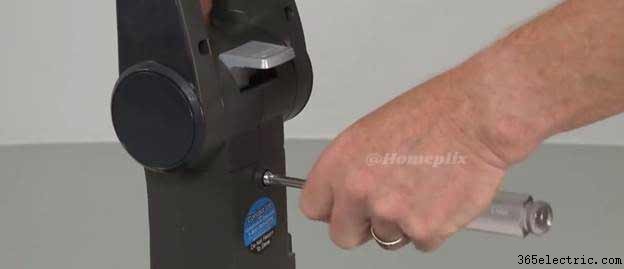
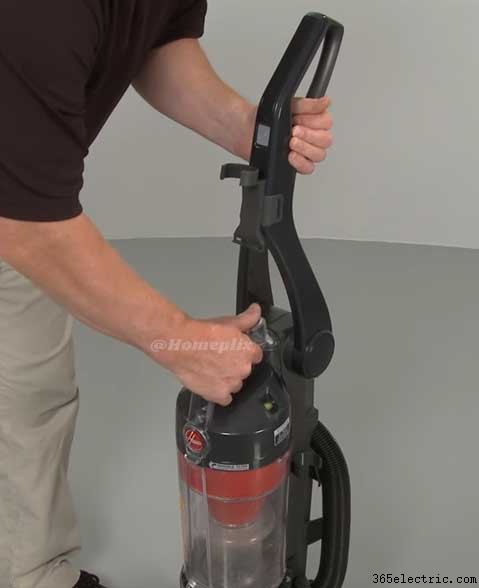
To assemble first remove the main screw from the handle base.
Slide the handle into the vacuum base push down firmly and tighten the screw with a Philips screwdriver.
Attach the dirt cup by sliding it in. Attach your tool so you’ll be able to easily reach for them. When you need them to put the air-powered turbo tool on the handle.
Slide the crevice tool into the extension tube and place it on the left side of the cleaner and the upholstery tool goes on the right side.
Set the hose onto the carriage. There is an automatic cord rewind feature that lets you pull out and rewind the power cord to need easy storage.
Your cleaner is now fully assembled and ready to use. A few things to keep your WindTunnel to rewind running well.
There are two filters the primary should be cleaned every two months or as needed and the HEPA filter should be cleaned every six months.
You will need to keep your brush roll clear of thread pet hair and other debris. See the maintenance and troubleshooting topic for more detailed guidance.
Hoover WindTunnel has some pro feature and innovative technology like
- Automatic rewind cord
- Five-position adjustment
- Easy maintenance filter
- Other accessories
Automatic rewind cord
Hoover WindTunnel holds 27 feet rewind power cord and that is very enough long to clean any large space and it doesn’t need to plug out and replug the power cord.
Five-position adjustment
Five-position adjustment of Hoover one of the innovative technology. This five-position adjustment very effective to clean all types of floors and surfaces.
Easy maintenance filter
This WindTunnel represents a bagless technology and it maintains optimal suction power. It has a rinsable filter that can be cleaned with warm water. It also has a high-quality HEPA filter.
Other accessories
- Comfortable grip handle
- Fingertip nozzle
- Thirteen and a half-inch wide nozzle
- No-scuff bumper
- 12-inch extension wand
- A crevice tool
We sometimes hear from you guys that your WindTunnel is overheating and shutting off. This can happen when there’s a clog somewhere in the system.
On some of the versions of the vacuums, you might hear a whistling or hissing sound when your vacuum is on the verge of shutting off.
That’s the system performance indicator. First, turn the vacuum off and remove the dirt cup.
Take the lid off and inspect the filter, if it’s dirty.
Rinse it with warm water for two minutes and let it dry for at least 24 hours.
Your vacuum also contains a HEPA filter. Take the cover off and check this filter.
If it’s dirty. Don’t get it wet instead, tap it into a wastebasket.
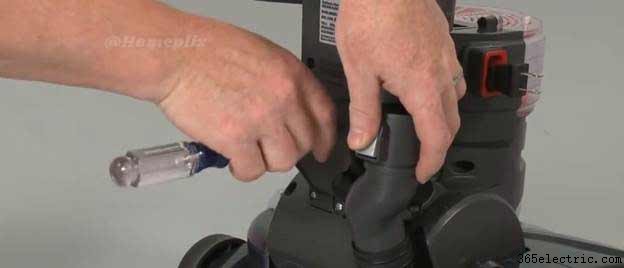
Next release the hose by pressing green clip.
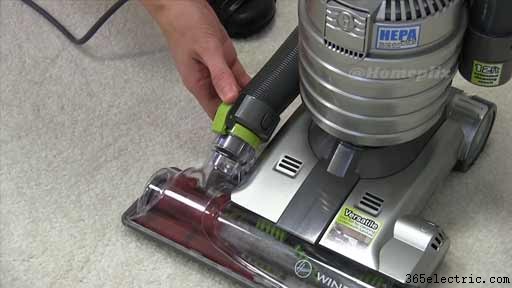
It’s on most versions of the WindTunnel and sees if there are any blockages inside of it.
You can use a wooden spoon handle or another household object. Just don’t use anything sharp that could damage your hose.
Lastly, leave your vacuum turned off for about half an hour.
The thermal protector that activated the shut-off will deactivate.
You can start cleaning again. These tips should get your WindTunnel in great working.
I’ll be showing you, how to replace a Hoover WindTunnel power cord.
The power cuts out, then do check the main cable, with the cable still plugged in and the machine running give the wire a wiggle around. If the power cuts on and off either at the plugins or at the machine end, then the cable has failed and it needs replacing.
Safety first! Always unplug an appliance before carrying out any work.
I’ll be doing this fix on this Hoover vacuum cleaner.
The process should be quite similar to your make and model.
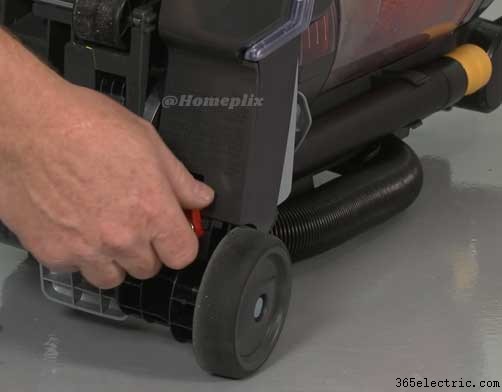
To access the mains cable, I need to first remove the underneath of the vacuum cleaner by undoing the screws that hold it in place.
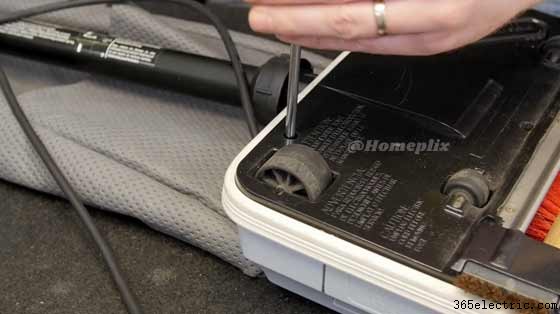
To access where the cables are going, the mains cable comes directly into the machine.
Wires go underneath this cover. I’m going to remove this cover by undoing the two screws that hold it in place.
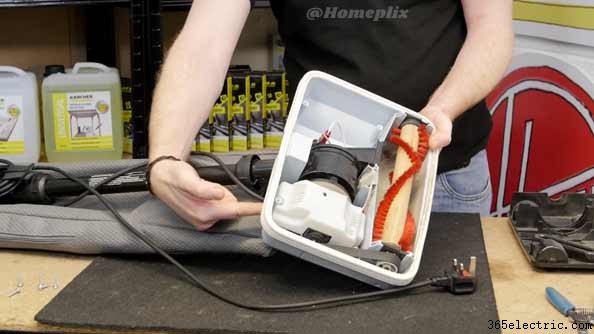
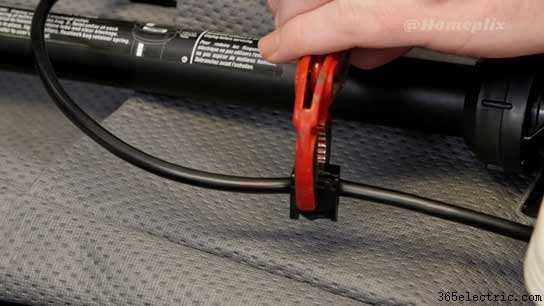
If the motor cover removed, we can see the cable clamp that holds the main cable in place.
To release cable, I’m just going to take a pair of pliers and pinch the two tabs should release the mains cable from the back of the machine.
Then you can just use a screwdriver just to push the wire down.
The mains cable released.
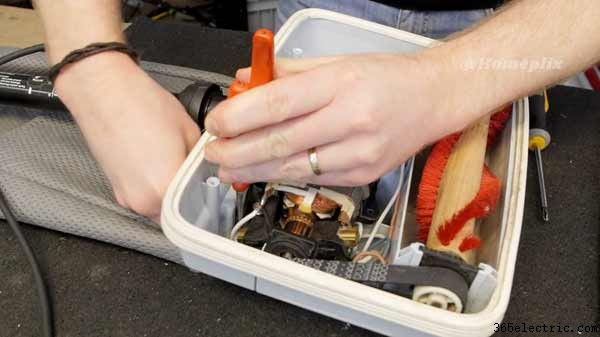
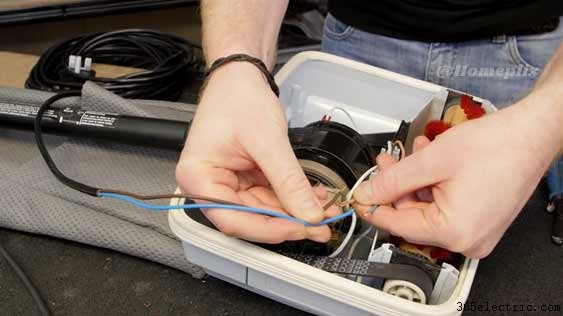
I forget to give it a little pull. I can tell which wires are connected inside, if I just pull these wires out as well you can see that more clearly.
It’s the blue and the brown here that are connected inside the mains cable.
What I want to do, because these the blue has been crimped here and I don’t want to disturb the brown wire that goes to the switch.
There is a little bit of space next to the motor, where I can put a terminal block and connect the new wires from the new mains cable to the old wires inside the machine.
The new mains cable does not come with any connection.
I’ll be using this electrical terminal block to connect the wires.
I’m going to snip the brown and the blue wire. Then feed those out by the old mains cable. I’ll just cut those cables now.
I’m also going to do is just strip back the insulation to expose the copper inside.
Then give a nice twist. It looks nice and solid and then just fold it back on itself, that it will fit nice and firmly inside the terminal block.
I’ll do exactly the same with the brown one.
I can then remove the mains cable from the vacuum cleaner.
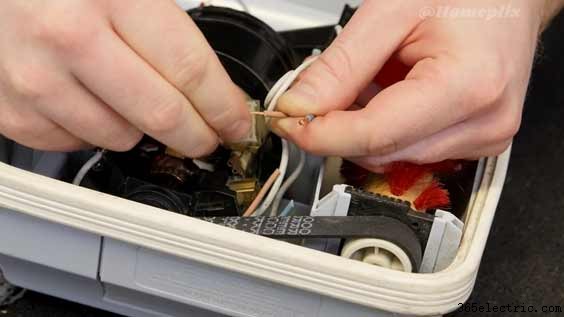
Now the old cable is out of the way. I can grab my new one. Now what I’ve done is pre-stripped down the insulation. It gives me enough space to feed the wires under the motor. Of course, connect blue to blue and brown to brown using the terminal block.
It’s worth pointing out that the new mains cable. The two ends have been crimped already. So, I don’t have to prepare those.
You can use a terminal block to connect the wires up.
With the wires all wired up nicely in the terminal block. I’m just going to push them down the side of the motor.
I need to do is to replace the old clamps that were on the old mains cable and put them on the new one.

The clamp-on your model may take a little bit of squeezing to get it into position. So, I’m just using a pair of pliers to do that on this one.
With the mains cable now in position. I can replace the motor cover. I’m just going to make sure there are no wires in the position of the screw holes. So, they’re not being pinched by the motor cover.
Lastly, now I can replace the base.
We have it one brand new mains cable fitted to this Hoover vacuum cleaner.
It has been having problems with, my Hoover vacuum cleaner switch.
I’ve decided to replace it.
This is a Hoover WindTunnel.
To replace the switch, remove the attachment.
Just connect hose again.
I’m going to remove screws from Handel.
Remove the canister.
Once you have that out, you can remove that holds the switch.
Once that’s done remove the two screws on the bottom and separate the unit using just a standard screwdriver.
I’ve got my unit apart here and see here is the link between the vacuum cleaner and the switch.
There’s your switch and there’s your link, at this point you’re going to just connect those two electrical contacts.
Remove the switch and pull it out. I was able to kind of pull it out with my bare hands.

I’m going to disconnect these two wires take the switch out of this housing.
You can see the housing that holds the switch has those two little clips on it.
I’m going to take a screwdriver, stick it under there and remove the switch from the Hoover housing.
So, you can see I’m about to take this switch out of here.
Let’s go and push up on it.
Take my new switch. Put it in the housing.
Put your switch back in the vacuum cleaner.
You have it reroute your wires screw everything back together be good to go.
I’m going to take apart or don’t get you.
Just steps there back together make sure that your peace doesn’t fall into the wrong orientation as you close it.
Just make sure this you have put all your screws back in and you’ve got a functioning switch.
Today we’re going to change the filters on the Hoover self-propelled WindTunnel vacuum cleaner.
- First, make sure that your vacuum is unplugged out of the wall.
- Click the switch and lay vacuum down.
- Lay your vacuum down on a raised surface such as a table.
- Remove the top sole plate first.
- Take out the bag.
- Take out the filter cover.
- Replaces the old filter.
- Take the cover motor filter cover put that on top.
- Replace your final filter for this vacuum.
- Take out the old filter.
- Replace it with your new vacuum filter.
- Replace your bag.
- Pop the top back on.
Final Sentences
Hoover WindTunnel gets four-star up with positive reviews in different marketplaces. Hoover WindTunnel is easy to move, simple maneuverability. You can get optimal suction power from it.
Your Hoover WindTunnel is your most precious cleaning partner and it cleans different types of surfaces like hardwood floors or carpet.
Sometimes your Hoover WindTunnel needs troubleshooting. Here we have solved all Hoover WindTunnel possible problems. If you have a Bissell vacuum and experiencing any difficulty with this, then you can also read our Bissell Proheat troubleshooting guideline.